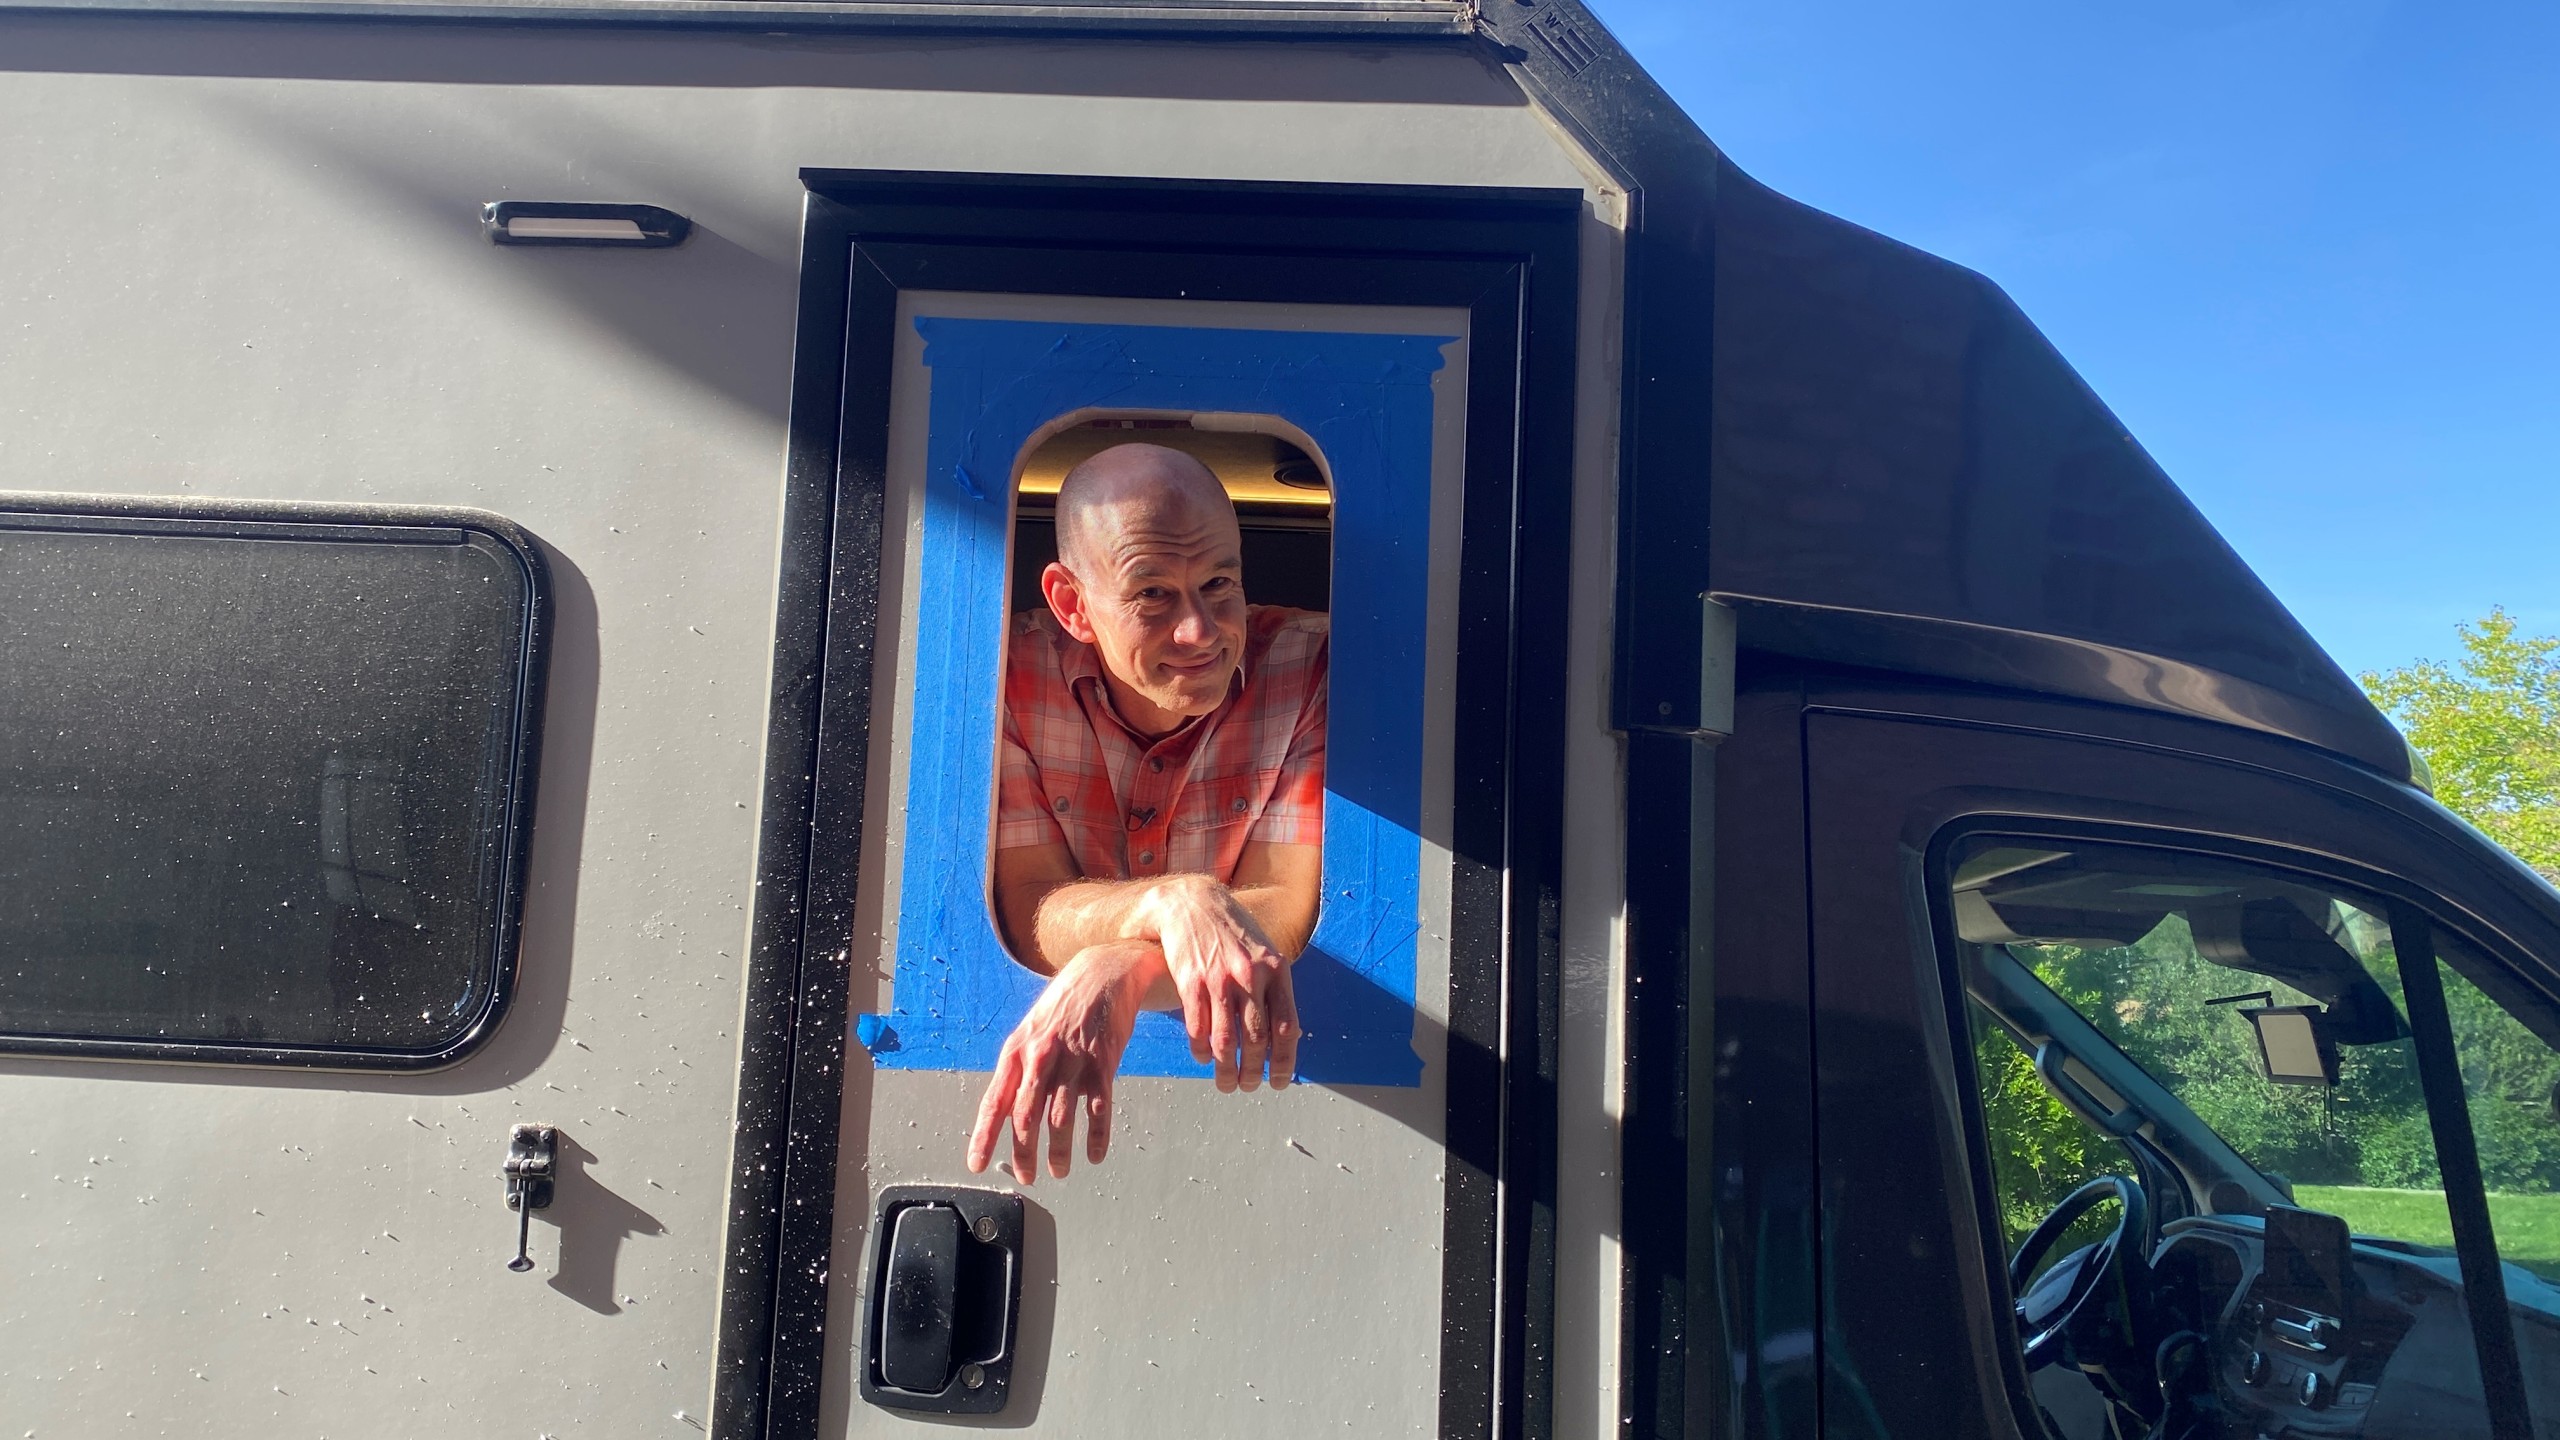
We love our Winnebago EKKO, but from the beginning, I’ve wondered about a window in the EKKO’s door. It just seemed like it was missing something up there. Of course, the reason there was no window was because of the heavy-duty screen that would have made the window difficult to see out of. Well, I removed the screen door and replaced it with a magnetic one a couple weeks ago. That left the door wide open (literally!) to install the window I’d always been thinking about. Check out the video!
First off – I want to mention that we have no affiliation with Motion Windows or Peninsula Glass at all. We paid full retail for the window, so we’re just customers like you. Their ordering process was simple, and it took about a month to have a custom window manufactured and shipped to us. It arrived well packaged, in good condition, and with the installation supplies you see in the video.
And while there are about a hundred thousand videos about installing windows in a van, there were a lot fewer about installing them in a “traditional” RV. There were plenty of videos about window replacements, but it turns out that not so many people are eager to take a saw to the walls of their Class A. So here’s my take on the process, and a few things I learned along the way.
- Cut out your opening in a smart way so nothing comes crashing down on you while you’re cutting.
- The trick about when to leave the paper backing on the sealant tape – and when to remove it – actually works.
- Misting with water doesn’t seem to affect the final adhesion, and does seem to provide a slower initial tack so you can get your positioning down.
- There’s not really a good way to install these windows without a second person.
- Taping the bag to the inside of the door to catch debris certainly helped keep the mess down – but it was by no means a cure-all.
The Thing I Wish I Had Done Differently
All in all, I’m happy with how it turned out, but there is one thing that concerns me. I’d like to put some metal reinforcement around the perimeter of the hole inside the door – think of it as framing for the window. Perhaps some hollow aluminum tubing. It’s fine for now, but I have a concern that, over time, the clamp ring squeezing down on just the fiberglass/Styrofoam sandwich may eventually compress the door and cause small cracks in the fiberglass.
So while it’s OK for the moment, I’ll be looking to uninstall the window and install some kind of interior window framing at some point in the future. The hardest part about that will be removing the Styrofoam from inside the door without messing up either the inside or outside skin.
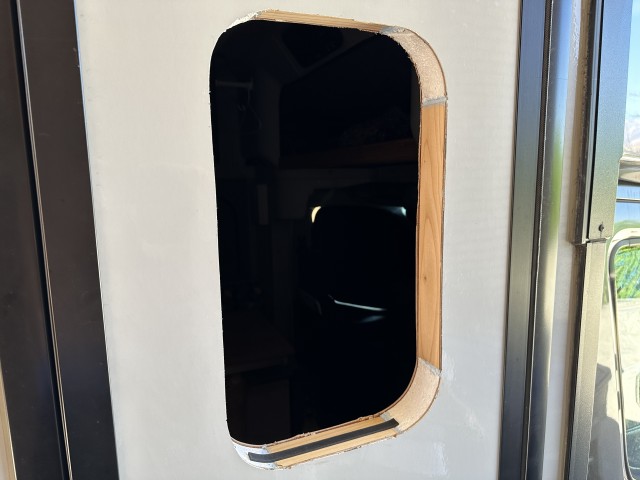
OK. An update…
I wound up being more worried than I thought I was going to be about the level of reinforcement in the door. So I removed the window and added some wood framing around the window opening. The framing doesn’t round the corners as the window frame does, but there are no screws clamping it down in those locations either. Chiseling out the styrofoam was tedious and messy, but once that was done, it was simple to cut some wood to the exact right size and glue it in place with Loctite PL300. Here’s a quick photo of how it looked before I put the window back in place.
The Order Form
Someone asked about recreating our order. It’s easy.
You can find the order form from Motion Windows’ site, here: https://www.rvwindows.com/wp-content/uploads/2015/12/New-Order-Summary-Worksheet-RV6.pdf
The dimensions we used were 13 1/4″ wide, 22 1/4″ tall, and a thickness of 2 5/16″. We also noted the following on the form”These dimensions are the outer width and height of the indoor window frame. There is no existing window, so we’re cutting a new opening.”
Considering we wound up with a gap of about 3/16 in our install, don’t take our word on this. You’ll probably want to measure your own door.


Another nice video! Have you installed any sort of privacy screen? I’d be interested in that if I had a window on my door. Thanks
Yes. I sewed up a magnetic folding shade to cover the window on the inside when we don’t want to have it transparent.
Really enjoyed the video…you make it look so easy :-). I’m looking to install a bathroom window. I don’t think I should have any wiring in the wall as it’s a fiberglass exterior…Any suggestion?
No suggestions other than to maybe take a studfinder (an electronic one – RV framing is usually aluminum and not magnetic) and double check that there’s nothing inside the wall before you cut.
Good Luck!
One other question as I’m ordering our window 🙂 Any reason you didn’t order a larger window? Would you be concerned the foam would crack if the foam width from cutout to metal doorframe gets too small?
I knew there was some metal framing inside the door, so I didn’t want to go too large.
We ultimately just went with something we thought looked in keeping with the size of the door.
You could go a couple inches bigger in each direction and it should be fine (But I haven’t verified this.)
Which tint did you get? How does it compare to the tint of the acrylic windows?
We got the dark grey. It seems about the same – maybe a little bit darker – than the original windows.
(But our windows have a protective film on the outside, so perhaps we’re not the best ones to ask!)
James–I’m curious. Was there any concern about hitting some internal wiring or structural members in the door? Would Winnebago provide any detail as to the door’s construction? I am contemplating adding a window to our LTV Wonder RTB in the wall anterior to the door(like the current 2023 models, but I am concerned about hidden wiring, etc. Not had a lot of luck getting info on construction from the company–probably proprietary issues? Thanks! T
I wasn’t too concerned about hitting anything in the door besides what I pointed out in the video.
This is where Winnebago differs from a lot of manufacturers. They put the majority of their wiring and construction diagrams online, so it’s easy to figure out what should be behind a wall.
If you’re up near Winkler, you could always take a factory tour – you’d see your walls being built, and you’d quickly realize if there was anything in them.
A. Really enjoyed the window install video and had asked if you had made a pattern for the “cat” door.
Sometime back, I had mentioned our desire for a window in the door; but after going through the whole detective thing w PTL Engineering (door manuf), Winn claiming the windows were from LIPPERT, Lippert claiming they were not their windows, contacting the European manuf (who sold them to Lippert- who in turn sold them to Winn) but who also said they don’t make that model anymore) – I sort of dropped moving fwd. I will now do this – thank you.
B. I have three minor little projects that you and your forum could really benefit other EKKO owners if you would share.
I am not interested in credit, but if you are interested I would send you a couple very self-explanatory pictures.
Super simple “and” preventative.
JohnNancy Guth
I honestly never tried to get the acrylic window for the door because I didn’t want it to open. I figured a window in a door that opened and slammed shut was asking for trouble…
(Motion Windows does make sliding windows though, if you really wanted that.)
We don’t generally accept postings from others, but if you wanted to share them, the EKKO Owners and Wannabes group on Facebook is the place to do it! (Stef’s an admin there.)
Hi James, The video is excellent…. And my wife and I really like the window. This has me seriously contemplating adding the window to our Ekko. Would you be willing to share the details/specs of your window order from Motion Windows.
I’ve added a link to the order form and the data we used as input in the post above.
Thank you!
Any project I take on I try and look at it from the perspective of how much it would cost to fix if I screwed it up. I take this approach because Murphy and I are extremely well acquainted. I don’t think I would care to have to replace the whole door so the cost/benefit ratio for me in this case favors leaving well enough alone. Besides, I happen to like the metal screen door in my EKKO.
But, this does outline how something like this could be done in general. Congrats on another job well done.
The calculus on the door window definitely changes if one removes the screen door.
Without the screen there, the large, dark, blank expanse of the door almost taunts you…
I’ll start this comment like I do all of my comments, by saying that I wish I could have just made this comment directly on YouTube, where I watched the video.
Now.
Being a woodworker, I was surprised you did not make a wood or MDF template, stick that to the door, and use a router to make the cut. Also, I was fully expecting to see a reverse shot of the interior of the blade coming through the door and the ensuing mess!
If I had more than one of them to do, a template would have made more sense.
Plus, the router I have that will drive a 3” long bit is my big Porter Cable 7518… which is a bit much to hold vertically while standing on a ladder.
And we did send Stef inside to get a clip of the mess. But with that bag taped there, she wasn’t able to get much of a shot, so we left it out. It just looked like a bag.
I wondered why there wasn’t a window in your Ekko. Saw the peep hole and thought that was a good idea. But this window is terrific!! Is there any thing you can’t do?
Welding. I haven’t tackled that yet.
Hindsight being 20/20 maybe use a way shorter blade to get through the outer skin, then cut the inner skin separately from the inside on the door? Hit the foam insulation with a razor knife after. Love your videos!
If I were to do it again, there are a few things I’d do differently, for sure.
But it went well enough. The whole thing only took a couple hours – and that’s including the filming.
To avoid the concern of jig saw blade wandering, use a shorter blade. Choose a blade that is short enough to not reach all the way through the door, then make the 2nd cut from the inside, with the door open to let the Styrofoam bits fall outside. (From a fellow former rocket scientist. 🙂 I built and operated telemetry systems at the High Speed Test Track (rocket sleds) at Holloman Air Force Base in New Mexico in the 1960s.)
What I REALLY wanted to do was to build a jig and use a large router with a bit 3″ long.
But I only had the one to do. If I had more of them, I’d come up with something better. The cleanup wasn’t that bad.
You didn’t happen to keep any of the rocket sleds… like in the back of your garage or something… did you?
No, I didn’t get to keep any of them. Most of them wouldn’t fit in my garage anyway. 🙂 There are some on exhibit in a public park in Alamogordo. I was given some unclassified photos when I left.
Here is a link to a short 2-minute YouTube video.
https://www.youtube.com/watch?v=qdp4gxfwlv0