Notice, that’s “need” not “want”. There’s a difference.

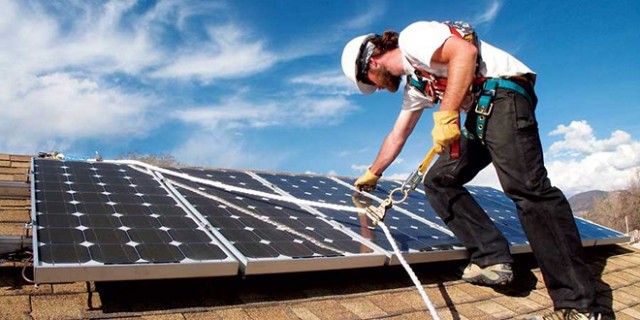
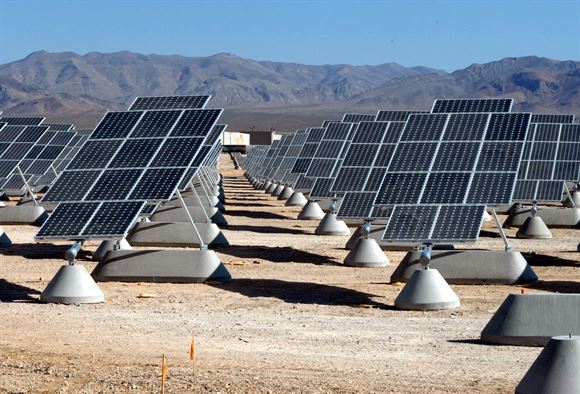
It’s going to be a good day for solar power!
This post grew out of a well-received seminar I’ve been presenting at RV shows. And that seminar itself grew out of my responses to lots of email questions from our readers that went more or less like this:
“How many solar panels do I need to run my air conditioner?”
Now, I’m not an electrical engineer (I’m aerospace), and I don’t work in the solar power industry. More importantly – I’m not a solar power salesman. What I’m about to walk you through is a process and some (hopefully fun) analysis that will help you properly size a solar energy system for your RV without wasting money on stuff that’s very cool but you probably don’t need.
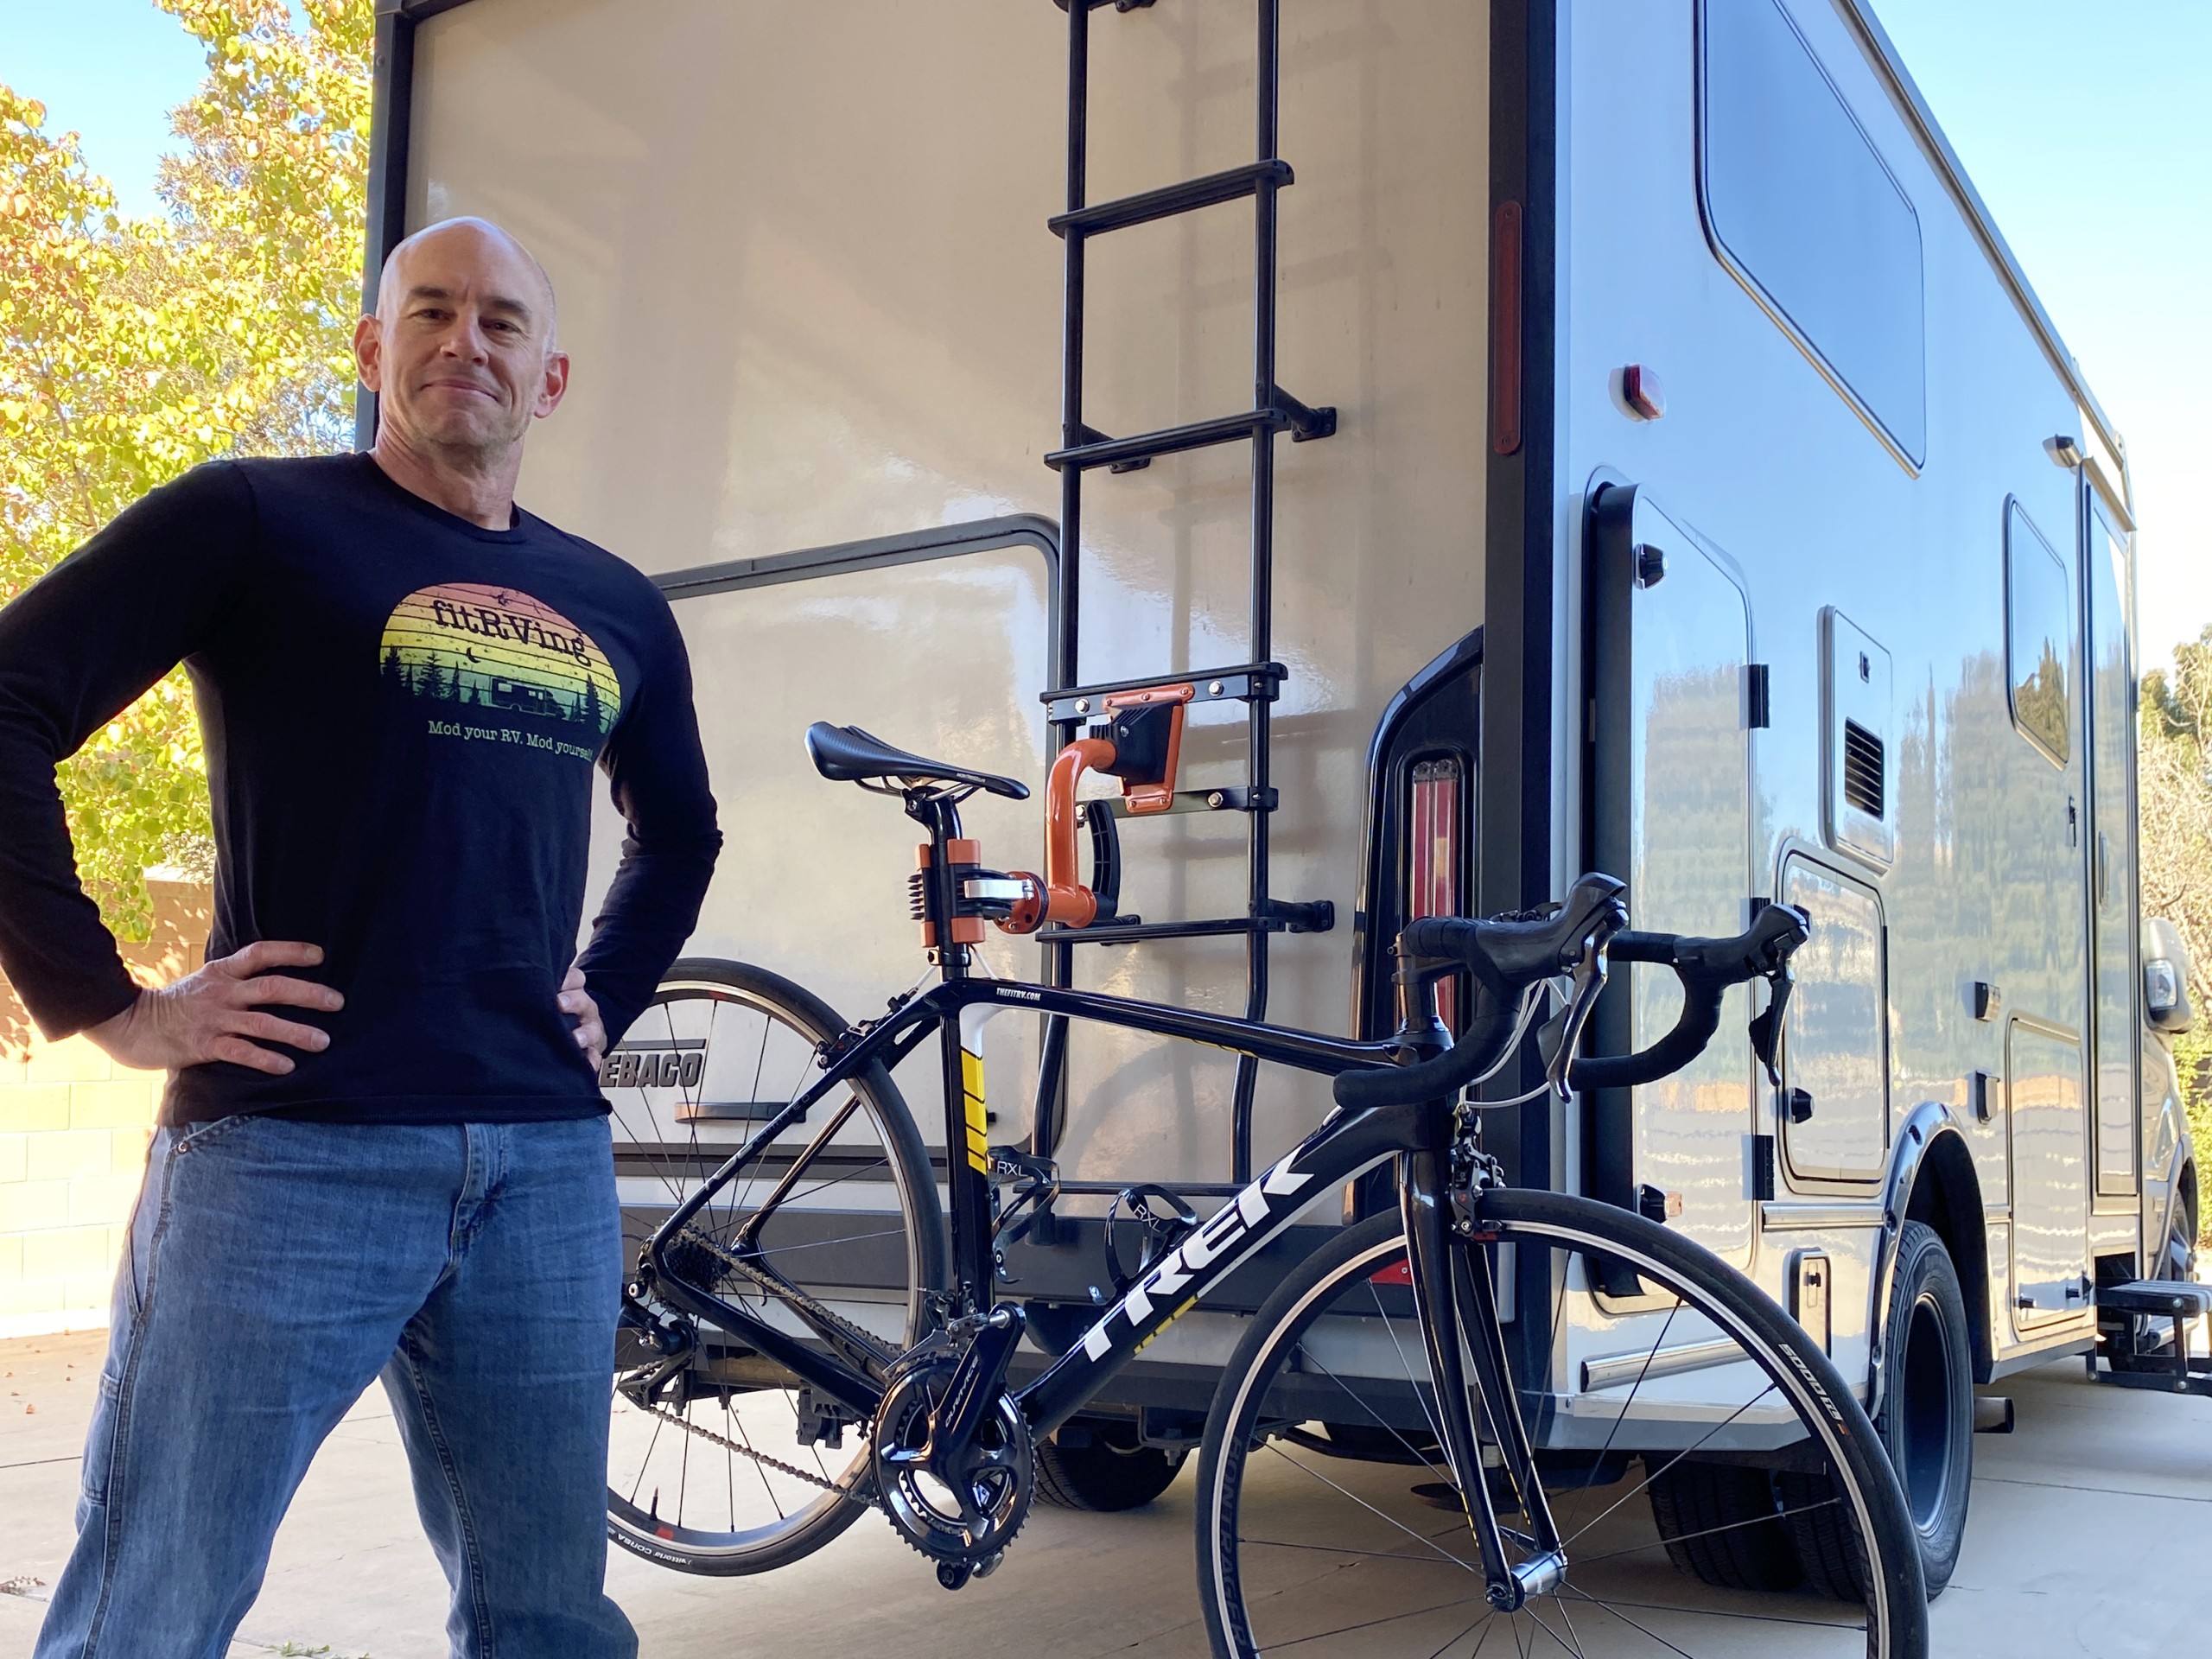
This doesn’t mean I haven’t wasted my own money on cool stuff that I don’t need! Just to give you an idea of where I’m coming from, here’s a quick rundown of the electrical system on our Class B Winnebago Travato, Lance:
- Lithium Batteries: Lance currently has a 525 amp-hour Lithium Iron Phospate (LiFePO4) battery from Lithionics. The battery self-manages, and has thus far self-maintained. We’ve never wanted for battery capacity since installing it.
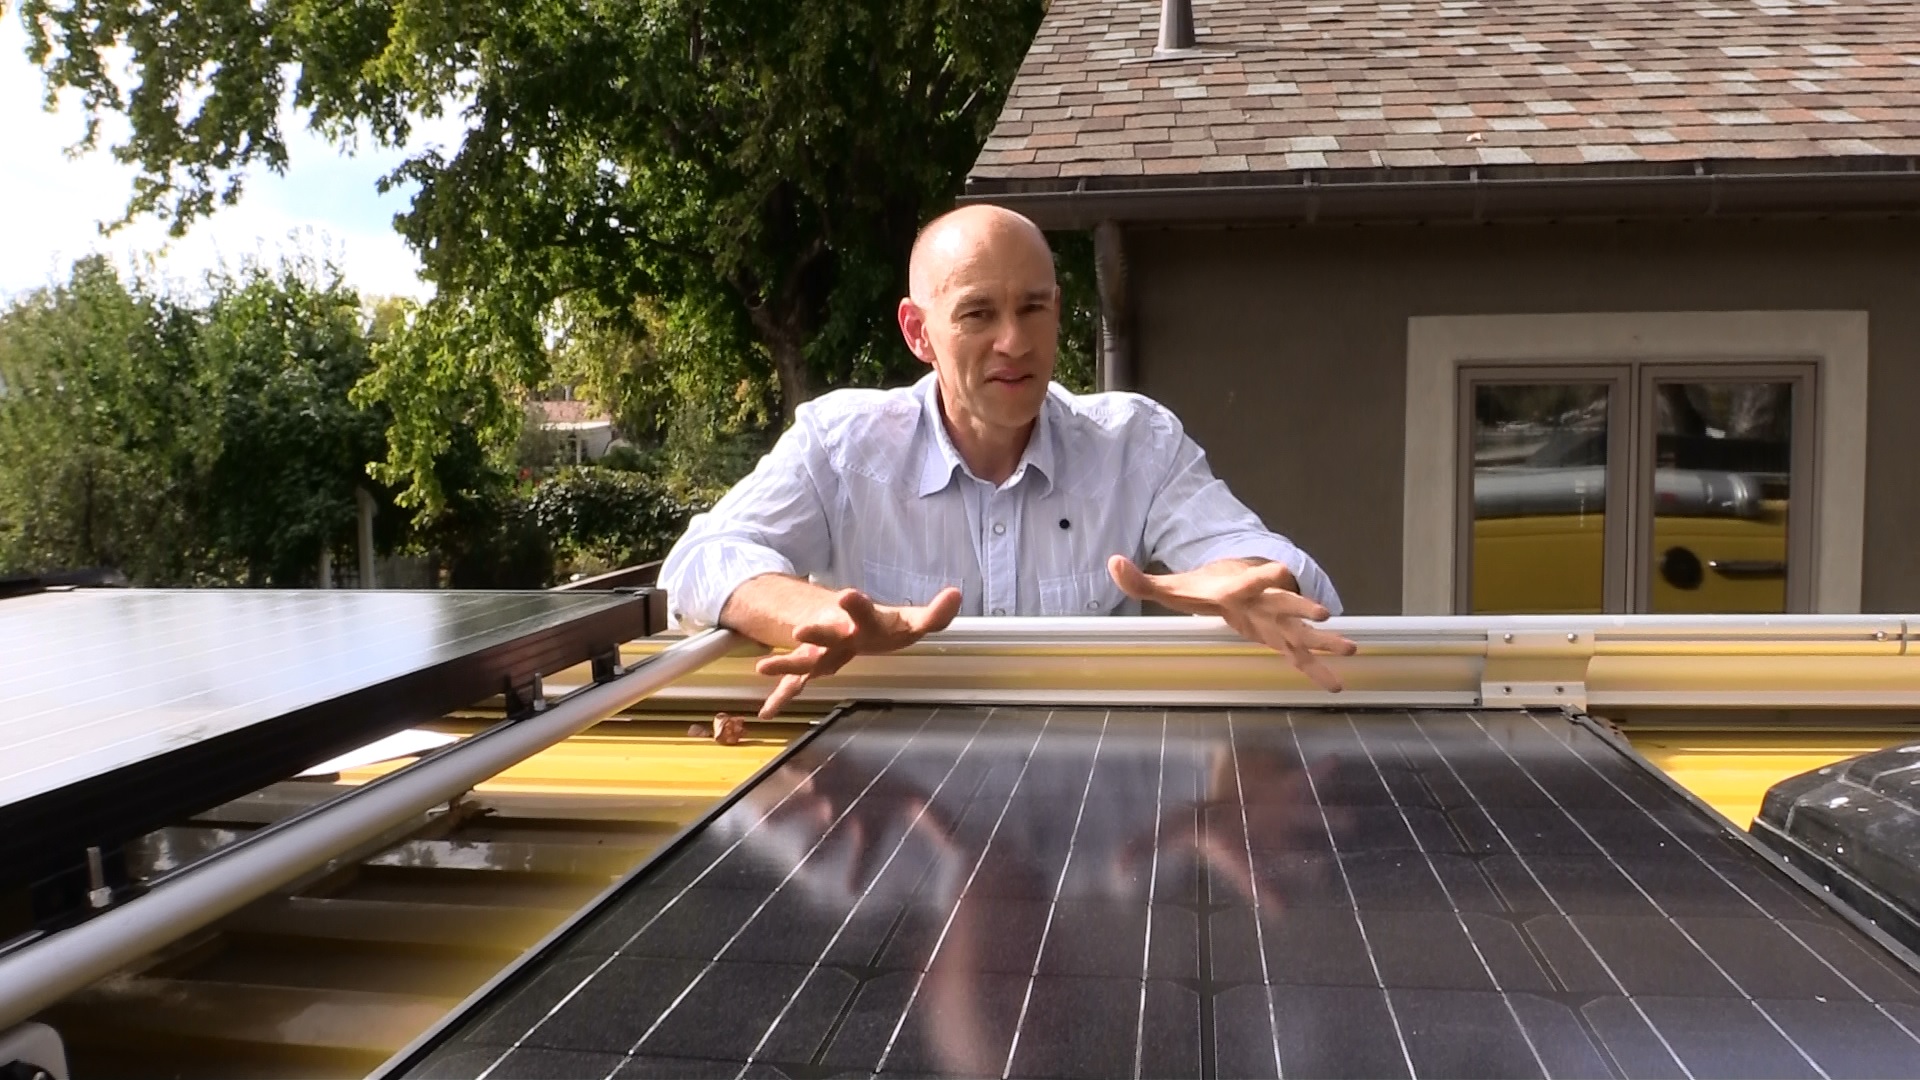
- Solar Panels: We currently have 300 watts of solar panels on the roof. These are run through the factory-installed combiner, and are integrated through a 40 amp solar charge controller from Zamp. We started off with one 100 watt panel.
- Second Alternator: The coach and chassis electrical systems on our coach are completely separate. There’s a second alternator from Nations Alternator which powers the house system and charges the Lithium battery.
- No Generator: We got rid of this because it was extra weight and we just didn’t need it. Most times, even when hookups are available, we don’t bother to plug in.
- Inverter: We have a Xantrex Freedom SW 3000 inverter charger which takes the place of our generator. This is the second inverter we’ve had in this coach.
Along the way and while tearing the rig apart multiple times, I’ve learned a thing or two, and that’s what I’m going to share with you in this post. So now, let’s get back to that question. Grab yourself a coffee or something – this is going to get lengthy.
How Solar in Your RV Works:
“How many solar panels do I need to run my air conditioner?” implies a basic misunderstanding of how solar energy in your RV works. For example, this is NOT how it works:
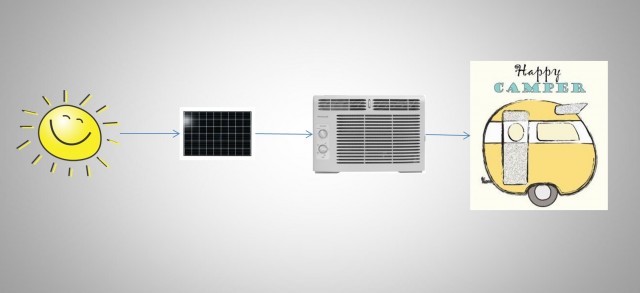
At least, that’s not how it works if you want air conditioning on a partly cloudy day. The solar panels are actually just a part of a much larger system, and a simplified diagram of that system might look like this:
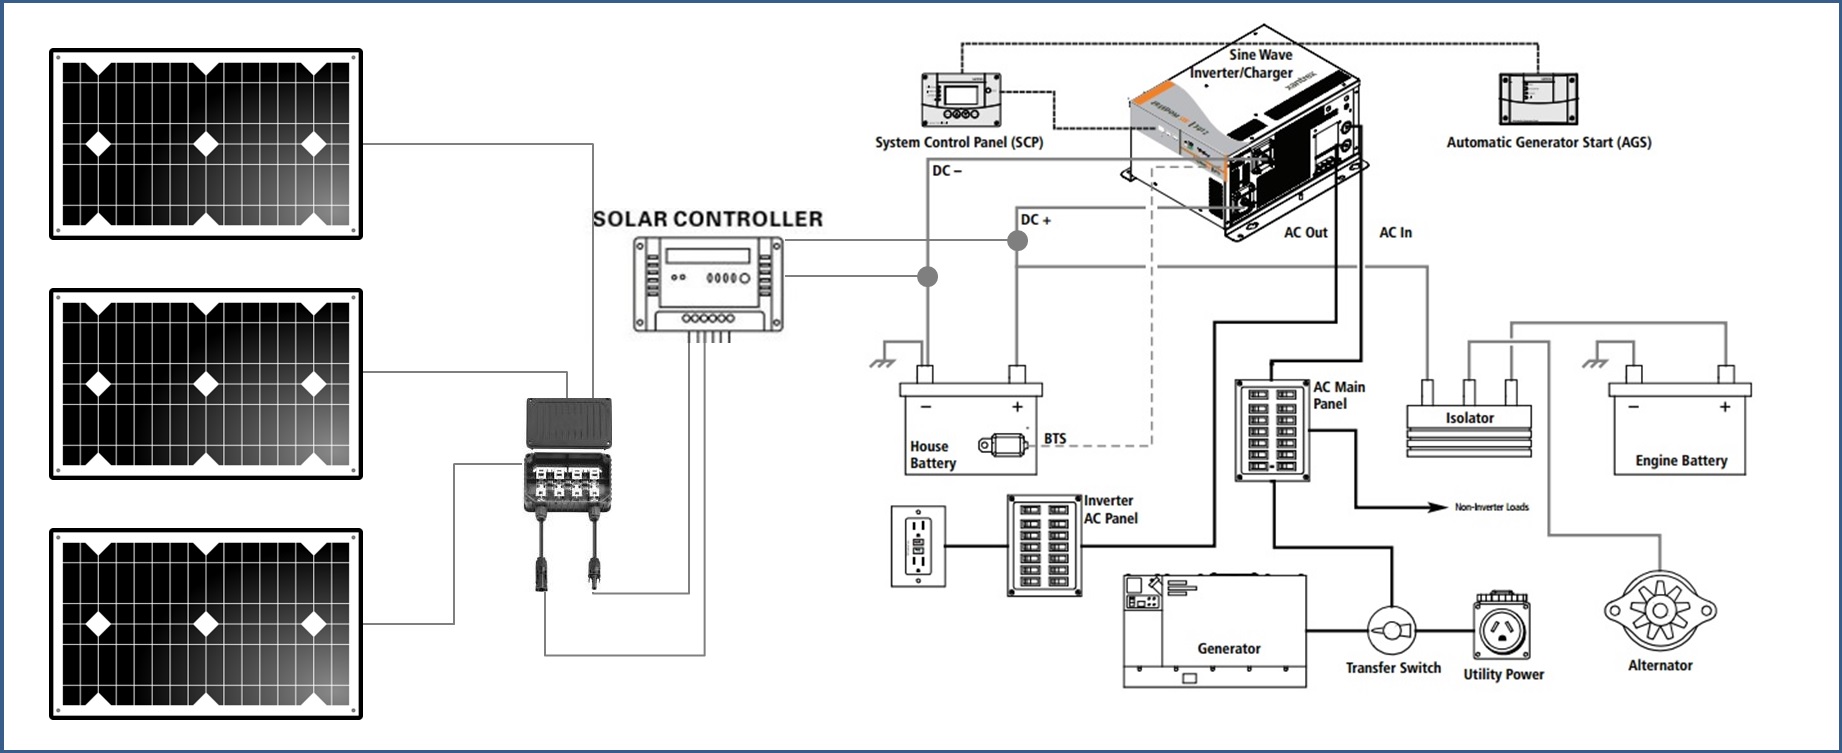
There are really two important concepts to pick up from that diagram above. The first is that solar is just one of several potential energy sources that you’ll find on a typical RV. In addition to solar, you might have a generator, shore power, and a vehicle alternator. All of those will put electrical energy onto the “mini grid” that you’ve got in your RV.
The second thing to note in that diagram is that it’s all about the battery. All of the sources putting power onto your grid can be either “on” or “off”. For example, solar power is “off” at night. The alternator is “off” when you’re not driving. And so on. The only thing that’s there for you all the time is your battery. The battery is what stores the energy produced by the other sources so that you can have power once the sun goes down, once you’ve turned off the ignition, or during generator quiet hours.
These two concepts are important to understand, because once you start thinking of your RV’s electrical systems as a mini grid with some storage; you’ll be able to define an objective for your solar energy ambitions. If you start making tech purchases without defining an objective first, you can drain your wallet (and your batteries) in a hurry. Don’t ask me how I know this.
Our Objective for Solar Power in the RV
In as simple terms as I can put it, this is what we’re trying to accomplish:
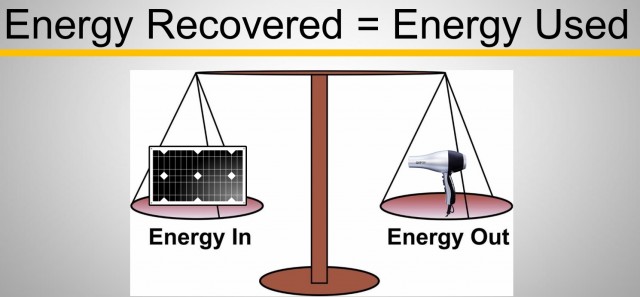
We want our solar energy system to recover the energy we’re using day-to-day, but no more. You see, there’s a key difference between home solar energy systems, and RV-based ones. In an RV, you can’t sell your excess energy production back to the power company. All you can do is store it in your battery.
But once your battery is full, it’s full! You can’t fill your battery over 100%. So if you build your RV solar energy system bigger than you need, you’ll wind up with a lot of wasted potential. (That’s actually a nerdy joke, because the Volt is the SI unit of electrical potential. Give yourself 50 bonus nerd points if you got it!)
Besides wasted potential, you’ll also have some wasted money from building your RV solar power plant too large. And I don’t know of too many people who like wasting money. So now that we know we want to “right size” our solar power investment, we need to figure out how to balance that equation. We’ll start with the left side of the equation: charging sources.
Charging Sources in Your RV
If you remember from the schematic, there are several potential charging sources in your RV. Yours may or may not have all of these:
Alternator: If you have a motorhome, or a towable RV with a beefy umbilical connection, you can count on driving or running the engine to provide you with power. The amount of power you’ll get from this varies according to the size of your alternator and what other electrical loads you’re running. On the high end, a dedicated second alternator like ours will produce around 180 amps of power when it’s running. At the other end of things, a stock alternator on a smaller vehicle may only have 40 amps of power left over to charge batteries.
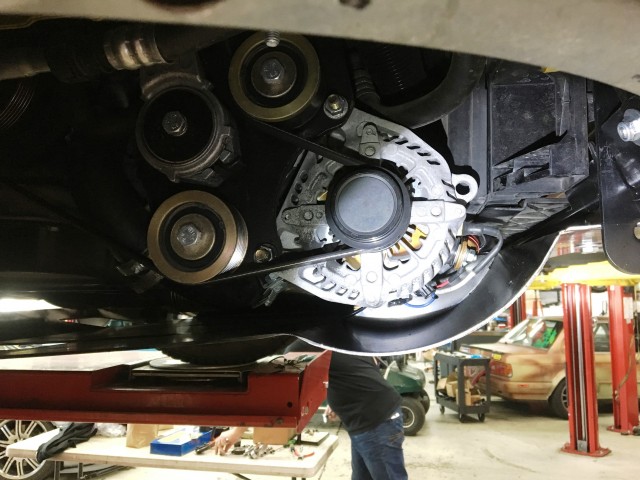
Even if you don’t have a beast like this, your alternator is a powerful source for charging your batteries.
Shore Power: Here, obviously, you’re tying into the larger electrical gird which (hopefully) doesn’t shut off. But shore power runs at 120 volts and your battery stores at 12 volts. To convert things from one voltage or another, your RV will employ a “converter” (not a terribly creative name) or an inverter/charger. These devices have various capacities. A stock RV converter may be able to deliver 40 amps of charging to your batteries, and a high-end inverter/charger like ours is self-limited to charge at 100 amps.
Generator: If your rig has a generator, this too will charge your batteries. They typically do this by providing energy to your converter or inverter/charger (not by connecting to the batteries directly). In addition to the converter’s capacity limit, the generator itself has a capacity limit. This can be only 2000 or 2500 watts for smaller generators. So if you’re running the air conditioner, two TVs and a blender with the generator, there might not be much left to go into the batteries.
Solar Power: Solar panels are sold in varying sizes, but a 100 watt panel is a commonly found size – particularly for RVs. That panel is rated at 100 watts at peak efficiency – meaning on a 78 degree cloudless day at solar noon on the equator during the equinox. I don’t know too many people who RV under those conditions. (Come to think of it, I don’t know if those conditions actually exist outside a laboratory.) But for the sake of argument, if we assume the best case, that 100 watt solar panel can provide just over 8 amps of energy for charging. With 300 watts on our own rig, this means at peak, I can expect to generate 25 amps of charging if I’m lucky.
Here’s what’s really important about all that. RV solar is the least powerful of the charging sources typically available. We’ve just reviewed the charging sources you have on an RV, and seen capacities from 180 amps all the way down to 8 amps. Using our rig as an example, what this means in real-life is that I will generate as much stored energy in one hour of driving as I will with over 7 hours of peak solar generation. (180/25 = 7.2)
Some Usage Scenarios
This doesn’t mean solar power doesn’t have a place in your RV. Maybe it does. I’m not trying to dissuade you from purchasing solar panels, and I’m certainly not implying that solar panels aren’t cool. But I do think that before you dive into an expensive solar project, you should give some thought as to how you use your RV. If you don’t use your rig in a way that lends itself to a solar solution, you may want to rethink things. Let’s look at some typical RV usage scenarios and I’ll try to explain.
“I use my rig almost exclusively at RV parks or campgrounds with electrical hookups available.”
In this case, I’d argue you have little use for solar power. Even a basic 40 amp converter will provide more charging than five 100 watt solar panels, and it will do it night and day, rain or shine. Adding solar in this scenario won’t get you anything except lighter pockets.
“We do more ‘touring’ than ‘camping’, and so we drive most every day.”
This actually applies to Stef and me. In this case, the driving will charge your batteries more than solar ever will. You’ll likely find that your batteries are full or near full most of the time from driving. This is another scenario where the addition of solar won’t really add much.
“We do a lot of ‘boondocking’. Parked, away from utilities, and not moving the rig most days.”
THIS is the ideal use case for Solar energy in an RV. If you’ve got no hookups, and you’re not driving, solar power starts to look a whole lot better. Yes, you can run the generator (if you have one), but people generally don’t like the noise and the fumes if they’re avoidable. Solar power can help you avoid exactly that.
You’ll need to consider how you use your own RV, and what charging sources you have available. From that knowledge, you can make an informed decision as to what role RV solar can play in your rig. Assuming you’ve done that, and you’re going ahead with solar power, there are some common terms we need to understand, so let’s look at that next:
Watts, Amps, and Amp Hours
Solar panels are typically rated and sold in Watts. Electrical loads are also typically rated in Watts (you can usually find the wattage stamped into any electrical appliance). But RV batteries are typically rated in amp-hours. Since we’re trying to equate things from an energy in = energy out perspective, we need to be able to convert things easily. Fortunately, the equation is pretty easy:
Watts = Amps * Volts
Volts are the unit of potential, and amps are the unit of current. Their product is power.
If you’ve read this far, you probably know that you have two kinds of power in your RV. 12 volt DC from the batteries, and 120 volt AC from the grid or generator. Watts are how you can equate them. A Watt is a Watt is a Watt. The voltage might be different, and also the current, but using Watts will get you from one to the other. So, for example, a current of 1 amp at a potential of 12 volts is 12 watts. A current of 8.33 amps at a potential of 12 volts is 100 watts. So remember the 100 watt standard solar panel? When it’s feeding your 12 volt RV battery, it’s producing a current of 8.33 amps.
(For the rest of this article, I’m just going to assume 12 volts for a battery. Yes, I know it varies by battery type, state of charge, etc. etc. I’m just keeping the math sane.)
Battery capacity is typically expressed in amp-hours. A Group-31 battery might have a capacity of 100 amp-hours . This just means you multiply the two together, like this:
amp-hours = amps * hours
So a current of 1 amp flowing for 1 hour will produce 1 amp-hour of charge. And that 100 watt solar panel – at peak efficiency – would produce 8.33 amp-hours of charge in one hour.
It’s important to get this down because with RV solar, what we’re really talking about is using it to charge the RV batteries. This kind of math tells us how much. But that’s as tough as the math gets in this post. So if you’re not a math person, and you’ve made it this far, breathe a sigh of relief and let’s move on!
RV Solar Power System Components
I know this seems like a lot of background before we get to the answer, but this is stuff you need to know. Some of these things might even save you money.
Batteries
There are two main types of battery chemistry that you’ll find in RVs today. The first of these is lead-acid. These batteries have been around forever, and though there have been new ways to dress it up (AGM batteries, Gel cells), they’re all basically the same chemistry for the purposes of our discussion.
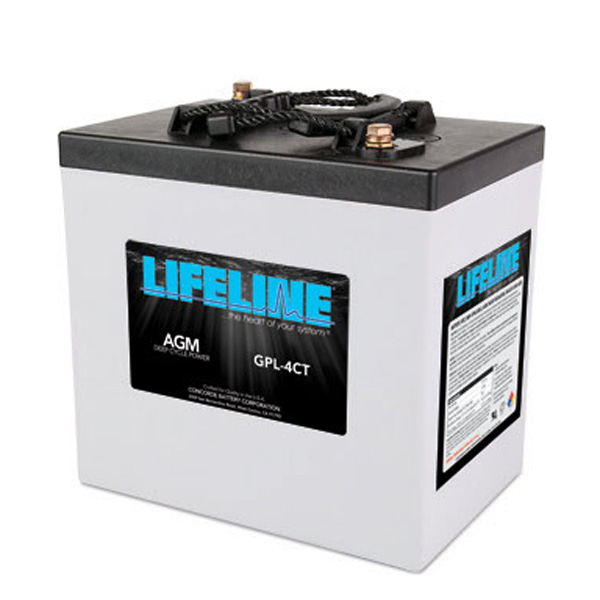
A typical AGM battery
The other type of battery that’s becoming popular in RVs is the lithium-ion battery. These use a completely different chemistry from lead-acid batteries, and they require a different charging profile. They’re also much more expensive than lead-acid batteries. There are lithium battery chemistries that are safer than others, and those are the ones that belong in your RV.
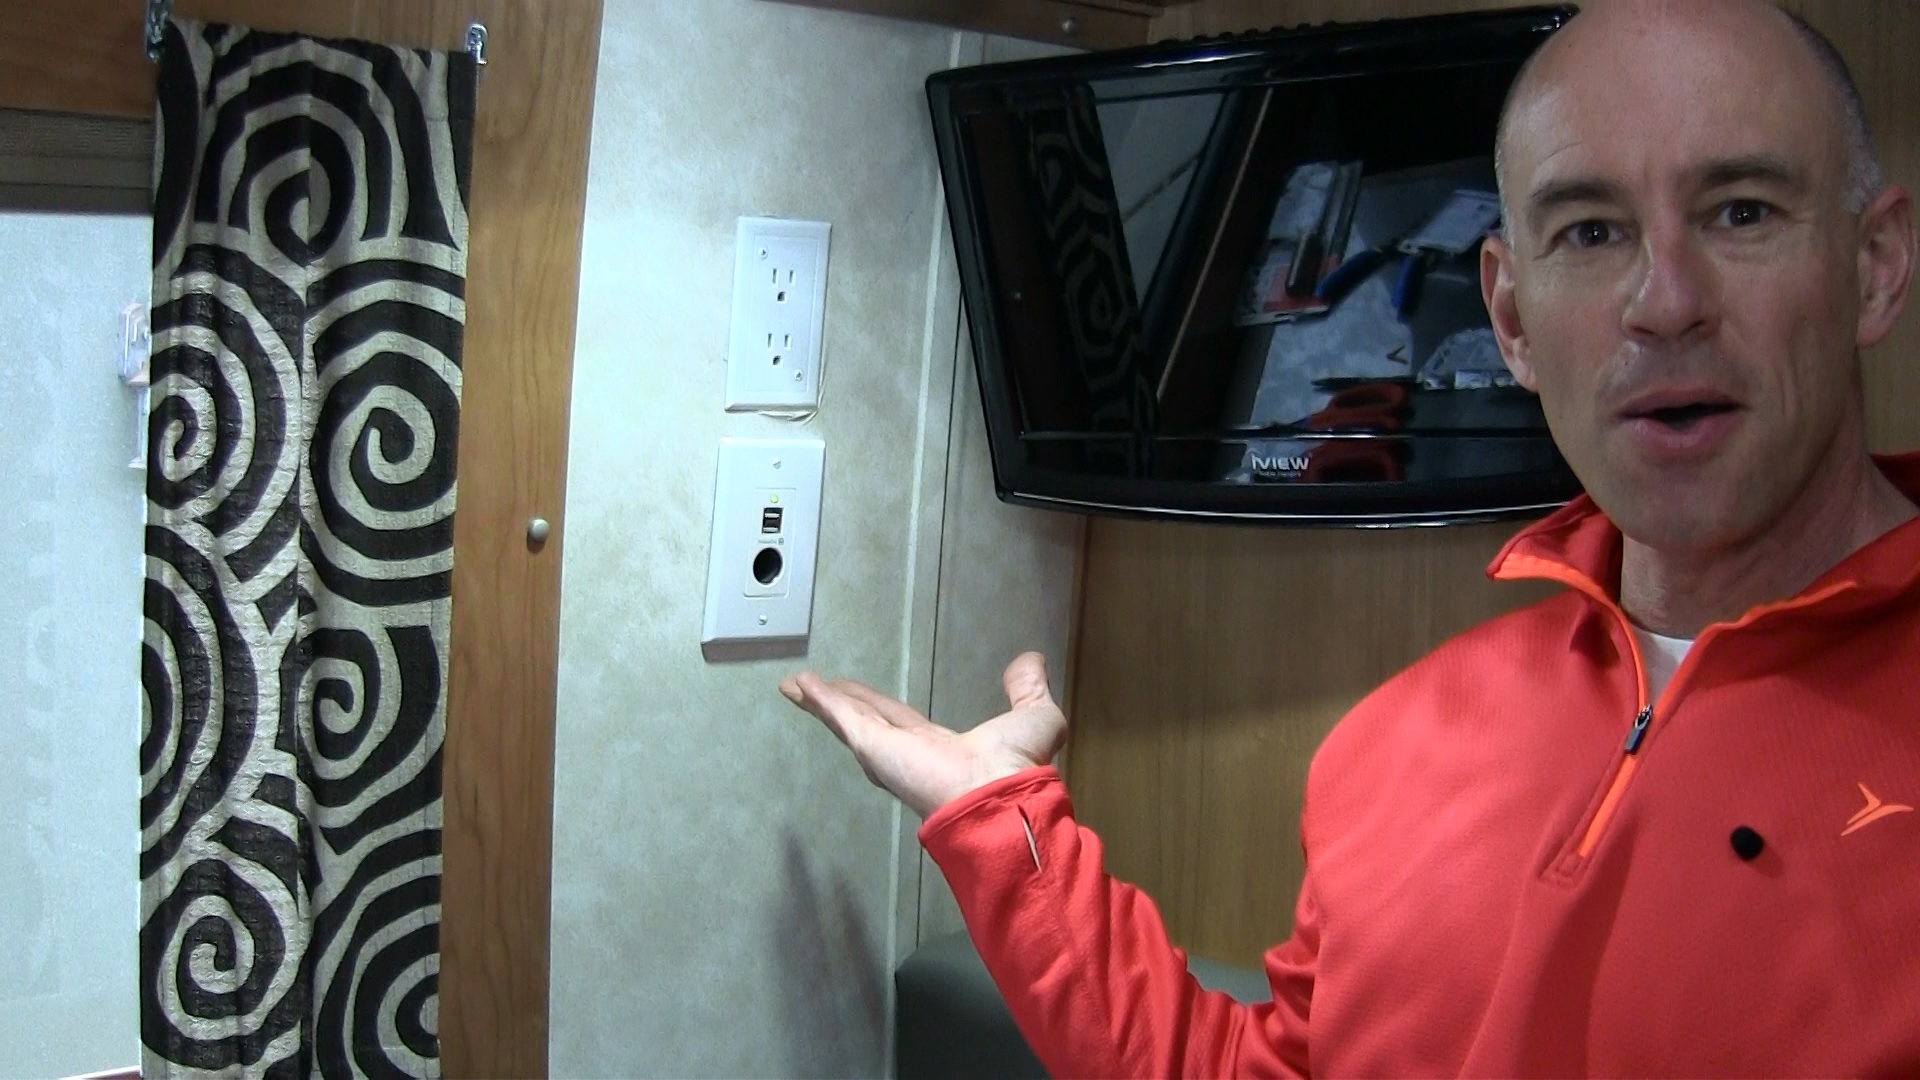
But it’s far more likely that your RV has some type of lead-acid battery than a lithium one, so that’s where we’re going to focus our examples. Sadly, batteries don’t come with a “Gas Gauge” to tell you they’re 5/8ths full. It’s sad because that’s exactly the information we’re going to need. So to get that info, you’ll need to use a State of Charge Chart. They look something like this:
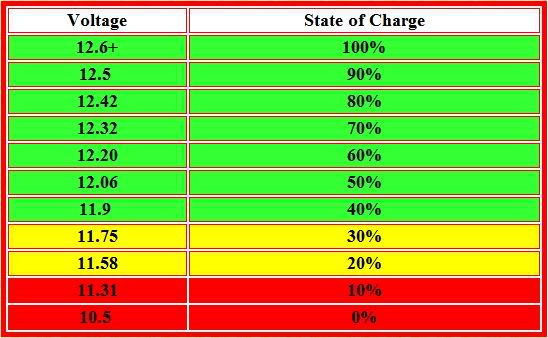
While I don’t know exactly what you’ve got in your rig, I’m willing to bet that somewhere in your RV there’s a display panel that will tell you the voltage of your batteries. Using the state of charge chart is simple: you just find your voltage, and the chart will give you the percent full your batteries are… ish. So if your battery voltage is 12.1 volts, the chart will tell you that your batteries are between 50 and 60% full… ish.
(It’s most accurate to read your battery voltage when the batteries are “at rest”. That means with no charge being applied, no current being drawn, and having sat that way for a half hour or so. But if you can’t generate those conditions, it’s OK. It’s a pretty inexact science anyway.)
One more piece of wisdom about lead-acid batteries and we’ll move on. To get the longest life out of your batteries, it’s best to observe the “50% rule”. This means that you shouldn’t discharge these batteries below 50% if you can avoid it. They won’t blow up or anything if you discharge them more. But you will find yourself replacing them sooner.
Solar Panels
There’s a lot of technology around solar these days, so let’s get some basic terminology and options out of the way up front.
Monocrystalline vs Polycrystalline
When you’re browsing for solar panels, you’ll quickly realize they come in two types. Monocrystalline and polycrystalline. Does it matter which kind you get? Maybe. They actually look different, too, so let’s start with that.
This is a picture of polycrystalline solar panels. Polycrystalline panels are about 13-16% efficient. And they’re the less expensive of the two kinds.
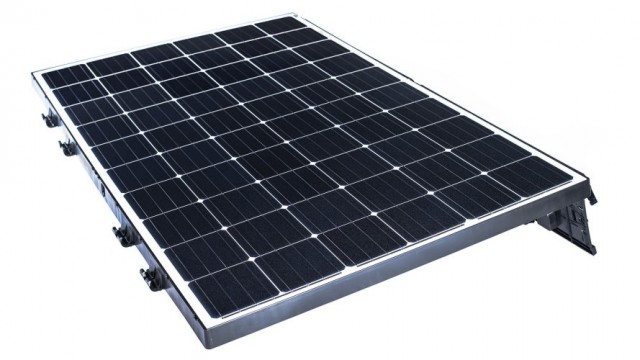
These are monocrystalline panels. You can tell the difference because the monocrystalline panels have a typical square-ish/stop sign appearance. They’re made from a more pure silicon, and so these panels are 15-20% efficient. Since they’re more efficient, that means they can be physically smaller and you still get the same output. They’re also more expensive.
We actually have both kinds of panels on our RV right now.
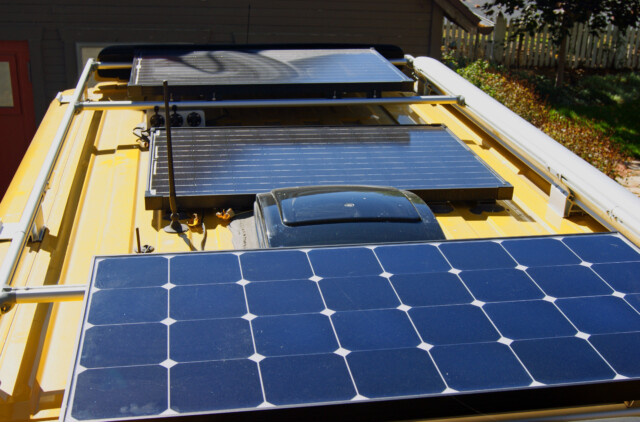
I’ve played around with them a bit. While monocrystalline panels are theoretically better in low light conditions, and better in high heat conditions, I can tell you that I’ve tried and I can’t discern a difference in our RV. Perhaps if I had a solar installation covering a couple acres, those small differences would start to add up to something you can measure and take to the bank. But in an RV, your install won’t likely be big enough for you to tell.
What I DO notice about monocrystalline panels is that they are physically smaller for the same output. If you’ve got limited roof space available (like we do on our class B), then this can be a big benefit. But if you’ve got the room, a 100 watt monocrystalline panel and a 100 watt polycrystalline panel will give you the same 100 watts.
Money Saving Tip:
Unless you need the reduced size of a monocrystalline panel to fit on a cramped roof, save yourself some money and use the cheaper polycrystalline panels. There’s no moral superiority in the monocrystalline panels, and your toaster won’t know the difference.
Flexible vs. Flat Panels
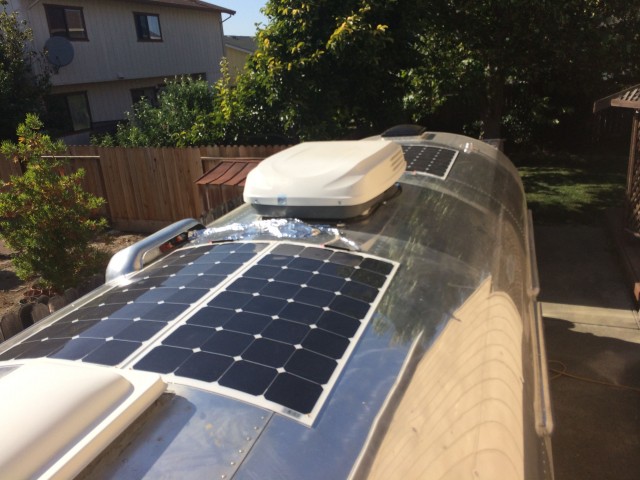
Recent years have seen the advent of flexible solar panels. These panels claim to be lighter (they are), more aerodynamic (they can be), and easier to mount to your rig since you don’t have to drill holes (also true). But in my book, the big advantage of flexible panels is that they can conform to curves. They’re also more expensive.
Traditional flat panels on the other hand are less expensive and have typically longer warranties (25 years vs. 10). They’re more durable, hence the longer warranty. Flat panels are also mounted off the surface, which allows cooling airflow underneath and improves efficiency. They can also be tilted to point more directly at the sun. On our own RV, I’ve only used flat panels.
But – straight flat panels sticking off the roof of a vintage Airstream would look terrible! So with that in mind, here’s another…
Money Saving Tip:
Unless you have a unique situation that calls for the aesthetics of a flexible panel, flat panels are a more durable and less expensive way to get the job done.
To Tilt or Not To Tilt
(If you’re that vintage Airstream reader, you can skip this section.)
OK. This is an Air Force base and not an RV, but the idea is the same.
If you’ve got flat panels, you may have the option to tilt them to point them directly at the sun. The tilting is usually accomplished with some sort of hinged rack and support system. Pointing panels directly at the sun is more efficient – but how much more? Well, the answer involves trigonometry, but I’ll spare you that and skip ahead to the answer:
If a panel pointed directly at the sun is producing 100% of its possible energy, then a panel 25 degrees off axis from the sun is producing 90%.
Yep. 90%. For a 100 watt panel, that amounts to less than an amp under typical conditions. It’s not much. And in order to maintain peak efficiency – you would have to climb a ladder several times a day and jockey panels around. Your reward for that effort would be a whopping extra 6 minutes of TV.
Meh.
Money Saving Tip:
Don’t worry about tilting or rotating your panels. On an RV-sized system, it’s more trouble than it’s worth. On a utility-company sized system, the gains are worth the expense and effort, but on the roof of your rig, you’ll likely never notice.
The Solar Charge Controller
Typical solar panels put out somewhere between 16 and 20 volts, depending on a lot of things. Your RV batteries are nominally 12 volts. A solar charge controller is basically a voltage and current regulator that keeps your batteries from overcharging. Every RV solar installation has one. There’s more than one way to accomplish this regulation, and so there are more than one type of solar charge controller.
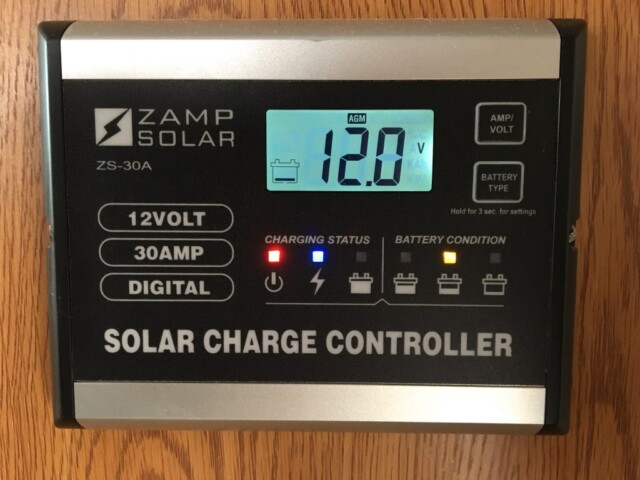
PWM Controllers are more or less the standard ones available today. It’s the kind we have in our RV, in fact, that picture above is the model that our Travato shipped with.
MPPT stands for Maximum Power Point Tracking. These controllers represent the ultimate in efficiency at 94-98% (meaning, most of the energy from the panels finds its way onto your RV’s “grid”). MPPT controllers are also better at dealing with a low state of charge, long wire runs, or really cold days. Unfortunately, that efficiency comes with a matching price tag. So if none of those special conditions apply to you, you can guess where this is going.
Money Saving Tip:
Unless you’ve got a huge system, long wire runs, dead batteries, or like to RV in the dead of winter, just go with a PWM controller. The more expensive MPPT controller won’t likely be worth it.
Estimating Solar Output
So with that math and terminology out of the way, let’s flesh out the left-hand side of our equation a little more. That’s the input side.
You can buy a 100 watt panel, but you won’t get 100 watts out of it. The reason for this is that there are a LOT of factors that can impact the energy recovery of a solar power system. Here are just a few:
- Time of Day
- Panel Tilt
- Weather/shade/sun/clouds
- Dirt in the air
- Dirt on your panels
- Efficiency of components
- Temperature (Contrary to intuition, solar panels work best at cooler temperatures. A 100 watt panel at room temperature is an 83 watt panel at 110°.)
So with all those things affecting the solar energy output, how are you supposed to get a handle on how much energy you’ll get? Well, if you like to take the easy way out, you can just go with this rule of thumb:
A 100 watt panel will generate 30 amp-hours per day
It’s a rule of thumb, not a perfect calculation, but it’s pretty useful nonetheless. The number will be higher in the summer, or further south. The number will be lower in the winter, or further north. But if you like to work in nice round numbers – 30 is your number.
If a rule of thumb isn’t good enough for you (and I don’t blame you), there are other tools you can use. Google “solar position calculator” and you’ll find all sorts of tools that will tell you the azimuth and elevation of the sun at any point on the globe on any given day. Some of these tools are even pretty fun, and it’s easy to waste a full day playing with them (trust me, I know).
But by far the best tool I found is actually put out by the US government (I know! Right?!), and it’s free. The National Renewable Energy Lab has an online calculator that will predict how much energy you can recover with a given sized solar energy system, at a given location, on a given day. It uses historical weather data and lots of math to give you a simple answer to the “how much energy will I get” question. You can find it here:
To check it out, I used our own RV. I entered a system size of 300 watts of fixed panels, mounted horizontally flat, at Phoenix International Raceway (where I gave this seminar last). It told me I could expect a total of 439 kWh per year from such a system.
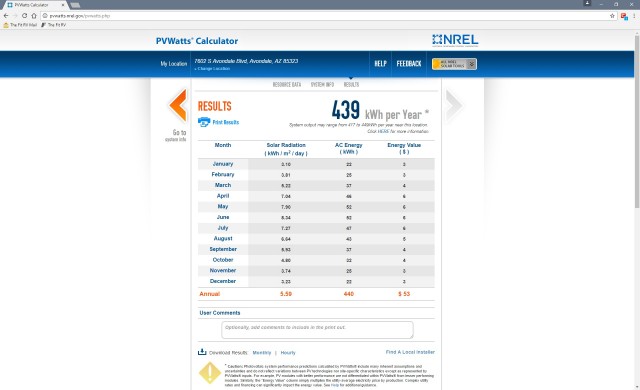
But I tend to think of my RV energy usage in days instead of years, so I broke it down.
439 kilowatt hours * 1000 = 439,000 watt-hours per year
439,000/365 = 1203 watt-hours per day
1203 watt-hours /12 (volts) = 100 amp-hours per day
100 amp-hours per day /3 panels = 33 amp-hours per day per panel
Which is remarkably close to the 30 amp-hour per day rule of thumb. Since we were estimating in Phoenix, the 10% increase should be expected.
But the NREL website goes beyond that! It will allow you do download the data – day-by-day, hour-by-hour, so you can predict your energy output on any given day. On the day we were in Phoenix (February 23), I downloaded the data and the NREL website predicted I would generate 91.6 amp-hours of energy. I compared this to our actual output, which was 78.8 amp-hours for the entire day. That’s about 14% low, but certainly still in the ball park. The difference could have been attributed to clouds, perhaps I didn’t park exactly level (though I certainly try) or any number of other factors.

The NREL website is good enough that I’ve given up trying to calculate solar output in any other way. I either go with the rule of thumb or jump right to their calculator if I’m contemplating a trip to Alaska or something. I recommend you do the same.
The Load Side of the Equation
Now that we’ve got a decent idea of how much energy we can expect to come in from an RV solar energy system, let’s turn to how much energy will be going OUT. There are a few ways to do this, but most of them are no good.
Approach #1:
If you’ve poked around the internet on this topic for a while, you’ve no doubt come across energy calculators. These present you with a number of appliances or other electrical loads and you estimate how long you’ll run each load. From there, it creates an “energy budget” for you. They look like this:
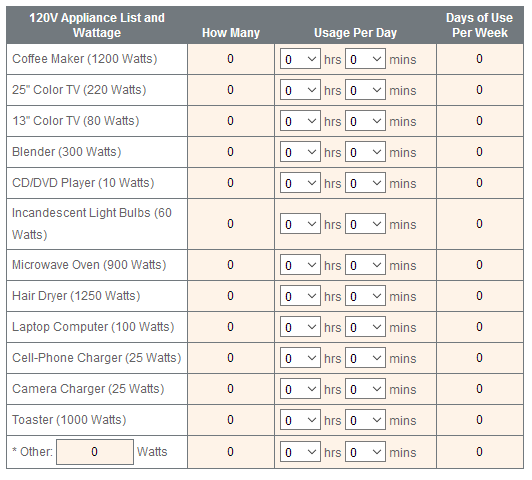
These suck. Every single one of them. Don’t use them.
You’ll usually find these “helpful” calculators on the websites of merchants selling solar panels. That should be somewhat of a red flag.
The main problem is that – let’s be honest – you have no idea how long each day you run your hair dryer, or how many watts it uses! Sure, maybe if you look you can find that it’s rated at 1500 watts, but does it really run at 1250 watts? I don’t know! Well, jeez, we’d better be safe and estimate high then, huh? And my toaster? How long does it run? Well, that depends on if I want one piece or two, and how dark I want my toast. I’d better put down 30 minutes just in case everybody wants four pieces of toast. And the stereo? Well I don’t run it every day, but I might. I’d better put down 4 hours just to be safe…
You see where this is going. Garbage in – garbage out. These calculators, without fail, will cause you to overestimate your electrical needs and buy more solar panels than you really need. Don’t go there.
Approach #2:
This approach is slightly better, and something I’ve actually done myself, but I don’t recommend it. It involves taking actual measurements in your own RV.
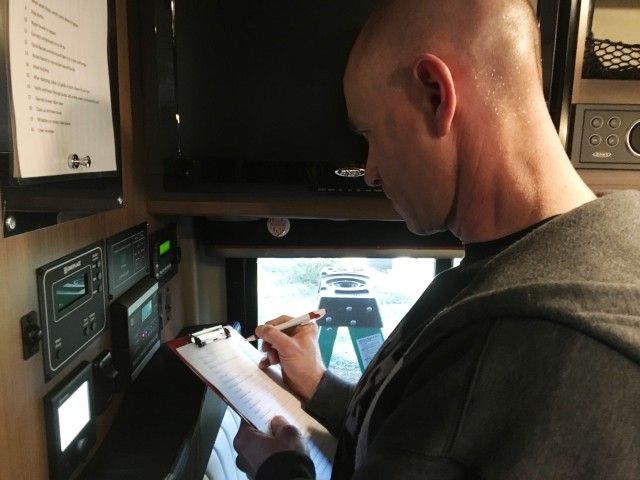
To do this, you’ll need a way to measure current, both AC and DC, and a lot of patience. I did this on our own rig, and you can find the results in this post I made on calculating the 12 volt loads in our RV. But again, I don’t recommend this because it’s tedious, time consuming, and you’ll still wind up estimating how long you want to run your toaster.
Approach#3:

This is BY FAR the best, most accurate, easiest, and most fun way to measure your electrical loads. You just go camping and do your thing. I call it “camping in the name of science”. Stef doesn’t buy into this, but that’s what I call it. Here’s how to run your camping experiment:
- First – go do your normal camping thing. It’s important to have as typical a trip as possible. Don’t try to conserve. Don’t try to use extra juice. Just be yourselves.
- Once the experiment starts, no generator usage. If you have solar panels on your rig already, unplug them. If you have a motorhome, don’t turn on the engine. The idea here is to only draw down your batteries – not charge them as well.
- You want to start timing the experiment at nightfall, and you want to start with full batteries. So run your generator up until sundown. The reason for this is simple: Solar power doesn’t work at night. And if you don’t have enough power to make it through the night – you have a battery capacity issue, and all the solar power in the world isn’t going to help you.
- Start timing once the generator is off, the sun is down, and the rig is unplugged. Use the rig normally.
- Keep tabs on your battery. You want to know how long it takes to drain your batteries down to “empty” (keeping in mind the 50% rule if you have lead-acid batteries).
That’s it! Way more fun than crawling around your rig with a multimeter. Here’s how an example might work out.

If your typical RV day involves getting out of your rig – then do it during your experiment!
Let’s say you have a 200 amp-hour battery bank. They’re lead-acid batteries, so you don’t want to discharge them any more than 50%. At day zero, you start at nightfall with a full battery bank.
At the end of 24 hours, your voltage is down to 12.4 volts. That’s still about 80% according to the state of charge chart, so you continue on.
At the end of the second day, your voltage is down to 12.2 volts. 60% according to the state of charge chart, so you keep going.
At the end of the third day, you’re down to 11.9 volts. That’s 40% on the state of charge chart, so you stop the test and turn on the generator.
So – in three days, you used 60% of your battery capacity.
Your battery bank is 200 amp-hours. 60% of that is 120 amp hours over three days.
Dividing that by three, you used approximately 40 amp-hours per day.
DONE!
Putting it all together
So now, you’ve got a handle on the supply side of the equation, from either the rule of thumb, or from the NREL website. You’ve also done an experiment to determine exactly how much energy you use on a typical day. So let’s translate that into how much solar you need to equip your rig with.
Continuing with our previous example, we’ll assume we use 40 amp-hours per day of battery capacity. We’ll also assume that we’re good with the “rule of thumb” of 30 amp-hours per day from a 100 watt panel.
40 amp-hours per day = 30 amp-hours per panel per day * X panels
Divide both sides by 30 and you need 1.33 100 watt solar panels.
Now, I’ve not seen a 133 watt solar panel for sale. But I have seen plenty of 160 watt panels. There are a lot of starter kits that include them, like this one (I’m not affiliated – just found you an example). So, from our camping experiment, we’ve determined that a 160 watt panel will keep our batteries topped off most days, and that kit fits the bill.
Parting Thoughts
A couple thoughts on the solar power thing before I wrap up. Even after you’ve gone through the experiment and analysis above, there are still some questions to ask yourself before you invest in RV solar. For example:
- Will I ever be staying in one place for three days with no movement and no hookups? In the example above, even without solar, the RV didn’t encounter a battery capacity issue until some time into the third day. If you never stay put for three days, solar power in that situation isn’t strictly necessary, as the alternator will charge you up as you drive to your next destination.
- Do you have the propane and holding tank capacity to match? In other words – does it do you much good to have 100% full batteries with 0% fresh water?
- And finally, were there simple conservation steps you overlooked? Could you replace incandescent bulbs in your RV with LEDs? That would save a lot of energy and tip your equation. Good, old-fashioned conservation may get you where you need to go without the investment of time and money in RV solar.
So there you have it. I hope this hasn’t come across as a “Solar Grinch” piece. We’ve got plenty of solar panels on our own RV and we think it’s awesome. We’re in favor of clean, renewable energy wherever we can get it. But I’m not in favor of wasting money, and often I hear of people maxing out solar capacity on their brand new rig without a clearly defined need for the expense. I don’t want that to be you.
(It can be me though. This stuff is like toys to me… 🙂 )
Cheers!


Thank you for all the information! It was so well written, even I could understand it! Here’s my situation: We’re in Northern NH and starting to dream about camping season. We have an older camper. It’s a 1993 Layton 26′ tagalong. However, she wasn’t built for solar. We have started working on modifications (she’s permanently parked to boondock. Like a second home that’s off grid). The first year we got a “portable” 100w system and hooked it up to the 2 6v golfcart batteries she came with on the front (these do the basic systems). Seemed to work great to keep the fridge cold during the week when nothing else was in use & fridge was set to lp. If we wanted to use anything off the 110v side (microwave, tv, AC, wall outlets), we had a generator. Last year, we decided to add more batteries, another 100w of solar, an 2000w inverter (cheap one from Harbor Freight), and take her off the generator. We got 4 6v AGM batteries (305ah each on the label) hooked up in series and parallel. Didn’t last 24 hours with only the fridge and 2 phones charging 🙁 And they were hooked up to the panels and charging during the day. I’m thinking I just don’t have the battery capacity to make it last? I would have thought that 610ah would have been plenty, however we are in the Northeast, not great sun, not spectacular temperatures, and trying to run a not so energy efficient camper off 4 6v batteries.
I would agree that you’ve probably got a battery capacity problem. If you can’t make it through 24 hours on the self-test procedure, you may want to look at additional capacity, or making your camper more energy efficient.
Love this article and the one estimating power needs!
Any comments on the portable solar kits available for purchase? Is the efficiency the same? Lifetime?
What is the expected lifetime on a solar installation, and any concerns about appropriate disposal at that point?
Thanks!!
As far as the portable kits… a watt is a watt is a watt. So as long as they’re rated honestly, your decisions can focus on space available, storage requirements, etc.
Solar panels can have really long warranties. 25 years or more. Of course, nobody in the RV solar field has been out there 25 years yet, but it gives you an idea as to the confidence the manufacturers have in their gear.
This was awesome!
Hello, What seems to be missing for me from your ***oh ever so helpful post*** is that I will be running a laptop and an airfryer while in this real life test.
That means I’ll need to buy an inverter (not converter?) to get 110V. Which one should I buy?
Then once I find out my needs, by measuring the percentage use, I will have a solar panel power idea.
Thoughts?
Yes, if you intend to run 120 volt appliances off the grid, you’ll need either batteries and an inverter, OR a generator.
We’ve had good luck with Xantrex and Magnum inverters in the past. Victron is also top quality stuff.
Get one sized to handle the concurrent loads you expect to run.
Some 120v appliances are energy hogs, so if you plan to run one with an inverter from your 12v bank, make sure you have enough reserve amp hours. A general rule of thumb is to multiply your 120v amps from an inverter by 10 (ten) for the 12v amps consumption. So a 1500 watt appliance conceivably consumes about 15 amps at 120, or about 150 amps of 12v. My 200a golf-cart battery array at 50% discharge would be discharged in less than an hour – or about 45 minutes. That’s more power than we use for the whole coach for an entire day – led lighting, phone and tablet charging, an led flatscreen, charging a couple of ebikes, etc.
For running these types of appliances or our roof air conditioner, we run the built in onan generator – it puts out 40 amps of 120 volt power – enough to run the AC AND a 120v high-energy appliance. It’s quiet and powerful and uses about a half a gallon of fuel an hour.
Our 160w portable solar panel ‘suitcase’ can be placed anywhere in the sun with 20′ power leads – we get about 8ah of charging out of them. Enough for most day’s 12v power usage. I just installed a 600w inverter and a couple of outlets it powers, for light usage. It’s good for 540w continuous usage – from Xantrex. High quality stuff.
YMMV
Plenty of reserve capacity here!
That’s the great thing about these batteries.
We’ve run the air conditioning from battery – in the desert at 110 degrees – for over 14 hours.
And the batteries keep about 10% of their power in reserve anyway… just in case.
James,
Thank you for the excellent walk-through on solar.
We had our new Jayco 24RL out for its maiden voyage last week here in Montana. We have a GoPower 30 amp solar controller, one 190 watt solar panel on the roof, two new AGM batteries and a GoPower 3000 watt pure sine wave inverter. Conditions were: cool and cloudy 2 of the 3 days, partial shade (30%) on the sunny day. We ran minimal lights, no microwave, refrigerator on propane, etc. There is some latent draw from gas monitors, smoke detector, radio, etc. About 2 amps.
Throughout the day, I noticed that the batteries would generally be at around 11-12 volts most of the time.
We dry camp almost exclusively for 2-5 days at a time, spring-end of summer. We have sufficient propane, fresh water and tank capacity for that.
I am considering Dakota 100 ah 12 v lithium batteries. The reason I’m considering the lithium batteries is that they will produce power for a longer period before discharging. I believe my solar charging load would be approximately 29 ah with 3×190 watt panels.
What is your opinion on my setup and the idea of lithium batteries + 2 more 190 watt panels? I have no problem running the generator, but would like to avoid it if I can purely for the aesthetic value of quiet camping.
Not a bad plan. I’d do it in stages. Get the batteries first.
You describe your electrical needs as pretty minimal. If one solar panel will keep the batteries topped off, would you still want to get two more? You won’t get more than 100% full!
The lithium batteries – even if they are the same size as your AGMs, will get you almost twice as much usable capacity. I’m not familiar with the brand you mention, but start there and then evaluate.
Well done James.
Like many, I have a problem with space on the top of my 31′ Tioga. Vents and other things are installed haphazardly on the roof which makes installation of the same size panels impossible.
That said, what is your advice about using different size pannels to accommodate available space and if the answer is ‘yes you can’, what is the best way to connect them: Parallel or Series or a combination of both?
Appreciate your response.
You can use different size panels, but how effective they are will depend on how you connect them, and what their individual specs are. It’s a bigger question than I can answer in a comment, but it’s a GREAT question for a future post or video! Look for a post this summer on exactly this topic. (We have to get our new RV first before I can make the video!)
Hi guys, I read your article about solar panels… Thank you, lots of good info. My question is… I have three wet coach batteries. Adding solar (or any charge)… I assume they can only take a certain amount of amps over a certain amount of time to charge properly. How would I know how many amps is the most efficient to properly charge them quickly? I assume this is the big problem with electric cars… You want to charge them fast but you can’t just keep adding power. TIA
Interesting question. It’s been a while since I’ve dealt with lead-acid bateries, but really, the information on charging them should come from the battery manufacuter.
Trojan, for example, puts out a detailed guide that you can find here: http://www.trojanbattery.com/pdf/TrojanBattery_UsersGuide.pdf
Usually the charging for lead-acid batteries runs by voltages, not amperes.
Amps will be limited by whatever component is doing the charging. Your solar charge controller or converter. So if you have a 30 amp solar charge controller, obviously, you don’t want to add any more panels than that.
HTH!
This is definitely the most comprehensive article I’ve seen so far. To echo what most everyone else has said, you definitely have a knack for communicating this stuff! I can see why you teach seminars on this.
I’ve got a few questions too. I am trying to determine how much solar I will need, but I don’t actually have the RV to test things out. I’m building a trailer and want to at least set up the electrical correctly the first time. My game plan is to install two100Ah AGM batteries and two 250W solar panels. I figure I can go back and add extra batteries and solar panels as long as I plan appropriately. But, I’m getting a little confused with the whole 12v and 110v conversion thing.
I’ve heard that a watt at 12v is the same as a watt at 110v. Can you explain more on the conversion from wattage required by your device to battery Ah to inverter/converters to wattage required by solar panels?
Also, is it an issue to use cheap polycrystalline home-use solar panels? I can get new 250W solar panels locally for about $60, which is significantly cheaper than any “RV” solar panels (15-20V?). For example, someone is selling 395W solar panels with a open circuit voltage (which I read somewhere was the key factor) of 49.5V. So as long as my inverter can handle 48V, is using those type of panels an issue?
First – open circuit voltage matters. Whatever panels you get, you will want to make sure they are compatible with your solar charge controller. A solar charge controller intended for RV use may be only intended for 18-20v panels. Panels intended for mobile use may also be built to handle the rigors of life on the road, versus sitting in one place forever.
Solar panels do not directly feed your inverter. It does not matter if your inverter can handle 48v. Your inverter will be drawing from your battery bank.
Yes, a watt is a watt is a watt. An inverter will change watts from 12v DC watts to 120v AC watts. But you lose some along the way. The particular losses will depend on the inverter, but may be in the neighborhood of 15%. A converter or charger changes watts the other direction – also with losses.
I’d recommend consulting with a solar electric system designer as a sanity check before moving ahead.
Good luck!
Hello James. Thanks for the great article. I’m just starting on my journey of research before deciding whether I want venture into RVing in general, and this has been super helpful.
Since this article is going on 4 years old, I wonder if there’s been any updates on technology or costs in this space that are worth calling out?
Things are pretty much still the same – as in I would take the same approach to determining how much solar I’d need.
There have been new panels, etc. But the basics are still solid.
Haven’t changed my mind about pointing panels or MPPT etc.
Hello!
What a great article! Seriously, you explain it for the simple mind and that’s appreciated.
Quick question.. how do I charge my solar with the alternator?? This may be a dumb question being that I’m not sure it’s possible, but I’m admittedly not too good at this stuff.
I have 300W solar, with 2000W pure sine inverter, and 200Ah lead-acid battery bank, for what it’s worth.
Thank you in advance!
-Alister
Well, to be completely correct, you never charge the solar panels. Everything charges your batteries.
As to charging your batteries with your alternator… on a motorhome, that should be happening for you from the factory. On a towable RV, you’d need some sort of umbilical connection to make that happen – basically compatible wiring that would go from your towing vehicle (where the alternator is) to the towed RV (where the battery is).
Good evening,
What a fantastic tutorial! Thank you so much for this. I have a question about calculating my needs. I currently do not have batteries that I can rely on to do a “boondocking” test. They are old AGM and are pretty much shot. I do, however, have a Power Watchdog by Hughes Autoformer. I currently run a hog of a rooftop AC that draws roughly 15 startup amps and runs at around 10-12 amps. We will NOT be using the rooftop AC when we travel. We have since purchased an LG mini split (27 seer, 15.8 eer) 9,000 BTU. This should use considerably less energy.
With that being said, would it be possible to just check my readout on my power watchdog for 24 hours? It keeps a continuous reading of KWH. I kept track one 24-hour period and I used about 30KWH. If I convert that to amp hours, an online calculator told me it was 300amp hours. Does this sound right? It sounds really high to me, however, we did run the rooftop AC a little on purpose as to see what our consumption would be. We will be traveling to hot areas regularly and will be using AC often. Hopefully the mini split will help with less consumption.
Thank you in advance.
I’m not familiar with the Power Watchdog. Does it track both 120v and 12v loads, or does it only track 120v? You’ll need both if you’re going to run 120v appliances through an inverter.
Hey James,
What a great write up! Thank you. With a 5th wheel and a residential refrigerator we have started to dry camp and manage our power. Needless to say that the 3 yr old <180Ah two battery factory setup which has long expired we decided to go with 900Ah of AGM 6v batteries and will be starting with a 100w solar panel to see what we need. We are excited about where this will take us!
Your section on going out and surveying normal use to determine solar need is brilliant. We will do this through the 20/21 winter in TN to see what it brings. I expect to drop by with questions from time to time but I have to say that if one needed to filter through all the minutia out there on the web on RV solar, your site and your explanations is the filter we need! Thanks so much for the clarification and simple explanations for so great an insight.
Happy trails. Be safe.
KC
Wow! I’m so glad you found it useful.
Best of luck with your “camping in the name of science!”
I live in Australia but I can apply most of your information to my own RV situation. Absolutely brilliant and I’ve learnt a lot. Thanks James.
Glad you found it useful. The sun is the same… here or there!
Stay well down there!
Hello James,
I have a 45’ renegade motorhome and want to install solar, we do a lot of dry camping in Glamis ca, (sand dunes) for 4-8 days at a time. I was looking at 300w panels (maybe 2) to help not have to run generator as much. It’s a12k diesel so not bad on fuel but over a weeks time it adds up. My stove and microwave runs off 120 so I thought two big panels would help replenish the battery power used to run the microwave story time or stove to heat something up. I have a magnum control panel that tells me what my batteries are doing and other stuff along with auto start function, also a 2500 or 3000w inverter, but I believe if I still need some kind of sulfur monitoring panel along with a couple circuit breakers. what would be the best solar monitor (I think you call it) to get. Just trying to figure out everything I would need to hook it up.
Thanks John.
It sounds like you’re building a reasonable shopping list, but I’d recommend consulting with someone like AM Solar in Oregon. This is what they do every day!
I am wanting to set up a boondocking system on my 50 amp fifth wheel with 2 rooftop 13k btu A/C units. We are in southern AZ and run our A/C a lot. What would you suggest?
2 rooftop AC units are going to use a lot of power. You may find that the battery capacity required to run that setup for any length of time would be prohibitive.
You could put a lot of solar on a fifth wheel, but for something like that, I’d consult with someone like AM Solar in Oregon.
Okay so we camp out in the Co area. We bought a new Forest river that comes prewired with Solar amp. My question is I have a 50 amp service that I can split into a 30/and 20. The 20 controls just all me electrical plugs, one ac and charges battery. All I want to do is get a invertor to work with a solar panel that will operate just the necessities, such as keep battery charged, use wall plug for charging phone and wife Hair dryer. and electronics for the water pump and control panel . How can I figure that out?
Great info!! It’s stuff that you think about and you have it all in one blog! Totally agree with how you figure out how much solar you need. You have to have that base to start from so figuring out how much/long battery you use to get to 50% over time then that will tell you how much solar power you need. It may be you are doing overkill with it. And always good to have alternative power sources because you never know what can happen. Also having more efficient appliances can help or even conserving if needed. What are ways you can conserve power or make them more efficient? Especially with air conditioning as that seems to be what most people are interested in. I’ve heard that installing a mini split is a lot more efficient than the typical rv AC units? That is if you have a place to install it?
I have been considering adding solar panels to my motorhome house batteries but am concerned how the other charging systems (From the alternator or 30 amp inverter would affect them. Thought I would have to install an off switch from the solar panels so that when the batteries are being charged from other sources, electricity wouldn’t flow back into the controller or panels and damage them. If I am understanding your article correctly, a solar controller would prevent that, therefore I can leave the solar panels hooked to the batteries all the time even when they are being charged from other sources. Just want to be sure!
Unless your solar charge controller is of some defective kind I’ve never heard of, you should not have to switch it off if you are also charging from another source.
(My word – that would be a pain! Turning it on and off each time you started the engine? No Thanks!)
Initially we were looking at a custom adventure van from Outside Vans but after learning the price tag we started researching other options. Your channel has helped us decide on purchasing a used Travato 59K.
Being a newcomer to the Van/RV world my current concern is the power setup based on our needs. Without the real world experience a load calculator is the only option I have to figuring out my power needs. I couple web sites indicated we would need 60-90 amps a day. My numbers could be off, just not sure.
Finally my Questions
1) Can I assume the Travato is setup to use the one chassis alternator for charging, provide around 30 amps/hour?
3) Zamp Solar setup can max out at 420 watts of solar? In a perfect world this would provide 35 amps/hour to the battery?
4) When driving in sunny weather would I get the 30 amps from the alternator plus the 35 amps from the solar for a combined total of 65 a/hour?
5) I would love 200 usable amps. Can I simply switch out the AGM battery for a 200-amp Lithium Battery? I found an article that does this very option but I need to switch out the Charger/Converter unit to handle a Lithium Battery. Would love any insights
Some answers:
1. Yes, the chassis alternator will charge the house battery. I never ran any tests on the rate, which would depend on a lot of other things (temperature, what else you have running, etc.)
3. 420 watts does represent 35 amps at a nominal 12 volts, but it’s extremely unlikely you’ll ever see that kind of current coming in. Maybe at solar noon on a cloudless day at the equator on the equinox. Better approach is to use one of the methods outlined in the article.
4. Solar does not stop while you drive, so yes, the charging is additive. However, due to 1 and 3, I doubt your absolute number is accurate.
5. There are a number of drop-in lithium replacements. I didn’t go that route, so I can’t speak to how well they work. But for best results, you would want to update all your charging sources (converter, solar charge controller, and alternator) to something with an appropriate lithium profile.
Wow amazing!!, thanks
So what ah battery can i buy for 100w or 300w solar panels and the repective inverters with the solar regulators
You should size your battery based on the *load* you want to power and how long you want to power it. Not on the equipment you have to charge it.
Assuming we do not “hook up” in campgrounds and if stationary for 3-5 days, and if our small camper is only using 2 LED lites at nite 3 hrs max, and the fan in the propane heater runs a few hours a day, can I just hook up a remote, satchel type 120 w solar panel directly to the battery with wires, for say, 3-4 hours, thereby skipping installing the solar charge controller? Is the charge controller 100% needed? Or could I use a portable volt meter, test the battery, and use the handy chart to estimate voltage/remaining charge?
You can’t hook a solar panel up directly to the battery and expect it to work.
(I mean, you could hook it up, but I don’t know what will happen. Probably nothing.)
You need to solar charge controller to get the voltages right for bulk/absorption/float. Otherwise, the voltatges are unregulated.
I flew model radio controlled airplanes back in the day (100cc-10ft wings) and used a solar panel to charge the battery directly. You will overcharge the battery and boil the acid out of the battery. I ended up installing a mechanical timer and would set it for one hour to charge the battery when it was down to 12.1 volts. I used it that way for 4 years with no problems.
Thank YOU! I was all over the net trying to figure out the “so what” questions about RV solar installations. You-know? So what that you get this much power, so what that your frig uses such and such power, so what, so what, so what. The big questions are how all these items of information affect us in installation and on the road when dry docking.
It was wonderful to find all answered here. BIG DEAL. Again, thanks!
Glad you liked it!
James thank you! Your article is great packed with alot of information. For sure has caused me to rethink my how I’ll go about my rv power needs.
Thanks again,
Gene
I don’t think there are words to express how helpful this article was and is to me.. I’ve been starting to get into solar but never could get anyone one to break it down or explain it the way you did.. I’ve been off the grid living and tired of the generator
Absolutely brilliant tutorial, James! Thank you so much for simplifying the mystifying (not to mention overwhelming) world of solar energy!
Thank you so much for the simplification of the process for a “newbie”.
When dry camping, I am plugging my trailer shore power into my inverter to run the Microwave and the plugs. I turn off the breaker for the converter when the inverter is running. Am I making a big mistake doing it this way?
Well, I’m supposing it works, but the possibility of a loop if you forget to flip the breaker is kind of scary.
I think if I had to do that, I would unplug the converter, just for good measure.
I’ve never really thought of whether this was safe or not. Perhaps others will chime in.
I built an automatic switch box using an electrical contactor, which is like a relay but for alternating current. Calling it a circuit is an overstatement, it’s an electrical contactor mounted on a short DIN rail in an electric project box with 4 wires running to it. The sensor side of the contactor is connected to the AC cord into the van, leading to my inverter. My inverter has a built in transfer switch so the AC flows from the inverter to the panel either way. The switching side of the contactor is connected on the wire running from the electrical panel to the converter. If the van is plugged in, the contactor senses AC power coming in and it switches to allow power to flow to the converter/charger. Conversely, if the van is not plugged in, the contactor switches to prevent power from reaching the converter. Everything works perfectly, I can still use the panel breaker to turn the converter/charger on and off, all of my outlets get either shore power inverted power, but when the inverter is proving the power there is no way for the converter to charge the batteries.
First, this is the best analysis of solar I have seen. Second, kudos on it’s longevity, over two years old and still relevant and still getting comments. The thing I like most is taking into account the contribution, or lack of, for fresh water, propane, etc. as well as assessing behavior. Thanks for a great article!
Thanks, Jeff!
I’m right there with Jeff. This is the best, plain language, fun, easy to understand article on solar i’ve read, (& i’ve read a few). The picture of the sun, panel, ac, camper was exactly where my brain was going lol!
I’m now going to read lots more of what you’ve written in preparation for picking up my new toy on Tuesday!!!
Thanks 🙂
really good job on solar. l have a 26 ft 5th wheel that l take hunting and camping , l stay 3 to 4 weeks at a time no a/c power. my battery will (2) will last about 2 1/2 weeks then the generator. Ques is will a 2 amp solar panel keep up. l use lights at night and morn for about 1 hour and frig, water pump now and then. most all cooking and wash is outside. thank you
Well, anything is better than nothing. If your batteries are lasting 2.5 weeks, that’s pretty darn good. A 2 amp solar panel is only like 24 watts or something. If you’re going to bother adding the infrastructure for solar, then I would go with a larger panel. A 100 watt panel is a pretty basic size.
You sound pretty conservative. Who knows. With 100 watts, you might get a whole 4 weeks!
the only reason l asked about the 2 amps is because it was given to me for xmas and it is still in a box and l don’t know what else to use it for. thank you for the advice
I also agree this is a very good article on solar. I’ve played with solar power since the early 80s, powering a small cabin in the Teton valley and 280’ deep solar well pump.
For the last two decades, life got in the way, but after retiring jumped back into my old hobby. We’ve been RVing in a small 5th wheel (24’ class) and I installed 4 – 100W panels. 3 flexible on the roof and 1 rigid for manual tracking. Through 3 (mostly boondocking) trips varying from 35 – 45 days each, I find your rules-of-thumb right-on.
I started with two standard lead acid RV/marine batteries (paralleled at 12V) and a 30A Morningstar Prostar MPPT controller. By our third trip, I modified the system to 2-100W flex panels and 1-battery. Other than the first day when we we plugged in at an RV park to “summerize” our trailer, this system kept our battery topped by evening of every night (except the last two). We rely on the battery for lights, water pump, furnace fan, device charging. Our lp tanks lasted the whole trip, (refilled one, but never emptied the second).
We stayed 7-10 days at stretch. the story on the last 2 days involved trying to scale Vail Pass in late May in a snowstorm. 12” of snow, two days in Frisco at Heaton Bay CG and no hookups. Below freezing every night so the heater fan used a lot of battery. Our panels were covered with snow, but the controller still reported 2.1 Ahr generated over the 2 days stuck until the pass was clear down to Denver.
I agree. Don’t over build it.
James, this is all great information and here’s my challenge. I have a residential frige. and my wife likes to watch tv at night even when we’re boondocking. I currently have 640 watts of solar on my roof and I still have to run my generator 2 times a day, the last time being 2 hours before quiet hour to fully charge batteries for overnight. Normally I’m down to 12.2 V by the morning. I have 4 L16 batteries which are quite large and rated at 380 A H at 20 Hrs. What can I do to make it through the night without my battery falling so low? What about wind generator tied in with my solar panels?
Honestly, short of plugging in or running a generator, there are only two things you can do: Decrease your electrical demands, or increase the battery size.
It sounds like your batteries should be large enough for the task. How old are they?
heh James i just got a 2019 TRAVATO 59GL and love it , we do mostly boondocking and so wanted to add a 3rd solar panel on top to plug in the ready to go plug….we have the standard 140 and a 100 panel i think on top from factory Winnebago… i think another 100 would fit on easily and plug in that 3rd plug that is whispering my name each night my wife cranks up the A/C and i go sleepless watching the ‘GREEN LANTERN” battery gauge worrying about the engine coming on as backup at $4 a gallon in CALIforniA!! WHAT should i buy and can ya get just a panel w/o inverter and stuff that i don’t need? THX
Getting the panel should be easy. I believe on the current Travatos, the panels are made by ZAMP. You should be able to find one of their panels that will be plug and play with your system.
First off great article, I have been scouring the web looking for someone who can really break it down and tell me the best options for solar.
I am new to the RV life, I have a 2005 Lance truck camper. I plan to do mostly (if not all) my camping “boondocking”. I typically work 8-12 hour days 5 days a week so with solar it should get plenty of sun time. When in my camper I would like to run AC, charge/use cell phone, watch tv, and occasionally use an instant pot to cook with (I typically meal prep). How much solar wattage would I need to acquire? I don’t know exactly how large my batteries are (I am willing to upgrade).
Thank you for all your help!
On a typical RV, the AC,which is the largest single electrical load, will not run off of the batteries. The AC is a 120 volt appliance that is connected to run only off of the generator or shore power.
To run the AC off your battery bank, you would need a very large inverter (oversized to handle the current inrush during the AC compressor startup)- something around a 3000watt rating should handle it.
Assume 1800 watts for the AC and 6 hours of run time a day and that’s 15 amps times 6 hours or 90 amp hours. But the whole system is quite inefficient and to get 90 amp hours out of the system, you realistically need to assume a 60% conversion ratio. So dividing 90 by 0.6 equals 150 amp hours off charging input at the unrealistic nameplate ratings. As the article gave the daily output of a 100 watt panel at 8 amp hours per day, you’d need about twenty 100watt panels to just run the AC 6 hours on a perfectly sunny day. And now you can see why RV’s have generators.
What is the best way to connect an approx 3000 watt inverter. I am purchasing a 200 watt solar kit but how do i use AC 120v in my rv?
Uh…. with really big cables?
Seriously though, I’d recommend consulting with a professional RV or marine electrician in your area who can either survey your situation, or just do the job for you.
James- thank you for this article. It’s the most sane article I’ve seen for RV solar and it’s refreshing to see someone put the info out there just for the sake of helping others. While I’m not against affiliates, the internet is awash on sites that are really just affiliate marketing engines, and don’t offer anything helpful.
Glad you liked it!
It’s turned out to be a pretty popular article.
Hi James,
This has been one of the most helpful posts on RV solar I have found. I am buying a 2020 Jayco Seneca that is pre-wired with 8 gauge wire from the roof to the inverter. I’m hoping to get 1200 watts of panels because we plan to boondock for 2 weeks at a time. We also have an 8k Onan generator if needed. My question is; is that 8 gauge wire large enough to run 1200w of panels to the inverter?
You should be able to find a chart online that will give you the ampacity of a given wire or cable. My advice would be to over-build so that you have room to add if you want down the line. Plus, it’s safer.
You’ll need to know the nominal voltage of your panels in order to get the amps they might push.
James, great article in easy to understand terms. More importantly you provide real world examples rv folks can relate to. I’ve decided to go Lithium batteries for many reasons, but was struggling with configuring correct build out on my solar system to maintain them. I’m going camping first like you suggested. I’ll worry about solar build out after getting data you suggested.
Camping in the name of science!! I love it.
Enjoy it, and learn all you can!
This is a Rookie question I’m sure. My wife and I are retired, we decided to live at an RV park for 7 months a year in Florida. If the class C has some solar panels on top and Im plugged into the power at the site, Will I be using any of the power Im generating, or is the solar power stored in the batteries only used when unplugged ? Im running the a/c constantly i assume, but when I use the lights etc, doe the solar help me on the electric bill? Thank you. Most of the article was way above my pay grade, but I made it too the end and I appreciate your time
If you are plugged in, then you won’t really notice solar. I suppose technically it could cause you to draw a bit less juice from the pedestal, but unless your park charges for electricity by the watt-hour, you don’t really benefit.
Some of the RV parks in Europe charged for electricity this way, but we’ve never encountered one in the US. Maybe it’s different if you stay for months at a time.
Unlike a home, there’s no “net metering” with an RV.
Thank you, yes its water, septic, trash and lawn cutting, we pay for the electric used per month. If we stay more than a month electric,. is put in our names.
I followed your solar sizing method and am close to installing some panels on my Bigfoot TC. Before drilling the fibreglass roof, I have realized that perhaps my smokin’ hot deal on a pair of 160 watt panels was a mistake. Upon close examination I realize that the junction box on the back of the panels is rated IP65.
Are you able to comment on the wisdom of running these panels on top of a 70mph vehicle in heavy rain? I’m concerned that IP65 might not keep the water out.
Our Zamp panels are – I believe – IP66 rated. So just a little bit better.
If you think about how a solar panel is mounted though, it might not be such a big deal. The junction boxes on the panels are typically on the bottom. I don’t know about your panels, but on ours, the boxes do NOT extend below the frame of the panel. Which means that any water would have to bounce off the roof and back up to hit the box at all. I suppose turbulent air could carry some water up there as well. But in any case, it’s not like you’re putting the junction boxes on the grille of your vehicle and driving into a thunderstorm. I think you’d probably be OK. To be safe, I’d try to rig up some kind of mounting solution that you could replace the panel from if it ever went defective.
You have me rethinking solar power. I stay maybe three days at most usually and then off I go. So I need more battery power. I don’t use the air conditioner much here in the Pacific Northwest but I would like it use my microwave and TV. I have one lead acid deep cycle battery. Maybe I should add three more since I have room for that many. Will my truck charge all four while driving and will they last me long enough. Or should I buy a generator ? Oh and can I buy an inverter and go from the battery power plugged into my land line power socket? That would be easy. My trailer is a 2018 and has LED lighting.
If you have room for the batteries (and cargo capacity for the weight) then yes, I would add batteries before adding solar panels. They’re more useful in a wider variety of circumstances – like clouds in the Pacific Northwest!
If you wire them properly, then yes, your vehicle will charge four the same as it charges one – just perhaps more slowly.
I can’t say whether they’re enough, but you could go camping in the name of science to figure that part out.
Thank you for clarifying a lot of points I’ve been wondering about (cost of panels, how I use the system, tilt vs no tilt, etc) I think that if you were to harness the brain energy you’ve obviously expended on this subject you could probably run your air conditioner for a few days. I will say, however, that after researching the cost of your litium battery, extra alternator, inverter and such that you are waaay out of my league. Also, should it fail on the road at 2am like these things invariably do, I doubt I could walk into a Walmart or RV supply the next day and find a fix. That said, you have a really cool system. Once the price of lithium batteries, inverters and controllers come down out of the stratosphere I’ll be the first in line. Keep up the good work!
Same here. The last 1200 watt solar system I admired on a fellow rv’rs rig (w. 3 – 100 ah lithium batterys) cost a whopping $15,000 ! If the owner would have mentioned the price prior to the grand tour, I would have skipped the solar dream tour. 15 K ? !!!! A generator never looked or sounded sweeter. Great info here though on building a solar system.
Yo John… I think you got ripped off on your solar install. $500 for panels & misc, 3 battleborne batteries at $3000, Mppt Charge controller at $500 and misc wiring etc at $1000 and if you paid someone to install 3 days at $3000 it put you in at about $8000. Was this done at Camping World????
OK here is my situation. I am curious as to your thoughts. 2008 Majestic 29′ Motorhome. Most camping done on the western slope of Colorado. SUNSHINE New to this adventure. Unit has a single Group 31 105 AH battery and the tray does not have room for a second.
We have Onan 4000W generator to run the AC if we ever needed it. Typically I will leave on Friday come back on Sunday. I would be dry camping the whole time. The fridge would run off propane and a small amount of DC, Maybe if it rains we turn a small tv on for an hour. DVD player. Fluorescent lights — until I replace with LED…. Mostly its going to be the cool Colorado spring and fall nights. I’ll probably turn the heater on at 9 and ff at 7.
Could I get buy with a simple 200W portable unit and avoid making holes in my roof? Should I do a 400W roof mount or even more? Removing enough from these so they are not free links for Amazon.
https://amzn.to/2Z0432U
https://amzn.to/2X1o5Zp
Honestly, in your situation, I’d start with more battery.
I know you said there’s not room for any more, but if you were to go with a drop-in lithium replacement – that would effectively DOUBLE your battery capacity instantly. No worries about cloudy days.
From there (now that you’ve got enough juice to last at least a day), try the experiment in the article and see where you wind up.
I have a 24′ TT and a 100 watt Grape Solar panel with a Xantrex 35 amp controller. Question is why the panel won’t get my batteries as fully charged as my household current at home?
Most of our power use is just for lights, but when temps get down below freezing we use the heater and the fan apparently sucks down the power. When we start & batteries are fully charged from our household 120 v, the batteries last for several days under these uses, but once i’m down on the gauge, I need to use the panel every day. Even though controller says the batteries are full, they’re not as full as when charged up with 120 v.
Interesting.
I’d question whether the charging parameters are set properly for your battery. Are they adjustable?
The people at Xantrex said I need a larger panel, preferably above 9 amps That would be at least 180 watts w/a Grape Solar system. Sounds do-able, if necessary
Do many full time boon-dockers add a wind generator to their solar systems?
I’m sure someone has. Not us though. We don’t stay put long enough to make something like that worthwhile.
Thanks for you knowledge and honesty! Spoken from an engineering
not marketing perspective. My young son is an EE working for Toyota and I’m starting to understand how engineers think. 🙂
I’m a vacation RV’er using our TT for long weekends or 1 week vacations. I just want to go places that don’t have power pedestals and keep my 2 6 volt Trojans charged.
What do you know about the Renogy panels? The are comparatively inexpensive and I’d like to know why. I’m not one to buy cheep for the sake of cheep. I like quality but I don’t like wasting money either.
Thanks James! I’m a fan of your Youtube channel. Love your style…don’t change a thing.
Dan
Many people buy and use the Renogy panels without problems.
Though I haven’t used them myself, I think they’re probably a fine panel for the money based on anecdotal evidence from other users.
I like your tip about trying to conserve extra energy. That would make sense considering you don’t want to burn the energy you store. I’ll have to consider your tips so that solar works for me.
Great presentation, James! I might be getting this someday yet. I think of batteries like buckets, but they leak all the time and get less full… well anyway, it’s not a good analogy.
My goal is to be able to have breakfast without running the generator! I have an induction stove & a microwave to cook with, both require 110. Behind that goal, is to skip using the generator on days we don’t drive (several), as I don’t like the noise/pollution nor did I like other people’s generators when I didn’t have or need one.
1. I should have been more diligent getting a propane stove top. The induction works fine, but can’t use it without the generator or shore power. Almost everywhere we’ve camped since we got the van limits gen use to 10AM. Kinda late for breakfast. I have been using my old backpack stove, but when it’s windy or raining that’s a pain. So I missed my first goal from the get go.
2. In our camping test, we ran the batteries (2, 105Ah flooded 12V) down to 50% two nights in a row this week using lights, the small Truma fan (I assume it’s small, it makes 1/10th the noise of any of our other RV heater fans) a limited amount (set at 54F) AND the refrigerator. All of this on an early 2018 Crossfit. That compressor reefer is killing the battery I think. If there had been an option to get the old style cook top and propane reefer that’s what I would have chosen. I didn’t see propane reefers on any of the new vans of interest but a Popular from RoadTrek was the only thing we looked at with both propane options. We have 200W of solar and no inverter with our 210Ah of battery.
So right now I’m reading blogs and user sites to figure out what to do before spending more money. It looks like doubling the battery pack would get us through 24 hours, maybe. There are some high rated AGMs, I think one rated at 300+, so 2 of those would be over 600Ah. Don’t know the cost. Adding more solar might not help much, tho that’s the direction I was headed. 100 W panels (we have 2) are good for about16 Ah/hr in charging so it takes a long time to get to 210Ah, I see 12.8 hours on my calculator, but more like 6 to get the 50%, 105Ah needed as long as I keep the batteries above 50%. Oh my! Equator camping indeed! To charge 600 Ah is at least 1.5 days without any over daytime use or night time loss!
I still have a question about the capacity of my batteries, i.e. whether they are able to deliver the Ah they were rated for since they sat around for a year after the coach was built before I bought it. I might be dealing w/ limited capacity at this point. Need to find out how to determine that. I think there’s a load test for that but don’t know who to ask for the test. From what I have learned from others online my experience may not be that different. I think the builder (Coachmen) expected their B vans to be used from Point A to B each day w/ van engine alt charging to get thru the night, which it will. Or people will stop for extended time where they are plugged in. Boondocking requires generating it looks like…
So part of my question is about an inverter to run the induction cooktop which I think is 1400W about 10 minutes in the AM when my current battery is already at 12.0-12.1V. I think I need more battery and will that require a 2000W inverter?
I am in awe of your persistence on your tech pursuits, your writing clarity and your willingness to answer questions. Thank you!
Interesting saga there – but to answer your question… yes.
It sounds like you need more battery capacity for your style of camping and the rig you have. That’s problem #1.
Problem #2 is yes, you also need a larger inverter (if you want to run the cooktop wide open). I don’t know of any 1500 watt inverters off hand, but that might be cutting it close anyway.
A 2000 watt inverter would be enough to get you cooking.
Best of luck!
Regarding your concern about battery capacity and suspicion that you aren’t getting rated AH capacity: if your batteries are lead- acid and since they sat in a dealer lot for a year it is likely they were poorly maintained and developed some sulfation on the plates. This occurs over time and is accelerated by deeply discharging the battery, or by not fully recharging the battery to a full state of charge after partial discharge. “Equalization” is a charging profile that can reverse some levels of sulfation and recover lost capacity on degraded lead acid batteries, especially liquid cell batteries that require owner service, like most golf cart batteries. Sealed maintenance free batteries and AGM or gel cell batteries may be limited in the amount of equalization that can be performed, or it may be damaging to the battery, so check with the manufacturer for the proper profile and especially for restrictions. The high voltages used can damage some types of lead acid batteries or cause boil over, so read up on it first AND follow battery and charger manufacturer recommendations precisely.
I’m sorry but I want the horse in front of the cart. Batterys are the limiting factor. Once I have all the batterys I can: afford, carry, place I need to know how much solar is needed to safely ( for the batterys) to charge them as quickly as possible. Depending on battery type, change rates vary so no matter what I want to power I’m still limited by available battery amp hours.
Still the best article I’ve read to date!
True – on a day-to-day basis you’re still going to be limited by the size of your battery bank.
Lithium batteries offer the best electrical-storage-to-weight ratio. You’ll have to do your math.
Interesting factoid: On our lithium powered coach, I’m actually going to *remove* solar panels. Our alternator charges so fast, and our capacity is so large, that we don’t find solar gives us much.
Solar, for us, it mainly useful when the rig is in storage. That’s it.
Great article James,
I have a few questions. I live in a Step van in Santa Cruz. Currently been living In The van as a full time student for 16 months. I am getting really close to adding solar. I did t think I needed it but the longer I’m in the van the more I would like a few amenities. I ran my batteries dead once since living in the van( 2 x 12v deep cycle batteries ) using a regular battery inverter. Was charging a phone and a laptop all night, that’s all. Since then I worry about killing my batteries so I use them quite miserly.
I want to stop worrying about my van batteries and be able to charge my minimal devices in addition to a few security cameras. All my other need run on propane. I was thinking about getting more than I needed just for potential upgrades(maybe an energy sipping cooler and a water pump)
What are the best cost efficient batteries to buy that I can have inside my rig? I’ve been thinking of still keeping everything minimum but I don’t want to waste money on batteries that will not be useful in the event of an upgrade.
I need a couple solid batteries and I’m thinking one 100w panel.
What do you think?
You probably don’t want to have regular lead-acid batteries inside your van. They vent – and you don’t want to be in the same space with that.
You can get AGM batteries that are sealed. But the best bang for the buck, long term, is lithium.
They’re expensive up front, but will last far longer and provide double the usable capacity than a similar AGM battery.
No venting, and they’d actually prefer to be kept in the van with you.
Most good ones would come with a BMS that should prevent you from destroying the battery by over-discharging it.
But yeah… expensive up front.
Hi James, great article. I fully appreciate the “ya, but do you really need it?” approach here. I found it while looking around for wiring diagrams that cover solar charge controller integration with the existing converter. We just bought our first trailer – a used 21ft toy hauler. It came with a 200W Blue Sky solar system and I wanted to verify that it was set up properly (the prior owner installed it himself), and what it would take to upgrade to 400W. After reading this, I doubt I really need to, but might want to, because, well I’m an electronics geek and I do that sort of thing for fun.
Anyway, I have a few questions: If the tow vehicle remains electrically connected to the trailer, will the solar system (or any other trailer-side charge source) charge the tow vehicle battery(ies)? Or is there typically some level of isolation to prevent that? And are the tow vehicle batteries usable as part of the system total capacity? (I understand the dangers of running down your car batteries while camping. But we have a diesel with two huge batteries in it.)
Thanks!
Well, this stuff IS fun, so I can’t fault you there… 🙂
We have a motorhome, not a TT, so I’m less familiar with those systems. But if I had to guess, I’d say that the battery on the tow vehicle is (or should be) isolated from the TT at all times when you’re not driving.
The possibilities for stranding yourself unintentionally are just too great otherwise. With that in mind, any charging or connecting of the batteries between the two systems is likely done by a relay on an ignition-switched circuit.
Totally guessing at that, and it sounds like the kind of thing I would set about testing myself because each rig could be different.
Mark, try this test {in the name of science!}: measure the voltages of the trailor and tow vehicle batteries, preferably when the trailer battery is partially discharged. Then hook them together and turn on the tow vehicle engine, and record both voltages again. If the trailer voltage starts to rise, then the tow is charging the trailer battery. After a period of charging, turn off the tow engine but leave it electrically connected in the configuration you plan to use when camping. Let the batteries “rest” at least a half hour, preferably more, until voltages stabilize. Then run some significant trailer loads and see if the tow vehicle battery starts to discharge. If it does, then the tow batteries will contribute to your house loads, but could also be drained by them.
On my vehicle (a motorhome) the engine charges both sets of batteries, but the chassis battery is isolated from the house loads to prevent being stranded with a dead starter battery.
James, I used your article and others to add 2 100W flexible panels and 30 amp controller to my RV to charge the house batteries. Everything was great for 6 months, never plugged in and all boondocking. Last week I found the house batteries dead, and no solar power. After much testing, it appears to be the panels stopped working. We actually tested output at the panels. But, is there any way the charge controller may have caused the issue? They seem more likely to go bad than panels. The controller shows the battery charge level fine. I may not fully resolve this until I plug in new panels. Any thoughts?
I fried a solar panel once by hooking it up backwards on my bench.
It had a diode in it. That diode is, as I understand it, intended to keep the current from flowing the other way. In other words, preventing your batteries from draining themselves trying to excite your solar panels after the sun goes down.
So, if the output from the panels is dead, and you have a diode on the back of the panel somewhere, then perhaps something blew out that diode.
Would that be the controller, or a random surge, or something accidentally making contact in the wrong way? I can’t say.
But it’s something you can look for. (And diodes are cheaper to replace than panels…)
This is, without a doubt, the BEST article ever. Thank you very much. I no longer travel but because of two incidences: I lost power in my house and I had a guest stay over and I live in a one bedroom cottage. I have decided to have a small camper in my backyard (as an emergency guest room): I want to get an older one since I won’t be using it on the road. I also want to make it totally off the grid. By your article, I feel confident that a 100-watt panel and a 120 amp battery should do. (About 15 hours to charge). As for what’s inside. I small TV, a small radio, a propane heater, and a gas stove. Am I correct in my assumptions?
The battery capacity is going to be the biggest thing that would hold you back. Your needs are modest, but depending on where you have the trailer, having the fan on the propane heater cut off during the night could be a big deal.
Our last rig, and current model Travato rigs, come with 220 AH of battery capacity.
I’d say if you double the battery capacity, you should be good enough most of the time. If you had two really cold nights in a row, in the winter, you might want to look at additional solar capacity.
So I would suggest getting a solar energy system that is expandable and you can plug additional panels in later if you see the need.
For 2019 Winnebago offers the Travato 59GL with The Pure3 Energy Management System. This is a 48V Lithium battery “storage pack” that is suppose to replace the generator. Seems to add about $20K to the coach price. It sounds techy and fun but I seldom ran my generators on prior coaches because I could always find electric. For the money I’m leaning toward the 59G with 200W of solar which should (one person) keep the lights on. I think the small holding tanks are going to bite me the most. What do you think?
If you’re not going to run the generator much, then the non-lithium version may be right for you. (But having a lithium powered/no-generator coach now… there’s no way we’re ever going back.)
Small tanks have not been a problem for us, but we installed a composting toilet which saves water and tank space.
I guess this can be applied to a power boat too. I would really like to get rid of a 5k Kholer and go full battery.
The same concepts would absolutely apply to a boat!
I need to know how much solar (batteries/lithium?) I would need to run an air conditioner at least 12 hours a day when boondocking? Open to any type of AC, a 5000 BTU window unit, a portable, Marine or rooftop or any other suggestions you have. Thank you so much!
First – I’d recommend reading this post.
But – to amuse myself…
If you have a typical 1500 watt air conditioner, you would need 18,000 watt-hours of battery to run it for 12 hours. (1500 x 12).
That’s a giant battery. Truly massive. You might want to put it in a trailer.
To recharge that battery using only solar, you would 36 or more 100 watt panels.
OK. This is getting ridiculous… I’m going to stop now.
Ok, as an Electrical Engineer I ca say that James’ answer is off quite a bit.
First: The Air Conditioner does NOT run full time. In expedition type builds the vehicle walls, floor and roof have very good insulation values and this generally means that the A/C only has a cyclic duty cycle of 20 to 50% depending upon heat load, setting and insulation.
The numbers I ran for a 6m X 2.2m X 2.5m 2″ thick FRP foam sandwich panel working on a 36F (20K) differential was about a 25% duty cycle for a 9000btu/hrs (about 1 low electrical load) A/C. Hence for the 10 “heating” hours you are looking at 2.5 kW-hours. Given that there are about 5 peak sun hours and you want about double that amount of energy for the entire day about 1 km of panels should be sufficient.
A battery bank of 10 kW-h should suffice. This equates to 8-10 100A-hr LiFePO4 13V batteries. At 35 lbs each you will be right at 350 lbs, or about what 4 group 31 12V AGM batteries weigh with over twice the total usable capacity.
It CAN be done, it is not cheap, it takes space and, above all, it requires a very well insulated camper body (in my example the body was R-10 insulating panels).
Dr. Larkins
What a great article James! And the schematic you provided sure broked down the components (and how they are connected) very well.
My question – puchased a 2019 Regency Class B+ motorhome which was supposed to come standard with 2 100 watt panels (flex), 2 6volt batteries, and a 2000w inverter. To compensate for shade, we added on 2 more 100 watt panels. After delivery (but prior to taking it out for the first run), we discovered that the rig did NOT have the 2000watt inverter – which the mfg now says was a misprint in their sales literature. WHAT??!!! Needless to say we were shocked and stunned, as our main purpose for buying this rig was to have it off-the-grid ready.
The Mfg is suggesting we bring the rig back to them, and they will then add the inverter and change out our 2 6v batteries to 2 lithium batteries. Our thought is, (after having the rig in the service center for abt 2 months fixing warranty issues) is that the company does not have “building these rigs” figured out yet, and we are extremely hesitant about letting them bastardize the unit now to add in the wiring and all componets necessary for the 2000watt inverter. (We assumed they knew what they were doing when they designed the rig, but apparantly not).
Right now we are seeking legal advice under the lemon law to have them fully refund our purchase price. (Which currently, they are refusing to do.) However, would be interested to know if in the same position, do you think it is feasible to even consider stripping down the entire rigs electrical system to add the inverter (and other needed components) into the equation, or would you say “run for your lives!” We are worried that not knowing what they are doing, how many years of trouble could this bring, and also uncertain of the lithium batteries and fire potential. Any insight you have would be helpful. And again – thx for the great article!
Actually, adding an inverter is not really that difficult. Some heavy cabling, the inverter, some fuses, and maybe a remote switch. I guess part of the complexity depends on *where* the batteries and circuit breaker panel are in relation to each other. And in where the inverter itself might fit. The electrical bits are the easy parts of that install. It’s the physical things that will be difficult.
If the manufacturer has experience in installing inverters in other models (should be easy enough to check), I think they could probably do it.
Another alternative would be to see if they would reimburse you from having the install done at a third party. That’s how we added an inverter to our already-built rig, and it worked out fine.
Loved the article! What would you suggest for a first time RV couple? Neither of us has any experience with RV’s. We are retired so we won’t have kids with us. We are planning on getting a Class C under 32 foot. We plan on using it mostly in RV parks so we would be plugged in. We thought we would need to get solar but after reading your article that doesn’t seem necessary. What should we look for in alternator, batteries, and inverter? My big concern is we use our laptops, ipads & phones all the time and we would really like to use the A/C 24/7 on hot days. Do you recommend one RV brand over another? Thanks for all your help.
For a first time RV couple, I’d recommend reading our post on how to select your first RV!
You can find it here:
8 Step Program for Choosing Your First RV
I would like to purchase the Edison Battery package that put out 300 amp hours. It has the 300 watt panels (8) of them and the batteries. Most travel campers require 220 hook-up. Will this system run my medium sized travel trailor?
Not familiar with the components or system you’re describing.
Perhaps another reader knows these items?
I have a question I seem to be getting mixed answers too. I live in the south and my 27′ TT can be an oven without the A/C. With the the A/C and my fridge on electris my TT typically draws 16 to 20 amps through the shore line.
I don’t cook in the trailer, but I may run my toaster once a day. Usually with the A/C off. Personal choice as I don’t spend lots of time in my trailer after I wake up. Coffee Pot once again the A/C is off.
Still never more than 20amps through the shore line.
A/C is on at night.
Is a solar system available to handle this? Yes I know I can get a generator, but many places frown on them runnng. A lot of state and federal parks are non-electric.
Frankly I like the idea and freedom to go further and not worry about stopping in a rest areas. Knowing I can stay fairly cool and not bother anyone.
Don’t think of it in terms of a “solar system” to handle this.
Instead, think first of how much battery capacity and inverter capacity you need.
All the solar in the world won’t help you keep the AC on at night (you know… no sun). Battery capacity is what will keep your AC on at night (or on a cloudy day). The solar then, just helps keep the battery charged up.
I’ll go out on a limb and say it’s extremely unlikely that you could get enough solar power on the roof of a 27′ TT that would fully charge in one day a battery bank large enough to run air conditioning all night long. I just don’t think that’s going to happen with today’s technology.
All the a/c units I know of require 110 volts ac, not battery supply
There are some 12v AC units, but yes, the vast majority are 120v. An inverter (or inverter/charger) is required to get the battery voltage up to 120 AC.
That’s 20 amps 110 so it will be 200 amps 12 volt you would need lots of solar and battery power
I really enjoyed reading your article. I think it has useful information that my dealership may not be willing to give. I will be living (solo) in my 27′ Winnebago Vista LX. I will not always have access to hookups for several days at a time. I also may leave my rig to do some international travelling. I will have the standard issue fridge in it. I want to avoid using the generator. My unit has an inverter. It sounds like I may need two panels and a couple of extra batteries. Would you say that sounds about right? Also, someone mentioned needing to do some extra wiring. Would that be to allow for storage of the “extra” solar energy for when it is needed later – say on cloudy days?
Offhand, I don’t know the power consumption of the Vista refrigerator. But if you follow the advice in the article and do a test camp, it will tell you where you fall short.
“Extra Wiring”… Not really sure what that means. Did you get a Solar option and you have solar panels already?
If not, yes, you will need to wire in a solar charge controller, and wiring runs from that to both the solar panels and your house batteries.
Hello James. I just ran a test on my 2017 Thor Aria this week. I fully charged my batteries (four 6 volt) before I left on Wednesday ay 11:15 A.M. I left the refrigerator running. When I returned on Saturday at 4:30 P.M., the fridge was still cold but not running. The batteries had automatically shut down, even the light in the fridge did not work, neither did the clock on the microwave. So with this test, my best guess is that the one 100 watt solar panel does not produce enough energy to keep the fridge going indefinitely, but it does help. I have not tried, but I imagine the batteries will not power my A/C unit. Just thought this info would be helpful. Thanks for your article. It was very informative.
Sounds like your fridge is a residential (or at least a 120v) refrigerator. If it were possible to shut down the inverter, you would save some juice, but likely still not enough to keep it going forever.
I don’t know the details of your inverter, but if it is large enough, the batteries *would* power the AC. Just not for all that long before system shutdown.
Yes, it is a residential fridge. Not sure if the inverter can be shut down as I’m fairly new to the RV world, still learning. I didn’t know that the fridge would work without the inverter, again, new to this. Interesting idea though. I think I’ll try that. Thanks!
Wait!! Don’t turn off the inverter if you have a residential fridge! It needs the inverter to run.
Was just asking the question.
Turning off the inverter is only an option for you if you *don’t* need the refrigerator.
Great stuff, and much of what I need to learn…but, my math stinks, so getting ‘just’ the right amount of solar panels is still a guessing game for me. I’m new to this ‘motorhome’ lifestyle, and yes, all of us live differently (I tend to boon dock more than most) and I live in south west Canada (similar weather as Seattle) so when I’m out on trips locally, the ability to get the needed wattage is diminished by clouds…and rain sometimes,…Oh, and we have a ton of trees too…SO, do I decide on getting as many panels as can fit on my coaches roof (36′ Class A) or not…but then, what about when I go south in the winter and spend a few months in southern Cal or Arizona? I then have more sun than needed if my roof is covered in panels!
We are, as you alluded to, tired of firing up our 7500 Anon every morning and again at night for our 4 six volt 232 Amp Hr. batteries to charge…but for now, it works! I’d love to go with a Lithium battery mainly so I can moved down past the 50% mark more frequently, but, it depends whether I can get that past my wife, as ‘she’ is the budget minded one of our family. Our coach is 10 years old, but, it has a large residential fridge…of which (I don’t necessarily understand) after being plugged into my Kill-A-Watt, tells me after 96.5 hours, that the fridge is using 6.01 amp hours (I believe). Again, not a math wiz…but 232 X 4 = 928 then 928 @ 50% would be 464 amp hours per day? So, my 6 amp hrs (fridge) times say…12 hours would be 72 amp hours?
My OEM meter, just shows a gauge (no numbers) as to state of charge, so I’d be guessing, but overnight most nights…I’m above 50%, but not by a whole lot…so, I must be drawing a lot more ‘amp hours’ from other sources than just the fridge? I have all LED bulbs…so there are partial draws here and there, so I assume I just have to guess at what they are? When I enter our coach, there is a bank of switches on my left side, of which there is no way to turn off the lights for those switches (I believe that to be a safety factor personally) and the tv’s are off…but must draw a little bit anyway…as do any HDMI type devices? So, with all the said, from where I live…how I travel (lots of boon docking, but not essentially all the time), lots of local trips…several longer (months) in the southern climates, where am I at with the amount of panels needed? I don’t mind being ‘over’…not that I like to waste power, but realize our lack of sunshine…and may very well change to a different battery setup if needed. The hard thing being…to stay with my current batteries until they are ‘done’ and then move up to AGM or Lithium. I have a Xantrex 2000 watt inverter currently…would that be enough, or the right one to work with solar? Some say they have a separate inverter for their residential fridges…how necessary is that? How do we know who is the best installer in our areas? Does one go by how long they’ve been in business, or go by other factors? I would like a quality controller…one, that can help me ‘learn’ more about amps, watts and volts (and amp/hours) the more I use it! I believe the solar panel’s in array these days have their own controllers don’t they…or is that not the right term? Thanks for any suggestions/advice you might have on this, as I know many are in the same boat I am, so anything you can suggest would be of value for sure.
Well, the first question I have would be… if you are just using your rig normally, how many hours do you have until the batteries are “done” or at or below 50%? If I read your description correctly, it sounds like you may be getting less than 12 hours if you have to charge at morning and at night. Is that correct? If that’s the case, then all the solar in the world won’t help you at night… you need additional battery capacity to get you through the night and until the sun is high enough and solar could kick back in. Have I got that right?
Dale, there is one possible error in your capacity calculations. Since you have 4 six volt batteries, these are almost certainly wired in series-parallel configuration, so you should think of them as TWO 12 volt banks each of 232 AH capacity for a total of 464 AH. (Series connections add the voltages but retain the same AH amperage and rating.) Thus your 50% draw down limit would be 232 AH. That is probably the biggest reason you aren’t getting the power duration you were expecting.
I am getting a new Mirada 35LS – 2018 and would like to put solar on the roof. A commercial fridge is in the coach. When I am not at a campground, I would like the fridge to be on 24/7 when it is park, this way I don’t have to empty it every time I go camping.
Solar is too unreliable for that kind of usage. A few cloudy days in a row and you could have a whole refrigerator of spoiled food.
I’d recommend a plug in solution for keeping food refrigerated.
I’m not saying it can’t be done with solar, but to hedge your bet, you would want to go really crazy with battery capacity. Depending on your risk tolerance for cloudy days (do you want 85% certainty? 99.9%?) that could get expensive.
So can you explain the workings of a Solar Powered Generator? I saw this Rig (45 footer), with a Solar powered Generator. What are the pros and cons of a Solar powered Generator and a normal 5K, 8k, or 10K (onan) generator?
Well, I don’t know exactly what they meant by “solar generator”. That’s just sort of a marketing term.
Do you have a link to a specific product you could share? I don’t want to comment on something without having a look at it.
But one advantage I can think of for the Onan generator is that it will work regardless of sunshine or shadows…
Yes, some generators on the market do not run off gas/propane but powered by solar. The advantage one can use inside and it makes no noise. Goal Zero Yeti is one of the popular power banks that can be charged with solar panels.
https://amzn.to/2NysNNI
Yeah. I stand by my characterization of “marketing term”.
Since that product does not have the ability to produce any power whatsoever (note, it is not sold with a solar panel), it’s merely an energy storage device. Not a generator at all.
What you’ve got there is an inverter/charger and a battery. It’s simply a smaller capacity version of what we have installed in our own RV.
On the unit that you linked, if you were to fully deplete the battery, and then charge it with a hundred watt solar panel (sold separately), it would take about a week of cloudless sunny days to charge the battery back up.
Finally! I now almost understand solar power 😉 I am also realizing I probably don’t really need it. I think just running my onboard gennie to charge up my batteries would be the cheaper route to take. Plus, I don’t stay put for too long. Thanks so much for this article. It has helped immensely!
Glad you liked it!
I have a 32′ pull behind camper that I live in full time and have been looking to switch to solar power as an alternative to having a power bill, or at least have a reduced power bill. Your article was very helpful but I’m still unsure as to how many panels/batteries would be sufficient, and was wondering if I could use a month’s power bill and calculate what I would need. I’m still in the research stage and I’m just trying to get as much info as I can before I spend any money
First… Very interesting question! Thanks!
Your situation is somewhat different from the one I wrote the post for. It sounds like you’re more or less stationary, and plugged in to shore power all the time that’s metered.
First question would be: do you qualify for net metering? If you can sell excess power back to the power company, that changes the whole picture (and the equipment, but that’s a whole different line of thinking).
But let’s say you don’t. The only electricity you can replace with a typical RV solar power system – without significant rewiring and expense – is on the 12 volt side. When you run your air conditioner, for example, that will run directly off of the grid power. The solar power charging your batteries won’t touch it (unless you had a really large inverter installed, and even then, most inverters will pass power through when you’re on shore power).
In a typical RV without an inverter, the only point of crossover between the 12v (battery/solar) and 120v (grid power) sides is at the converter.
Some models of converter actually plug in – like a wall socket. If you have one of those, then a 100% positive way to know how much juice your 12v side is using would be to buy a “Kill A Watt” and plug your converter in through that. It can tell you exactly how many watt-hours you use.
But in any case, I’d say your 12v loads are likely small compared to your 120v loads. If I had to just guess, I’d say solar won’t buy you much (again – unless you can sell the power back).
But wait. I’m in a similar situation-fulltimer, stationary travel trailer.
I recently purchased some undeveloped land and will move the trailer onto this land soon.
I’d really prefer to go 100% solar vs hooking into the grid. Are you saying that I can’t set up a solar system (“solar system” get it? Har har) without significant re-wiring of the trailer?
That’s correct.
To use all of your electrical accessories, and to use them at night, you would need a large battery bank and inverter.
On a typical travel trailer, there would be some significant rewiring to make that happen.
Great article James. I am glad I found it. Similar to Gina, I rarely move my camper trailer. I understand most of what you said however my challenge is to determine how large a battery I need. I currently only have a 12V marine battery, no inverter. I am running strictly off generator now and want to stop the gas, noise and pollution. Any hints on determining battery size?
Well, the first question is: do you run the 120 volt appliances after dark?
You need the battery to make it through the night. If your current 12 volt battery makes it through the night powering your 12v appliances, then you only have the 120v side to worry about.
The 120V appliances can generally be monitored with a Kill-A-Watt. That will give you exactly how many watt-hours you use over an evening.
In the “mostly stationary” situation, especially with Gina who has a plot of land, would it be feasible to build a small shed or use a tiny cargo trailer to put your additional battery storage and mount the solar panels on and simply plug in with all the “new” wiring in the shed instead of tearing up the RV?
Well yes, that would be feasible.
Interesting idea… making your own power infrastructure to plug into.
That would be a pretty expensive trailer though!
OK James, you are a friggin aerospace genius with these numbers and concepts, LOL. I am a simple retired physiotherapist who wants to get back on the road with my wife. I’m not going to try to figure everything I need to do this type of system, BUT I don’t mind doing a lithium battery and Solar, and SERIOUSLY don’t want to have a generator. We are going to buy an older 59G, 2017.5 or 2018 I think. Really want to boondock as much as possible. Run the Frig full time. NO TV, very limited AC, some laptops, but nothing too demanding. I’m thinking one Lithium battery and 200 maybe 300 watts solar. I can’t seem to find anyone who can give me a reasonable answer. Neil of UM referenced you in his latest video post on going all electric. I think going all electric seems a bit far fetched. I don’t mind propane for cooking and for the Truma. I want a simple rig that can basically be easy to take care of concerning electrical matters and do lots of boondocking without flying monkeys. LOL
I hope you can help point me in the right direction. Thanks so much.
Hey there –
Honestly, I think a standard 59G would get you most of the way there. The 2 AGM batteries are about equivalent to the 1 lithium battery you were referencing.
The best advice I can give you is to buy the rig first, and then see where you fall short. Often times, how you *think* you will use the rig, and how you actually wind up using it can be very different.
Excellent advice James. Thank you so much.
If you’re going to boondock you should be running a refrigerator on propane. Most cost effective.
Hello, I have a question that I can’t seem to get answered from the internet or YouTube. I have a small 2016 Viking RB12 (hard side a-frame pop-up). It has a 12V battery as only power storage. It is prewired for ZAMP solar. I explored the option of purchasing a 100W solar panel and from my charge controller, I would use a MC4 to SAE adapter. I would then use a SAE polarity reversal plug because of Zamp’s reversed polarity. I believe that this would keep my battery charged, however, I would not be allowed to use the 115V outlets inside the camper unless I have an inverter. I am not that mechanically inclined so the thought of wiring a separate inverter inside the camper with all of the wiring and fusing did not appeal to me. I then thought about getting a solar generator with an inverter. I can connect the solar panel directly into my generator/inverter combo. I would then want to plug the camper’s power cord to the generator. My thought is that this would allow my battery to stay charged and provide my with 115v outlet usage inside the camper. I, of course, would not attempt to run the ac under this arrangement. My question is would a 100W solar panel with a 300W generator/inverter to the camper’s power supply be a good setup? Could I charge the solar generator at the same time I draw from the generator with small electronics/led lights? I would appreciate your thoughts.
I don’t know exactly which product you’re considering or what the capacity of your battery is, so this will be kind of vague.
By “Solar Generator” I assume you’re referring to one of those all-in-one battery/inverter/panel devices made by folks like Goal Zero?
The various models come with different capacities and capabilities. So as long as you stay within the capabilities of the unit you choose, I don’t think you’d have a problem.
As far as “charging while discharging”, that depends on a lot of things, but in general it’s a matter of math: if your power in from solar is greater than all loads on the system, then yes, it’s a net charge.
James you are exactly the person I’ve been looking for. You are obviously the one to ask this – now here’s my dilemma…I told my wife we needed to go solar because we live in our motorhome and all we do is boondock so we are constantly draining the batteries and on top of it our Onan marquis 7000 generator stopped working so I was always having to start the engine to charge them up again. So I had to do something and i did!
Unfortunately I was brand new to this and after everything that I was looking at online I decided on 4 100 watt solar panels and a 20 amp charge controller. Well i chose these particular solar panels because they were the cheapest $80 each and the controller was I think $12. Anyway I had to find out the hard way that the reason they were that price was because it doesn’t come with anything else at all just the panel. So here i now own 4 100 watt solar panels minus any type of instructions or anything else. My wife is ready to leave me over this seriously because she is the one that put the money out for them and they still haven’t been installed. I try to explain to her what is keeping me from doing this but she is so furious she doesn’t want to hear it.
Now this is what I am working with :
We have a1997 National Dolphin 535 36ft motorhome:
The owner before us decided to remove the gen that came with it originally and replaced it with an Onan marquis 7000 which was working but now it is not.
I have 3 brand new Bosch Advanced AGM Platinum series batteries mfg.date 2/2018
CCA@0 F: 710
CA@ 32 F: 850
RC Mins@ 25 Amps: 120
Ah (C20): 60
And they are my successfully wired battery bank –
I have 4 100watt poly solar panels –
I have 1 solar charge controller PWM
Rated voltage: 12V/24V
Rated current: 20A
Max.PV Voltage: 50V
Max.PV Input Power:
260W(12V)520W(24V) –
Okay James now i already know where I’m going to put them and how I’m going to attach them to the roof but what I don’t know at all is how to connect everything correctly and what else I’m going to need to accomplish that.
James I am certain that you are the one person that will be able to provide me with the answers I’ve been waiting for…..of course assuming you have the opportunity to. Forgive me for taking up so much space. I will be anxiously awaiting your reply.
Thank you again for your time
Guiding you to hooking up your equipment *safely* and properly is beyond the scope of what I can help you with in a response to a comment on a blog. I recommend that you contact an RV solar installer to guide you through the process. One that I’ve used in the past is AM Solar in Oregon.
Thanks, James. I was researching additional power sources for my 2002 PlWay van and the question I kept asking myself was, ” Do I really need anything extra?” I have propane for the frig, cook top, and heater. The engine stores energy in the ancillary battery for lights, the frig, etc. I can plug into the grid if it’s available… Gas propells the van so I can always just turn on the engine if the lights start to dim… Your article helped address that question. Right now, with the type of traveling I do, extra sources of power aren’t required. Thank you.
So glad to hear this!
That’s why I wrote the post the way I did. I had a feeling that people were just buying solar for their RVs because… well… they didn’t really know why. If you’ve figured out it won’t do much for you, then you’ve made the smart choice by keeping the money in your pocket.
See you on the road!
Thanks for the education. I am about to pick up a 2018 Winnebago Navion with the optional 100 watt solar panel and Zamp controller. My question is… do you know if the solar panel/controller will re-charge the battery when the MH is parked, not in use and the house power is turned off? I’ll be picking it up next week and can check myself, but I thought you might know. Thanks!
I’m not 100% sure on the Navion wiring, but typically, when you turn off the main power, that disconnects the battery.
So in that case, no, the solar would not recharge things, because the battery would be disconnected.
Thanks James, If it turns out differently I’ll let you know. Getting it today. I really like your site. As a fellow cyclist I also enjoy your ride recommendations and stories.
ok, I’m new to RVing, going to be purchasing my first one in a few months. I’m getting a fifth wheel and wondering about the power options on it. If I’m understanding correctly there would be no alternator to make use of, correct? So while I am driving my only option to power things like the fridge is propane or solar, correct? This is why I was looking into having solar and also I was hoping to skip the electrical hook-up charge at an RV park all together with the solar option. I’m purchasing a certified green RV as well so it will be solar ready and have many green options that I prefer and most things will run on electric rather than propane as well. So, I’m just hoping to get your input here on this just a little as to what you think.
I certainly appreciate the information on how much and how to figure out what is actually needed as well. That will certainly make a very big difference in my purchase decisions, thank you. Great information and knowledge you have shared for a newbie like myself, for sure saving me from just spending more than I would have needed, in a uninformed purchase with a sales person scenario.
Generally, no. A fifth wheel will not have access to an alternator, except through a connection that it rated and fused at a low amperage (likely around 15-20 amps, DC).
It would be possible to rig up a better umbilical connection to transfer larger amounts of power from the towing vehicle, but this is not standard.
So yes, underway, propane and your batteries (supplemented with whatever comes through from the towing vehicle) are your power sources.
Depending on what you run while underway, that may be enough.
I’ll suggest you check your towing vehicle and RV to figure out how much power you can get while underway and go from there.
Hey, thanks for the reminder to not over geek my geek-mobile… Gonna spend a couple grand on batteries and interior updates instead. A daily driver mobile office and weekender Midwest Automotive Designs 144″ sprinter doesn’t need a full roof pv setup after all… lol
I am truly appreciative for this primer and all of the subsequent posts. I just took possession of my Class B Motorhome. I am beyond excited. I did order it with the max solar package which was 3 95 watt panels without really understanding anything about it because I have a situation where I am parked off grid for 3 weeks with very little opportunity to run the engine or generator. All my other trips will probably not be an issue. During those 3 weeks, I can now estimate better what I can actually expect to use in the RV and which things I should use traditional camping equipment. Water and portapottis will be available external to the RV, so it will be lights, charging phones, occasional vitamix usage and possibly bed and awning extending and retracting as well as a coupe of things that are hard-wired into the batteries. The coach has 2 Lithium Ion batters with 100ah each. I feel much more confident with my understanding now. I couldn’t even find within the stacks of manuals that came with my rig, how low the voltage could go before you couldn’t use the batteries anymore. It sounds like, if I understood properly that if it goes as low as 11V, I am out of luck. Is that right? Thanks again. I have subscribed to your Newsletter. You are a valuable resource and I wish you and your wife many happy trips.
Glad you found it helpful!!
However – lithium batteries have a flatter voltage/discharge curve than traditional lead acid batteries. You’ll find your voltage will be relatively constant, and then will suddenly fall off a cliff. When it makes that fall… that’s the moment when you’ve gone far enough and should charge immediately.
Thank you so much for your efforts to provide this common sense and easily understood explanation and recommendations.
Dear James,
Greetings. Your second pic on page 6, of your RV roof, looks like you are dual tasking your solar panels as vent rain covers too. I recently read a good iterative analysis of mainly Fantastic and Maxxair vent fans. The Maxxair is out due to the 900cfm would ruin the clean environment by overpowering the AC’s 335 cfm due to sucking in particle contaminants. At least the powerful Fantastic vent fan has speeds, but I think the Fantastic EZ Breeze at 350cfm sounds perfect (or close enough comparably.) Maxxair is also the LOUDEST fan too, so… :-O
I think the EZ Breeze may have been a vent fan you have hidden under your first and/or your 3rd solar panels from the picture noted above = ??. I have limited room on my Nissan NV High Roof (about 4.5′ less linearly than you do). I’m going to go with 2 – 180w Grape Solar panels and a Penguin II 13.5k roof ac in the rear.
I’d like to dual task my front 2 solar panels above one or possibly two Fan-Tastic Easy breeze fans facing away from the passenger or awning side (I could probably fit them under 1 panel easy, but it would be more of a spoiler effect if both the front panels were adjacent, the full width of my van, imo.)
** If I am correct (or not) how high did you or would you place the solar panel over the ‘roof’ with Easy Breeze vent fans (to minimize the distance)? From empirical surveys, 2″ high solar panels over the roof (w/o ac) was no effect at all on gas mileage from (at least one) credible source (??)
Thanks Greatly!!
Actually, there are no vents hidden underneath our solar panels. Our Maxx Air vent is visible in that picture, and there’s no vent further forward. (On a standard Travato, there’s a TV antenna there, which we had deleted.)
Our smaller bathroom fan is also uncovered towards the rear.
The placement of our rear-most solar panel was carefully situated to allow the Maxx Air to open fully on the one side, and not get too close to the Air Conditioner on the other.
I don’t know how much opening or clear air space the easy breeze fans need to be fully effective. But if I had to guess, I’d say 2 inches over the top of the cover would be a good starting point for testing.
Dear James,
How do you secure your solar panels from theft? Is that less of a concern on High Roof rv/vans?
Thank You!
We don’t.
I figure we’d hear someone on our roof stealing a solar panel.
They’re not terribly visible from the ground anyway.
Hello James,
I think that you just save me thousands of dollars regarding your article i’m going to be in the process of a project converting a conversion van for full-time habitat now I live in South Florida but I will be residing in the Everglades boondocks style now my van will not be moving very much I would say maybe once a week for groceries and whatever. Everything goning to be having in vehicle would be a new TV mini fridge water pump of course the radio and interior lighting computers iPad iPhone etc. but during the day I while be at work the only thing that’s going to be on constantly would be my mini fridge now I do plan to go on my first Boondock adventures from the month of September to the end of November my destinations have not been actually decided as for the moment. Now I am a (solar dummy) I was ready to buy three 200 W solar panel’s I would suppose that this is complete ridiculous after reading your article so this is why I am asking for your expertise would I need just 100 W solar panel system or none at all thank you ahead of time for your response
Chris
Hi Chris –
I think 3 x 200 watt panels might be overkill for what you describe. That’s 600 watts.
The BEST way for you to figure out how much you need would be to do the “test camp” as described in the article. You don’t have to go for long, just enough to test your system.
I can’t say exactly how much you would need as some of this depends on your battery bank and you didn’t specify the size of that. But as a benchmark, on their vans with electric refrigerators, Winnebago now supplies 200 watts of solar capacity. You’ll probably wind up somewhere in that neighborhood.
Good Luck!
Thanks, I’ve been considering this for quite a while. The way I use my RV I am only dry camping for more than 4 days once or twice a year. Solar does not make sense. I looked at my generator use for the last 10 years ( total hours on my generator) and it was only about 300 hours. Since it burns less than 1/2 gal per hr it costs me about $500 for the 10 years in fuel.
This is the kind of informed decision I was hoping for when I wrote the post!
I’m a professional video editor/animation artist and have a particular Mac based computer system I’d love to be a able to take on the road and potentially boon dock with whenever I can. It consists of the following items and I’ve included estimated watts used by each device.
Mac Tower @ 300-450 Watts depending on processor usage
(2) 27” Monitors @ 100 Watt each
Drobo Drive Array @ 150 Watts
(2) Yamaha HS8 Speakers @ 60 Watts each
Yamaha HS8S Sub @ 70 Watts
Mackie Mixer @ 13 Watts
Estimated total watts used: 1,003
Without spending a proverbial fortune is this just fantasy to ever think I could ever run this system off solar energy alone while boon docking?
Well, pretty much nothing runs off solar energy alone, you’re going to need a battery.
I’m going to guess that your estimates are high. The wattage stamped on electronics is often peak usage, and speakers are rated at (generous) peak wattage, which you won’t be driving all the time. Honestly, what I would recommend is getting a Kill-A-Watt and a power strip. Plug everything into the power strip, and run the power strip through the Kill-A-Watt. That will tell you how may watts you’re actually using.
But let’s say for the time being that your estimates are correct. That’s a thousand watts. If you run it for 8 hours a day, that’s 8000 watt-hours you’d need for just the electronics. You’ve also got your lights, water pump, etc. etc.
Our current battery has about 7000 watt-hours of capacity. It’s not cheap, and you’d need something bigger still. So, until you get a better handle on the usage side of the equation, the answer is: you’re going to be spending some money.
Thanks. My RV is an older Class A and has a generator, so I know in a pinch I could fire it up and such but I’d love to set something up so that’s more of a last resort vs a normal day as i reside on the west coast and sunlight is a plenty most of the time.
Thanks for the response, I’ll keep looking into it.
I owe you a beer, or maybe even a bottle of good whisky. Thank you so much for such a well written and informative piece. My wife and 2 kids are preparing for a 6mo trip across Canada this summer with a GMC Sierra 2500HD and a 22′ travel trailer. We’ll be travelling every few days but working along the way while also travelling in colder weather. We’re going to need power. And there will be times where we’ll overnight at a Marina or Walmart with no option for shore power.
I’ve jumped down the rabbit hole of solar for the past few days with no end in sight until I found your post. I’ve guestimated our amp hour requirements, calculated a battery bank of 4 x 6V but then everything came to a grinding halt when I realized we would need 15 x 100w panels to recharge. That won’t fit on a 22′ roof. Now what? We don’t want to be the family with the generator running at 8 am and I haven’t been able to find anything except confusing and opposing viewpoints when it comes to charging a battery bank from the tow vehicle. Some say yes, some say no, some offer complicated wiring systems , some say you’ll never top up the batteries fully….You’ve obviously worked this out. Have you done a post specifically on charging from from an alternator? How to set it up, what type of wire to run, connectors to use, monitors/controllers required, safety issues, etc.?
Thank you again for taking the time to document and share your designs, thoughts and experiences!
The thing is, with solar, even 15×100 Watt panels wouldn’t charge anything if it were a cloudy day!
Our experience is mostly with motor homes, but it doesn’t seem like it would be that difficult to work out a setup to charge the battery in the towable. You’d need a battery isolator, some heavy duty cabling (depends on your capacities), and a way to connect the two. A competent RV shop should be able to install those things for you.
Yep!
Starting the generator wiring next week. I found the following “hands-on” article that has been very helpful. http://www.truckcamperadventure.com/2016/03/heavy-duty-alternator-charge-system-modification-2/
My feeling is that your power requirement gestimate is over estimate. As James state in is text, the power requirement charts are not reliable.
One good blog to read is
Handybobsolar.wordpress.com
Is text on the battery charging puzzle is very informative.
Charging from the tow vehicule can be pretty costly, as it will need wire big enough to avoid voltage loss cause by distance between the batteries, plus the connector for these wires.
Plus, will the alternaror of the tv be able to properly charge the trailer battery bank?
I’m truly amazed by this article because it hooked me in after the
first couple of paragraphs. The organizational capacity of this
writer is phenomenal.
So many articles on solar on the net that leave the reader more
confused than enlightened, but James cuts through it all and
actually presents information in a way that it can be used
by almost anyone who is interested in this technology.
Wow!
Well gee, thanks!
Glad you found it useful!
Can residential panels be used on an RV?
They come in much higher wattages (200 – 350 watts) and appear to be less expensive per watt.
I don’t see why not – as long as the voltages are within specs.
I’ve installed panels on our carport and RV, and have never paid attention to “house” or “RV” panels.
I’d suggest you select a panel, and then run the specs by the tech support for your charge controller.
Panels exceeding 160 watts will likely get there by outputting a higher voltage than the panels suitable for charging 12 volt battery systems with a PWM controller.
(Remember Watts = AMPS x VOLTS).
Watts is how the sell panels but what you need to charge a battery is AMPS passing through the battery.
I am not saying they wont charge a 12 volt battery but you wont be able to use the extra power the panels are capable off generating over a 160 watt panel UNLESS you buy a good MPPT controller ( more bucks ). That controller will step down the voltage to match the battery and transform the extra power available into available AMPS.
One more thing .. cheaper per watt is not smaller per watt. The higher wattage panels will also be physically larger than lower wattage panels.
This is because the power still comes from the amount of sun falling on the panel.
Ahhh. Good point.
Additionally, the larger wattage panels are considerably physically larger.
I don’t see putting a 300 watt panel on the roof of an RV as very realistic.
And if you think there’s the potential for damage, it would be easier and cheaper to replace a single 100W panel than to toss an entire 300W one.
I’m new to this and have no clue what I need at all .can some one steer me in the right direction?
If you’ve read the above and still don’t know what to do, I’d recommend contacting an RV Solar specialist, like AM Solar in Oregon to discuss next steps.
I’ve personally used AM Solar in the past, and can recommend them.
This is an amazing article and has all the information you need to go solar on your coach or trailer. While its easy to just buy a package deal from one of the typical sellers like Zamp or Renogy, you’ll find they are really pricey and include components that are found on lower-end systems. There is an option.
It is really easy to buy a high quality solar controller and a good module (or two) and the hardware you need to install it for much less money. I’ll give you an example: I just bought a 40A MPPT controller, a top-end 200+ monocrystalline module, cable, fuses, and sealant for just over 400 dollars. A similar package deal would cost $700 or more. I bought all the components on ebay, and I can tell you that I got a much higher quality system that I can expand to 2.5X more watts for the cost of modules and mounts only. There is a lot of information on the internet at various websites that will guide you, and it is very rewarding to fabricate your own system while saving a lot of money in the process. Don’t be afraid of doing this yourself! Embrace it!
How many batteries should I have for 100 watt panel in order to run tv,led strip lighting and a gaming system,also what kind and size or recommended brand thanks
There are too many follow-up questions for me to try to answer. “How long do you want to run them for?” “What are the watt ratings of the devices?” “What battery chemistry are you interested in?”
I’d recommend you find and chat with a good RV mod shop. They can answer your questions and design something that will work for you. Again, AM Solar in Oregon is a good one that I have worked with before – but they’re not the only ones capable of answering this. (Before you ask: I don’t mod other folks’ rigs. 🙂 )
Thanks for the informative article. I’m about to dive into the RV lifestyle because I want independence, but I’m limited by disability income of $750 a month. I expect to be boondocking a lot, but I also don’t want to burn a lot of gas with driving every three days. I’m buying a 1988 Winnebago with 55,000 miles on it. I have good to excellent credit (not an easy feat on disability income!)
My goal is to get my business going and get off of disability while I still can. I have RA, which is under fairly good control with meds, but I’m told the meds will stop working someday.
Am I dreaming? Is what I want to do even possible?
Of course it’s possible! We know a number of people – still working – who live in their rigs full time.
I don’t know what your business is, but a great many jobs and businesses can be done very successfully from the road!
Thanks for the encouragement! In my primary business, Heartfire Green Living, I am an affiliate for sustainable businesses. I just want to help all those brilliant people out there who are creating things that are helping save the planet for our children. I am also a partner in Eden Now REI. These businesses are in their infancy, though, so I really just count $750 a month for income. Thanks so much for giving me hope for an independent life!
Not trying to pry in your or anyone elses business who survives on disability payments. Expert guidance in these situations is a must. Your goals are commendable but sharing them in their early stages with the folks at disabilty can be a huge mistake. Being notified out of the blue that you will no longer receive benefits and wishing you well in your “new career” is not uncommon. Once they do it, it takes years, if ever, to undo it. I have seen this happen to people with very serious mental /medical conditions. Good luck in your quest for independance.
Loved reading this whole article all the way through!!! Kinda curious how many batteries and what are best to buy for 200 amp hour battery bank but I’m sure I can find that since I found you! Happy Trails!
Depends on if you want AGM, or lithium.
If you were going AGM, I’d look at getting a pair of 6v Lifeline golf cart batteries. (We had them in our last RV and they were awesome.)
If you want lithium, we’re sold on Lithionics!
Wait a minute! The solar purchase was due to the generator not starting and couldn’t charge the batteries. Elevation is a key factor to a generator. You have to adjust the carburetor in the generator to take into camping at high or low elevations.
I had been thinking of solar but it seemed too expensive. I have 1 75ah 12v house battery and thinking of replacing it with two deep cycle, 6v AGM, 220ah each but wouldn’t I have to have a larger charger (converter) than what I currently have that came on Class C. Of course my class c has no manual so I don’t who makes the converter or the ah that it charges per day. Help!
Well, we solved that generator issue by getting rid of it… 😉
2x 220AH 6 volt AGMs is a solid choice for batteries. The amp capacity of the converter isn’t the big issue, as it will still charge the batteries, just slower.
What you really want is to get a converter with a true multi-stage charge profile that matches what will work best for your batteries. (bulk, absorption, float… that kind of thing.)
When I bought a new converter for our AGMs on our last rig, I got it from bestconverter.com. Good service and advice there.
Best explanation of the power grid in my RV! Thank you, I’ve read this twice and saved it to read again! We are going to master this!! 🙂
Glad to hear it helped.
And yes… you ARE going to master it.
Great read!!! Time to go to work on my 1997 30′ Beaver Monterey. If only to keep the batteries up while in outdoor storage.
Thanks.
Thank you, I’m converting a bus into an RV (For many reasons I won’t go into) and have been pondering adding solar or not. I’m living in it and on the road seven months a year as I am performing all over the country, usually having a mere 20anp outlet at most event campsites. The other five months I’m at my real home. During that time it sits on a storage lot. I mainly wanted to make sure the batteries stay charged when it is in storage, and maybe have a movie night with popcorn ever so often on the road.
Thanks for the great post. We just bought our first travel trailer this past summer and have only taken it in the boonies. This definitely helps with figuring out what we need and how to accomplish it.
Glad it’s been helpful for you!
Sorry, forgot to mention my travel trailer equipped with one 12 v standard battery.
Well, with one 12v battery, you won’t likely be powering the microwave via an inverter…
Best advice would be to upgrade the battery first.
Once you’ve done that, a portable panel into your side jack should help out with the minimal usage you’ve described. (Except for the microwave.)
Hello and thanks for the info. I read it all but still questioning whether a solar panel is worth investing in. I’m mostly concerned with necessity as opposed to $$ I recently purchased a 24ft. Travel trailer equipped with a side mounted Zamp port. Most of my camping will be with available grid plug-in; however, at least 1-3 times per year I will be using the camper on 4-7 day hunting or fishing trip with no elec.available and once retired (in about 2yrs)my wife and I anticipate using the camper at remote sites that have no elec.available for up to 4-7 days . Do you think a 140 watt panel would help my cause? Would mostly use fridge, keep hot water, charge a few devices, run lights a little each evening,cooking,occasional microwave use . I hate the sound of generators when I’m camping! Thanks for any thoughts!
My needs are quite different from all I see above. I have a small truck camper, I’m never anywhere near hookups, and it’s always cold. I run a few lights while cooking, and my furnace all night… period. I’m thinking that a single 100 will keep me up and running indefinitely. I’m totally new to this, and apologize for the moronic question, but “if you don’t ask, you’ll never know.”
How large is your battery bank? And how depleted is it at sunset?
The procedure and the math are the same, regardless of what kind of rig you own.
Thank you for writing back. I hope I’m not a nuisance. My battery bank consists of the trolling motor battery out of my boat. I’m guessing that you’re suggesting that I use some sort of battery tester (a volt meter? … to assess the battery condition each evening? What numbers would I be looking for? As I mentioned before, this is new to me. All I know is that my first attempt at this was a failure… I bought one way too small ( an 18 I think)… It left me out in the cold
Yes. Most coaches have a battery voltage meter of some sort. If yours does not, you can test it with a multimeter, or there are any number of plug in options if you have a 12v outlet.
Once you can measure your battery voltage, then you can follow the steps in the post to determine how much solar you might need.
Also – you’ll need to know the amp-hour rating of your battery.
Thanks for taking the time to write this article! It’s really helped make some good financial decisions for me. A question I have (since I’m new to travel trailer) is what do u need to be able to use my outlets if I’m only using battery? I want to do the “camping” test you recommend but right now if I’m not hooked up to shore power I can’t use the outlets for the hair dryer or toaster. Is that what an inverter is for?
Yes, that’s what you need an inverter for.
To run a hair dryer (which are all about 1500 watts), you’ll likely need a 2000 watt inverter.
Those can use up some pretty serious battery power, so do have that installed professionally.
Are power needs are generally met with shore power, but on occasion spend two or three days off the grid. We have a Winnebago View with the 100 watt Zamp solar option. We would like to upgrade the original batteries. Can we upgrade to lithium or will we have to add panels and change the controller?
Well, there are several battery manufacturers who make “drop in” lithium batteries for RVs. But in a perfect world, you would also upgrade the converter that charges the batteries.
How many original batteries do you have and how old are they? If they have lost a good percentage of their capacity, just replacing them as-is might be the way to go.
A detail about the NREL PVWatts model will explain why your day in Phoenix AH did not agree with PVWatt’s prediction for that day. The PVWatts model uses 30 years of data for each location in its data base and creates a typical year that will provide the energy obtainable there. This typical year does not contain 365 average or smoothed days. It contains a hodge podge of days that reflect the variations that can occur from day to day. If you look close at any month of daily kWH predictions from PVWatts, you will find they vary considerably, especially where and in months where weather variations are common. So, any particular day from PVWatts is not relevant. About the best you can do is compare 30 days of actual results at the location with the total for that month from PVWatts. Those should correlate fairly well. The real day to day variations you experience will not track the PVWatts day to day variations other than your minimum day of the month might look somewhat like the minimum day of the month from PVWatts (likewise the max day). A place like Phoenix where the weather and atmospheric conditions (many such conditions affect solar production but are not visible to the eye) are fairly consistent from day to day will track better, but still, one should compare a month from PVWatts to a month of actual experience to ascertain whether field performance matches the PVWatts projection. And, of course, even monthly totals can each vary by ten percent or more from year to year (variations in annual production vary much less but still as much as three to four percent. The PVWatts manual details these characteristics of the model.
Interesting. I obviously agree that the date from PVWatts can’t be assumed to be any kind of guarantee. Still, it’s interesting, and in the case of Phoenix, it at least got us in the ball park.
“But once your battery is full, it’s full! You can’t fill your battery over 100%.”
True, but you can run opportunity loads. Heat water, dehumidify, run computers and charge devices, whatever.
Folks who use most of their loads in the daytime can likely run smaller, lighter, and less expensive banks. IMO, of course.
True, but I think (well, hope) that most folks would be doing that already.
I like what i read.
One question.
How many batteries do you have in your rv.
We have one 420 amp-hour lithium battery.
You can read the details of the system in this post.
What was the name of the company that manufactures the mounting rack for the solar panels on your Travato? I have an Itasca Viva and would like to look into mounting solar panels.
Our roof rack is by Fiamma. But I think any roof rack would make a suitable base for mounting solar panels. There’s not much special about the rack itself.
Have you considered having a small, somewhat quiet generator (like a Honda 1000 watt unit, 39 lbs) to provide enough power, along with batteries, to run the AC for long periods? The engine generator could also provide this function, but some may not like running the vehicle engine overnight.
We could do that easily by plugging into the shore power outlet. But we’ve never done so. We’d have to find someplace to carry and store that generator. The best place for that is underneath the vehicle where the generator I just removed used to live. If I wanted that sort of a solution (and it IS a valid solution), I wouldn’t have removed our generator to begin with.
We make a habit of not staying anywhere that we need to run the generator (or engine) all night anyway. If we have to be someplace like that, we find a way to plug in.
Having just gotten back from supporting a race though, I can tell you that the engine is fine to idle for extended periods. No issues to report with that!
Dear Lance – I am planning to live in a 2018 59g full time – before i buy i would like to possibly order some mods from the factory ?? who do you deal with ?? I am in San diego Ca thanks – I would like to do the raised bed maybe not as high as yours – All the electrical mods and a couple small changes – thanks TED
Lance is our van. He doesn’t have a login on our website. 😉
But if you’re interested, his modifications were either done by me or the Winnebago factory. I’m not for hire. But Winnebago has a custom service. They may be able to help?
I’d start with a call to your local dealer.
Maybe Ted is a “different type” of nerd and he really was asking Lance for advice. Just a bit of nerdy
humor from a nerd wannabe!
This article was easy to comprehend and very helpful. I sleep with a Cpap machine without a humidifier. Would I be able to run it with solar power or is it a matter of running it off my batteries and keeping my battery charged?
This one:
“is it a matter of running it off my batteries and keeping my battery charged”
is correct.
Well, unless you sleep during the day when the sun is shining… 🙂
I am a total newbie at owning a trailer. I have been reading and reading and the bottom line seems to be that I cannot run an air conditioner in my travel trailer at the same time as anything else. Being as I am attempting to live in the trailer more or less full time, (I do go to work everyday nine to six), I am dismayed at this apparent reality. I live in Redding, CA and this summer we have had numerous days where the temperature was over 105, and up to 111. It is not possible to be in the trailer for more than about five minutes without air conditioning. So I hoping that adding solar would help me go off grid. But now I am not at all sure it can be done.
If you can’t run the AC while running anything else, I’d say solar probably isn’t going to help you much.
It sounds like you’ve got some serious capacity limitations on your rig. Solar won’t get you over the hump.
I knew nothing about solar energy before reading your site, and now having read it I feel like I know enough to get started. It is breathtakingly clear, to the point without unnecessary mumbling, and the flow of it was such that I was able to read from the beginning to the end without much interruption.
I have a 5 acres property in the middle of desert near Joshua Tree national park in southern California, and on it there is a 1000 sq ft cabin, an Airstream, and a small separated guest room of about 500 sq ft. I want to come off the grid, and I luckily ran into your site.
Thank you for sharing.
Just curious, have you installed solar panels on your home?
Hi Jim!
Glad you liked the post. We haven’t installed solar panels on our house. Part of the problem is that it faces the wrong way to be really effective. And the other part of the problem is our multiple old maple trees.
But if we did install solar on the house – that’s a different consideration because you can sell excess power back!
Your property sounds awesome. Good Luck!
I really like your resource management approach in this article. There is one detail that is missing for me. Did you collect data about the fuel needed to recharge with the alternator? I am gathering data before buying our first RV and wandering about the actual cost of the different energy sources.
On the road = $ for the fuel to recharge the battery
Shore power = $/night at campground
Boondocking = $ Generator + $ Solar power + $ Battery capacity
We are planing to buy a Class B as a second car and hop from one campsite to the other. I think the best approach would be to have a inverter charger with something like 120 amp-hours of battery capacity for a night off grid.
Hi Luc –
A number of folks have asked over time about any additional fuel required to charge through the alternator. In my mind, it’s pretty negligible when you’re using the van. 1 horsepower is 750 watts (ish), and we’re talking about a 300HP engine. I don’t think it notices the extra load.
But running the engine at idle would consume fuel just to charge the battery. That’s a bit different. I don’t know exactly what the fuel consumption at idle is for the ProMaster, but I’d then have to compare that to the generator (which was drawing from the same fuel tank when I had it). Those are all small numbers though – and we almost never idle just to charge the battery, so I haven’t done the math.
If all you want to do off grid is run a few things (NOT the air conditioner), a 120AH battery should do you just fine!
HI James and All….regarding solar: here is a link that is interesting from the ProMaster Forum…a custom conversion ProMaster with 600W of solar FYI. More good ideas to chew on and share:
https://expeditionvan.squarespace.com/
This is terrific and just what I needed to get started. I have 2 6v in a vintage airstream and am looking for a portable system. I’m likely going to start with a 100W panel as I think it will be sufficient in most cases and may add an extra panel should we find that it does not keep up. Normally I would be inclined for the overkill approach. This really help me weigh may options more thoughtfully. Thanks!!!!
James,, thank you for talking electrical english on this article…
I have so many questions,,,, but, the one to start with is:
If I want to convert a small vehicle like a Nissan NV HIghtop,, or equivalent,,, (for just me, right now),,,and , you may have made sense to not need solar after all,, but, just alternator(s)…. where does a second alternator mount to?
Then, later ,, I would like to ask about figuring the amount of power needed,, for example:
2 burner stove
blender (breakfast) short time @ 3.2 amp
countertop water distiller (580W running 4 hours each day)
small frig///feezer
2 laptop computers (running all day)
cell phone charging
small TV ( on most of the time)
maybe an exhaust fan ( to take heat and humidity out)
That’s all the power I can think of.
Thank you for this blog, and all your help to the RV community
Russ,, just a 65 your young guy wanting to try the boondocking life… and will at least be driving small distances each day.(around town,,, shop, workout, checking out places, etc.)
I’m not sure where a second alternator for a Nissan NV would mount. Nations Alternator would be a good place to start looking. It seems they have one available.
As far as figuring out how much battery capacity you need, the data you’ve given is an example of the kind of thing you could try plugging into one of those electrical calculators I never use.
Alternatively, you could just take the wattages from each appliance, multiply, and come up with the watt-hours and go from there.
Hello James. We just bought a 2017 k and are going to do a lot of boondocking in Alaska. It came with a 100 watt panel. I would like to add a secong 100 watt panel. If you were going to buy one today, what brand and model would you buy? Thank you!
I’m actually not that brand-sensitive when it comes to the solar panels. But I’d get a polycrystalline flat panel. Probably the least expensive one I could find.
A very well written article with lot of real resaearch on panels, controllers, load conditions and a decision on what we need based on our usage. As an electrical engineer and now a Travato owner, I had all these questions and most of the time I received a layman’s answer. Thanks for all your groundwork it certainly helped me understand the complexity of the power management we need to do in our RVs.
Thanks, Arvind! Glad the article helped.
Good informative article, easy to understand without being confused by complicated math that engineers love.
I agree!
Great post. But you still haven’t answered the question, “How many solar panels do I need to run my air conditioner?” My wife wants to know. LOL!
Uhhh… Six. You need six.
(But not the regular ones. The magic ones.)
James – Great article! I appreciate the pragmatic approach. My only issue is, I read this hoping for you to answer the A/C question. I understand it depends on the appliance load so will vary. You could have mentioned what loads you had used over your 3 days of testing. Did you run A/C? Microwave? – Thanks
I didn’t answer the air conditioner question because it can get kind of silly. 🙂
To generate the stored electricity needed to run our RV air conditioner all day, you’d need over 340 square feet of solar panels (ish), plus 3600 amp hours of battery capacity, and guaranteed perfect sunshine. I’m not saying it’s impossible… but it pushes the limits of practicality for a mobile installation.
But to answer your other question: when I do a load test, I don’t think about it. I don’t want to color the results by trying to use or not use a certain appliance or feature. I recommend everyone do the same.
James – Thanks for the reply. I guess I should have been clear on what I was looking for with the A/C question. You have a 3000watt pure sine inverter, so I assumed when you boondocked you ran the A/C off this and your battery bank, not directly from the PTV. Plus you have an independent house alternator….so do you need a generator? I could see keeping a small portable unit to supplement battery charging once below 60% or so.
I ask because I would like to remove my large generator and replace with solor/inverter/batteries solution and keep a 1000-1500watt gen on stand-by for long boondocking with maybe poor sunlight.
Ahhhhh!!! Now this makes more sense.
You are correct in most of what you wrote. When boondocking, we do run the AC off of our inverter and battery bank. In theory, we could turn on the vehicle, and run the AC off the vehicle alternator indefinitely, but we’ve never put that to a test. We no longer have a generator, having removed it when we did the inverter install. You can see the details of all that in this post.
If you didn’t go the second alternator route, then absolutely yes, what you describe would be a very workable solution. A small generator (2000 watts or so, like the Hondas we see everywhere) would be a good backup strategy. Totally sane, and an easy way to get into this without having to buy an enormous battery bank.
Sorry for the confusion. But you’re right on track!
Thank you!
You Guys Rock! Seriously. The information you post is always well thought out and still accessible to people like me, who are new to the RV world. Thank you for this, and for your many other pieces on YouTube. As an aside, my wife and I were on the fence about getting an RV, and watching your videos pushed us over the edge. So far, this is a good thing. Keep the information (and entertainment) coming.
Jump on in! The water’s fine!
Seriously though, glad we’ve had a positive influence.
Hopefully you get your RV soon and we’ll see you out on the road!
As a relative newcomer to RV life I must say this has been the best and most informative article I have yet come across. 5 ***** James, excellent.
Prior to happening upon your article, I found that the more I searched, researched and read up, the more confused I became, what with MPPT regulators, controllers, Inverters, Amps, Watts and Volts not to mention panels, batteries and installation, . . . had me in a tizzy.
Have planned for a lot of off-grid adventures and laying up for days or even weeks at a time in France, Italy and especially Greece so therefore a Solar installtion will be essential for lady wife and myself. Things are starting to make sense now and you have helped make the decision process a whole lot simpler for us and I would like to sincerely thank you for that.
Still have some research to do yet. Would like to get more advice on Lead Acid batteries over AGM deep cycle and what size/ capacity Ah batteries to use. Also, what wattage Inverter (pure sine) to install. Enjoying the learning process 🙂 Many thanks from Ireland.
Well thank you for the compliment!
I’m glad that this article is proving to be useful for people – around the globe even.
Your proposed RV destinations sound fantastic, and we hope you get your rig set up exactly as you need.
Cheers!
Here’s another potential case for solar battery charging – NASCAR race RV camping! RVs are often parked side by side dry camping with the generator exhaust typically pointing into the next RV’s patio space. The noise and fumes are not very welcome. Sometimes exhaust extension stacks are used to direct the fumes up overhead, like trucker pipes – but the noise still persists. RV campers may be parked in one place for as long as a week. There are site restrooms (portable and fixed) available (sometimes showers too), plus three types of tanker trucks often circling the campground (I bet you can guess what services they provide) – water, propane and waste tank pumping. We’ll be using propane for the refrig and portable grill that runs off of the low pressure supply from the RV propane tank.
As a recently retired EE and NASCAR fan, my wife and I plan to visit several NASCAR tracks in our new class B+ Pleasure-Way. I figured that two panels would keep the LED lights, TV, microwave, coffee maker and my wife’s hair dryer powered pretty well without need for the generator, from the 2000W inverter, even if we have a cloudy/rainy day or two. We’ll see how well that plays out. The only generator use I anticipate is for air conditioning, and hopefully not much of that. Our home NASCAR track is Phoenix, so we’re used to hot temps as long as there is some shade available (RV canopy or venue shade).
Food may be the only real limiting factor here – and sometimes there is an on-site grocery store for that!
Yep – what you describe sounds like a situation where solar power would definitely come in handy.
In fact, I’d recommend exactly that as your “test camp”!
James – thanks for endorsing my NASCAR RV camping solar power test scenario. I can’t help but peek at the solar charging status panel anytime we’re stopped and disconnected from shore power – great entertainment for me! Do you know where I could find (or can you publish on this Post) a State of Charge chart for Lithium Ion RV batteries. Ours is a 200 amp-hour unit that is now standard for Pleasure-Way RVs. The Go Power status panel does provide an indication of %charge, but it’s based on an AGM profile (no Lithium setting) – so I don’t know how accurate that may be.
Thanks!
Hey Phil – A State of Charge chart for lithium batteries is problematic because they have a very flat discharge profile. Meaning: the voltage stays relatively constant until you’re 90% discharged or so, and then it falls off a cliff. So by the time you notice a change, it’s too late. You can see a good chart (and read a good explanation) here: http://batteryuniversity.com/learn/article/how_to_measure_state_of_charge
To get a really good read on the state of charge of a lithium battery, you’d want to install a shunt-based battery monitor. On a Pleasure-Way, I believe the batteries are inside the coach, so it shouldn’t be terribly difficult. (But don’t try it if you’re not sure you can do it safely.)
And sometimes I have Stef get up and read me numbers from the monitors while I’m driving… so you’re not alone… 😉
James – great article. One item I am curious about that has an indirect relationship to this topic is regarding the multistage chargers. With AGMs for example there are various recommendations of using 3 stage or better chargers to assure longevity of the battery. There are chargers and inverter/chargers running on 110volts out there that meet this spec but I don’t think that an alternator does. I expect that most solar charge controllers do support 3 stage or better charging.
So then, does heavy reliance on an alternator to charge the battery bank actually result in reduced battery life as compared to other methods that use a smart charger? Or does your system incorporate smart charging for all 3 options? (Solar, alternator, shore power)
You are correct in that most vehicle alternators don’t support multi stage charging of house AGM batteries, and that solar charging systems do. This is one of the reasons to go with a separate alternator, as we did. Our second alternator supports a proper charging profile for lithium batteries.
Whether you rely on it for charging or not, a standard engine alternator will present 14.something volts to the batteries the entire time it is running. You’re right in thinking that this doesn’t lead to optimal battery life.
On re-reading this blog, I got to thinking about the usage side of the equation and how many of our new toys use battery power. Mylène’s new ebike has a big battery that requires hours to recharge fully. Same for our trolling motor battery. Ideally you don’t want to use stored house power to recharge these in the evening, so a bit of over capacity on the production side is a good idea and have them charge during driving or sunlight hours.
Yes, it makes sense to pay attention to the toys.
If your typical trip involves charging those up – then by all means, include them in your field test. The math will work out.
So if you were doing it over again now what would you setup be? Would you have 3 panels, 1, no panels? I assume you stick with Li, the alternator and inverter.
Well, I’d definitely leave the inverter/alternator/battery setup as it is now.
As far as solar, that’s a tough one. The electrical loads on Lance are always changing! And that will probably continue for a while.
For example, by changing out our refrigerator for a 12 volt model, I’ve increased our electrical load.
If I had no solar and I were going to stop here and add solar, I would follow exactly the procedure outlined in the article. Do a load test and work from there.
Ditto on all the comments about this outstanding article James! I’ve been trying to explain this all to my wife for hours. Now I’m just going to have her read your article. Well done! Thank you!
You’ll have to let me know if she likes it!
I don’t know where I read it so I can’t footnote it. But when I was doing my own research I read somewhere that you should pitch the panels at the same angle as the latitude you are at. And, of course face them south.
I did not know they work better cold. Thank you for that info.
And thank you for bringing up tank capacity vs. battery capacity. We have 3 kids so our water is our main concern when we don’t have hookups.
Solar for us would be wasted unless I could teach the wife to drive a trailer and follow her with a fresh water tanker.
All the rv blogs tell you, you will be amazed how much water you really use. And, it’s true!
So true – I think people get lost in the electrical aspects of things, and overbuild relative to their other systems. I know for us, water is a limiting factor as well.
Excellent post James. Am soaking up all the info around and about to spec up my own Sprinter based conversion and this is the best, most objective info I’ve read. Chapeau sir. Keep up the good work both.
Glad you liked it!
Nice article, well written for us non tech types I was able to follow easy peasy. Have a new Travato with solar and it seems like a pretty slick setup, so that I am pondering adding solar to my old class A. I rarely have shore power and use the generator for everything and thinking it would be nice to actually use the 2000W inverter,( that I never use) to power stuff and keep the batteries charged up with solar. with the class A there is plenty of roof but it would be good to do some math and not go over board on the solar. A little bit of microwave and some fridge (not compressor) would be sweet. Thanks
If you’re not using your inverter, I might first investigate adding battery capacity before I go adding solar.
Thanks for the well written informative article James! Solar seems cool, but I appreciate your approach and making sure that any install matches your intended use and overall power management system. Well done!
Thanks, Ed!
Very nicely done, Sir, even for an aerospace engineer. 🙂 (I’m an electrical engineer, BTW.) To piggyback on the first poster’s comments, I have often had thoughts about all the wonderful electrical upgrades I could do to our Travato. However, I do have those rare moments of restraint when I stop and think about our actual usage habits. My wife and I use our motorhome frequently, but we stay almost exclusively at full-hookup campgrounds. So, do I have an actual need for lots of gadgets to capture and store energy? No, I really don’t. Would I love to have and play with all the gadgets? Heck yes! Thank you, James, for indulging your inner Geek – that way I can save money and just live vicariously through you. Woo Hoo!
Hey – if I’m saving you money, then I’m calling that a success!
(There’s probably no saving me though…)
Wow, this is SO helpful! As a brand-new (and clueless) Travato (2018) owner, I’ve been dreading spending hours reading through the 47 system manuals and roaming the internet trying to understand the power system. Your article has saved me many hours and given me the bottom-line info I need. Thank you, thank you, thank you! Even though my eyes glaze-over the calculations, it’s so cool to see the joy you take in the nerdier aspects of these systems. Bravo James!!!
Glad this is helpful to you.
I expected a lot of comments from knowledgeable folks debating one aspect or another of the article. But they probably already really know their solar.
I really wrote the piece for people like yourself! So I’m glad to hear it’s helped you out. 🙂
A very interesting and informative article. I understood most of it, I think. My question is: If I buy a standard Travato 59k and go on your 3 day boondocking scenario (not running engine or generator), won’t I need to buy additional solar panels and an inverter in order to power my coffeemaker, toaster and refrigerator?
Well, the “do I need an inverter” question can really be a separate one from the solar question.
Basically, if you want to run standard household appliances without running the generator, then yes, you need an inverter (but not necessarily more solar).
If you normally run the generator to power these appliances, then I’d suggest just running it briefly if you can’t live without the K-cups. After you’ve made your cup, kill the generator and back to the experiment.
The charging you’ll get while running the generator for coffee will skew the results somewhat. But if that’s reality for you, then that’s what it is.
Hi James,
Good stuff.
One exception to the tilt does not matter much is winter camping in northern states.
In our MT location in Dec, output goes from 1.2 KWH/sm-day with 0 degree tilt up to 2.6 KWH/sm-day for 60 degree tilt (using PVWatts).
Gary
Thanks, Gary. Far north in December would obviously be an outlier.
(But if you’re RVing in Montana in December… hats off to you! And I thought Stef and I took winter camping seriously!)
Correction: 0.6 gal LP contains 54,798 BTUs (not 91,330 BTUs), which is still equivalent to 16,000 Wh.
Shame on me for not checking the math before approving! lol.
Thanks for the correction.
If you boondocked for an extended period (I get that is not what you usually do) how long do you think your battery would last with your normal demands on it? If your battery was “dead” how long would it take to charge (while staying in place) with your 2nd alternator? Again, assuming your normal demands on the battery. How much does your furnace fan tax your battery overnight in cold weather? Your post is great. I was thinking of asking you previously to do an “RV Electrical Systems for Dummies” Thanks for anticipating that request.
Lots of questions. Let’s see if I can answer.
With our 300 watts of solar and moderate sun, we could boondock until we ran out of water. If we unplugged the solar panels, we could still make it several days. But I have not checked this since installing our new compressor fridge. That post is coming in the future. Our alternator could charge our completely dead battery in about three hours. And the furnace overnight is not very noticable on the battery (we have a Truma Combi).
Thanks.
Hey James, as always informative and fun! Am an electrician/geek so love the tech, but have a saying that the trade seems to use a lot, “better looking at it than for it”. In my experience damn the money buy big! Best controller, more panels and get out there! Will you be reviewing or looking at any of the technology built into the Roadrek/Hymer offerings? Would love to hear your take on EcoTrek/VoltStart and some of their Solar Options. THX
Excellent article James. I’m commenting in part for the poster interested in Hymer / RoadTrek products. Your article didn’t touch on the scenario of the new RV buyer ticking off options on an option sheet. We are guilty of ticking a lot of options!
We recently bought the 2017 RoadTrek Zion with 400 ah lithium (2 200 ah EcoTrek modules), 280 amp second alternator, and 300 W solar. RoadTrek indicate in their docs that the phantom loads on their EcoTrek modules are 6 amps, which admittedly is CRAZY, and we didn’t know under AFTER our purchase. Even the service tech who introduced us to our RV quoted the 6 amp figure from his factory training course. While I’d like to think they have improved this and their docs are out of date, let’s assume it’s still true. From the 30 ah/day/panel estimate provided, we would have recovered 90 ah/day total from the solar panels offset by 144 ah in EcoTrek phantom loads. On a recent 6 week trip, I don’t think the van ever sat still for more than 2 days. We never ran low on battery power.
James you make a great point that if you move every couple days with lithium batteries and a large alternator, even if it’s just a grocery run, you likely don’t need solar at all. In our case, I’m thinking the solar is saving us from the phantom loads but otherwise was totally unnecessary.
I think the heart of this article, for those buying a new RV or retrofitting, is consider the electrical system as a whole. While our system isn’t perfect, I still think a large alternator combined with lithium batteries is a great solution for those that tour and boondock. My add would be to investigate the phantom loads of any system BEFORE you buy!
I’d be curious James if you know what kind of phantom loads your system has (losses to battery management / disconnect relays).
I’ve heard about these HymerTrek phantom loads before, and that’s just NUTS!!
We have NONE. I did a big experiment before where I measured all the loads in the RV using our shunt based battery monitor. There was less then an amp of undefinable load.
That has not changed with the addition of our new system. If anything, it’s decreased as we no longer need to leave the propane solenoid open and there’s no auto gen start.
We have no heavy duty disconnect relays. There may be one internal to the Lithionics battery (because I CAN shut that off), but it appears to draw milliamps, if anything, and it does not affect the rated capacity of the 420AH battery. I still have all 420AH available to me. (actually more, but that’s another topic.)
The only load that might be considered phantom would be if we left our inverter on when we didn’t need it – but simply we don’t do that.
Regardless of all that, you make a good point about the new buyer checking off options! The only way they could know this kind of thing would be if they asked some actual owners for opinions and advice beforehand. That’s actually one of the things I recommend new buyers do in our “RV Buying Process“. But if they were still unsure after that, I think the way Winnebago does it makes a lot of sense. The basic solar option gets you one panel, all the wiring, and a combiner box on the roof. If you decide to add more panels later, it’s super easy.
Interesting comment, Keith. Thanks for joining the conversation!
Excellent Job! Thank you, I plan to refer folks to this article often..
If I could change anything (you knew that was coming 😉 ), I would put the USAGE SCENARIOS at the TOP of the Article, with a larger font, in Bold, and maybe a different color text, like bright red… and BIGGER. Did I say BIGGER?
As cool as solar power is, it is definitely NOT the end all be-all many folks expect it to be. People often get hung up in details before they even know if they NEED solar power panels at all. Almost without fail, every time I ask someone why they want solar, the answer is; “to run my air conditioner”, “to replace my generator”, or, “so I can boondock as long as I want” – ALL of which solar, on a van, will NOT DO.
With a little more questioning, it invariably turns out they fit into your first two categories of USERS: They make use of campground hook ups OR they drive at least a little every day, in which case, solar is of very little benefit. So really, most folks don’t even NEED to CONSIDER Solar unless they just like cool new stuff, and spending money (or it’s a reasonably priced factory installed option on a new rig).
Folks that actually DO boondock for days on end in a B Van without driving, can make use of solar to top off their batteries, but should probably be more concerned about having a healthy battery bank to begin with. A larger battery bank could easily last as long as your water supply withOUT solar panels…
Solar IS cool. But get it to top off a good battery bank suited to YOUR energy use, not to run MORE, or additional items you can’t already run comfortably off your batteries. Conservation is more beneficial and cost effective than Solar. Solar is the LEAST powerful, and slowest charging method at your disposal.
…and don’t even get me started on big fancy inverters and Keurig Coffee Makers in a B Van….
But I like my big fancy inverter! 😉
Thanks for chiming in, Scott.
Yes a great post.
It is so refreshing to see an objective analysis of solar for RVs. There are so many zealots who claim solar is a “no brainer.” It is not. (Disclosure: I don’t have it.)
A couple of additional points:
1. Camping in shade – I seek shade when camping in the summer. Solar offers little benefit.
2. The Peukert effect offers me on average about an at least 20% capacity bonus based on typical draw of 30 Ah/day, e.g. my 220Ah Lifeline AGMs give me about 130 Ah down to 50%. When necessary (but rare), an hour of generator gets me another day, empty water and full waste tanks not withstanding.
3. Battery capacity contained in LP
I have rarely seen this calculation, but here it is. Generators are very inefficient electricity producers. My generator at half load (15 amps) consumes 0.6 gal/hr LP while producing 1800 watts (15×120). The 0.6 gal of LP contains 91330 BTUs, equivalent to 16000 Wh, while producing only 1800Wh of electricity for an efficiency of 11%. Still, my 10.4 gal (usable) LP tank contains the equivalent of 31,200 Wh ((10.4/0.6) x 1800) of “product” electricity, compared to 1560 Wh (130Ah x 12v) stored in the battery, or 20X as much. (The above ignores charger inefficiencies.) This is even 6X as much as Lance’s incredible 5040 Wh (420 Ah drawn to 0% SOC).
Thanks again for an excellent summary!
P.S. I can’t help asking how much you’ve spent, dollars and hours, in upgrading Lance. I know, I know … because you can.
I didn’t even mention the contradiction between camping in direct sun to get full solar… and then needing extra air conditioning because you’ve parked in full sun. Good point.
If you really have a 10.4 gallon propane tank – we’re envious! We have less than 2 gallons typically available.
And as far as how much I’ve spent on RV mods. In terms of either time or money… I don’t want to know! And for exactly that reason, I don’t keep track. 🙂
Excellent post!
As an EE I *had* to find a few things to quibble about.
Our Ford Transit conversion has about 400AH of AGM, and 560W rated solar, with an MPPT controller, so it’s a fairly large system. No generator. Our use is remote boondocking, for multiple days at a time, mainly in one location. Then moving on and repeating.
Since we’ve built from the ground up in a stripped van, it really wasn’t practical to figure out our loads empirically, as in your #3.
So we designed for likely worst case power. Figured that was better and cheaper than under designing, then needing to rip out and rebuild. We did this potential solar overkill for one main reason that you didn’t really talk about…we live in the Pacific NorthWet, and expect to camp anytime during the year. We can expect our available sunlight to be wildly variable, from season to season, and trip to trip. We estimate that on cloudy winter days up here, we might be able to get about 10% of rated solar. For a much shorter day than Phoenix.
For example, we can expect our compressor fridge alone to pull about 60AH/day, assuming it’s a ~5A load, and running at ~50% duty cycle.
A 560W panel array at 10% on a cloudy 8 hours/day is 56W*8hr/12V = only 37AH, so we still are operating at a net loss. But at least we’ve extended our stay time significantly over battery alone.
We chose the MPPT controller for similar “overkill” reasons. It is much better that a PWM on low light days at getting all the available energy from the panels. On bright days, the difference is not as significant.
Of course, if we travel down to California in the summer, the panels will easily keep the batteries fully topped off, and at the same time directly power all the loads.
Finally, we stayed with AGM for a couple of reasons:
I think that the cost difference doesn’t yet make up for the Li charge density and weight advantages. Hopefully, when our AGMs die, Li cost will be more reasonable.
Also Li still has some teething problems, like low temperature charging limitations…with, IMO, rather kudgy work-arounds.
That’s about it.
Thanks very much for your blog. It’s given us a TON of useful info as we’ve built our Annie the Van.
Interesting point. I hadn’t considered the case of the self build. You really can’t just “go camping” in that case!
I wonder – if you were to take the data from the NREL website, as calibrated for your system, and compare it to your actual solar yield – what would the difference be?
If you do this, please chirp back and let me know the results. I’ve wintered in Seattle before… some days it seems like there’s about 4 hours of daylight…
SkagitStan,
I am wondering how that system has worked out for you so far? I am about to start a van build and so I dont know my power usage yet. How many days have you been able to boondock in the worst of conditions? Do you run out of food, water or propane before you run out of battery? Thanks for any insights you could provide me with.
We’ve not taken Annie on any long outings yet, mainly because I haven’t finished the upper cabinetry and doors yet. That makes packing for a longer trip awkward. So we haven’t hit any limits based on propane, food or water.
But, the solar and batteries have been able to keep up with our electrical demands, even if we are camped in deep shade for a day or two. Each trip to date, the solar has been able to get the batteries fully charged once we came out of the shadows and into partial sun. In the deepest shade, over 2 full days/nights, the battery SOC dropped to about 85%
Really great article. I wish I had it a couple of weeks ago, since I’m presently evaluating the electrical usage of our new setup, because I suspect there is maybe a problem. I used your approach, fully charged the battery until sunset using my shore hookup. It was only showing 12,4V after more than 30 hours of charging so I tend to think that already is telling me something. I turned off everything I could think of to get rid of phantom charges, except for the 2 compressor fridges. These were to be my baseline loads, since my main concern their proper functioning. I set up my GoPro on time lapse to record the voltage meter, but since I am as much a novice on GoPro’s as I am on RV’s I didn’t use the right setting and it’s battery dies after 2 hours of recording (if you read the book “The Martian”, you’ll know where I got the inspiration for that…LOL). The next morning I got up before sunup and the battery was reading 11,3V So after about 8,5 hours of use with no charging, my batteries dropped from 78% to 10%. Even if the battery was 100% initially, it would have dropped to 32%, way below the target of 50% Which is why the RV is now back to the dealership for verification. Luckily the owner of the dealership is a fellow engineer, so I can easily discuss this and not get a run around by somebody who doesn’t really understand.
I’d say back to the dealer is the right response. That’s a compressor fridge, right? If that’s the case, they yeah – just running it overnight shouldn’t kill your batteries. Something else is wrong.
And about the GoPro – their batteries just suck. They last about 8 minutes in use, or 36 hours in a turned-off device. When I did the time lapse video, I had to plug the GoPro in.
(Don’t even get me started on GoPro. You’ll get an earful!)
Right, both are compressor fridges. The “beer” fridge close to the door so you can just reach in…LOL. A total draw of 4,4 A when both are running according to the specs. I believe the batteries total 190 Ah. For 8,5 hours, at 50% duty cycle, they should only have pulled 18,7 Ah. And since its rather cold these days, I think the 50% duty cycle is probably overly conservative.
I also went to the max of 380 watts solar panels available to compensate for our northern cloudy grey low efficiency days later in the year. I believe reading somewhere that the Travato has the basic 180 A alternator. I’m suppose to have the 220 A option, so a bit more power on that end but nothing like your extra 180 A.
James,
Excellent article. I wasn’t going to read as I feel pretty informed on solar, Ah, volts, capacity, etc., but read all as interested in how you presented…and very well done. I know subj. was solar not lead-acid battery, “wet” v.s. AGM v.s. gel, but I think a review on characteristics and advantages of gel & AGM over wet lead plate batteries would be a good review for you to consider.
Hey, that’s a good idea, DJ! I’ll second his idea, James! xoxo
Thanks!
You’re welcome!
In the shortest possible way, let me re-emphasize a lot of the other points as they relate back to this one statement:
“We do more ‘touring’ than ‘camping’, and so we drive most every day.” – In this case, the driving will charge your batteries more than solar ever will.
^^ IF your alternator is suitable (in some cases it need not be a second alternator, but it danged well better be properly-sized or else there is likely to be failure and grief), and IF your batteries are lithium.
Especially given the myriad ways in which Class B RVs come OEM-equipped, perhaps the best way to clarify this for less-technical folks is to use the example of my husband and me. Our electrical upgrade sequence went like this:
(1) We started out with a pre-owned stock 2007 Airstream Interstate which had one conventional Lifeline coach battery and no solar. We quickly found out that the MB Sprinter-installed alternator had no hope of keeping that coach battery charged, no matter how many hours we drove each day. Between the pathetic alternator and the resistance of conventional batteries to accepting charge quickly, it would never happen. The only way to charge the Lifeline was via shore power, and that was unacceptable to us because we are not campground people. We are primarily boondockers.
(2) Not having a coherent long-term plan, we then DIY-installed 300 watts of solar, a controller, Trimetric monitor, etc. PRESTO! Lifeline battery issues totally solved. The solar was able to supply a smaller amount of charge over much longer periods, and we never had the battery run too low. Boondocking bliss ensued, UNTIL…
(3) Six months or a year following solar installation, we decided that one Lifeline was no longer meeting our needs. I am self-employed and wanted to be able to function more like Technomadia (in fact I paid them for a consultation on remote connectivity) and I had to be able to run a full-sized, multi-monitor off-grid computer out of our rig. That required lithium. Given that my husband and I are both employed and “our time is not our own” as the saying goes, it took several months of free time – countless hours – to DIY-retrofit the lithium system. PRESTO! All computer issues totally resolved and I’m off to the off-grid working races with no more power limitations. Plus I can now run my hair dryer (important while working on the road when one must be well-groomed), microwave, etc. EXCEPT…
(4) During the lithium retrofit, my husband also upgraded the alternator to a model that had more than enough capacity to serve both the Sprinter and the lithium battery recharge function. And lithiums have very low internal resistance, so this is entirely different from trying to charge a stubborn Lifeline – this charging happens far more efficiently. So, all of a sudden, our former-problem-child alternator starts blowing our solar out of the water (she said as she pounded her head on her desk). I no longer need the solar for my work – in a worst-case boondocking scenario, I just need to idle the engine for a while and let the alternator do its work. But we didn’t know that back when we first started planning solar improvements. Lithium was just beginning to appear in the market and, at that time, in the very beginning, we couldn’t see a path forward to DIYing it.
So my husband and I ended up becoming those poster children to whom James referred above, the poster children who spent a few thousand extra dollars on solar only to later not need it. It looks cool, it’s fun to play with, I guess it’s a good back-up charging system of sorts, but it was a boat-load of money and work that we could have skipped if only we had known then what we know now. Retrospectively, I wish we’d put the money and effort somewhere else on the van because there are additional projects that we really want to do.
Moral of the story: Know exactly what you want to accomplish in advance, and plan for it ruthlessly. We are two years further down the road now vs. when my husband and I started out on our electrical system improvements, so this determinative process should now be easier for people.
Ouch!
We previously had Lifeline AGMs in Das Bus, and we never had any problems with the stock Sprinter alternator giving us a good charge in a reasonable amount of time. Maybe we were just lucky, or maybe I had hacked something the right way, or maybe there’s something on the Airstreams that we didn’t have.
In any case – we completely agree that it’s best to have a plan in place before embarking on knee-jerk upgrades!
We were under the impression when we first bought our rig that the OEM alternator could successfully charge one lousy Lifeline coach battery. But in practice (ground truth always reigns supreme), we were getting only about 5% per hour recharge from it, even at fairly low states of charge (because remember that conventional battery charging rates are not linear), and even with a brand-new Lifeline (i.e., not damaged from running it too low). Therefore it would take about 5 hours of driving to raise it 25%, which was ridiculous (I’m oversimplifying the non-linear part). Given that we were using around 25% per each night of boondocking, we’d need to average a minimum of 5 hours driving per day, each and every day, to safely sustain the battery above its 50% usage threshold… that was not happening. Hence our solar retrofit.
This is the best basic solar primer I have ever read.
Precise and to the point.
You must have been a teacher in your previous life.
Thank you for all the videos and info you publish.
Very informative.
Very kind of you. Glad you liked it!